
This post contains affiliate links
I talked all about the basics of crop rotation in the home garden in THIS article. I wanted to go beyond the basics and address an issue that often comes up with crop rotation. The problem is growing a lot of one crop family, resulting in an uneven rotation of crops. In most cases this is the nightshade family (tomatoes, peppers, potatoes, etc.)
Nightshades are disease and pest prone and need at least four years of rotation in different soil before it comes back to the same spot. But what if your nightshade family easily takes up 40% of the garden in the summer months? How to make it so those plants don’t go in the same soil until four years later?
I have a few possible solutions to alleviate this problem.
#1 Add more garden space
The ideal situation would be to make your garden larger to accommodate. While this may not be possible for everyone, if you have the space and ability to increase your garden size, I would do it.
I personally think this is the best option and here’s why:
If you have a large enough garden, you could easily rotate crops even when you don’t have perfectly even amounts. The reason for this is that you can grow cover crops in any extra areas. I can’t speak highly enough of cover crops. They make such a huge difference in soil fertility and yield, weed suppression, and disease prevention. I have lots more information on cover crops HERE.
Below is a simple example of how you could rotate when you add additional space to the garden.

#2 Get Creative
Unfortunately increasing my garden size wasn’t an easy option for me. We set up a 40×80 fence and have lots of deer, bunnies, chickens, and animals that would love to eat my food if they had access. So I opted to get creative in my own garden. I had to really think hard about how to make the most of my space.
The first year I had too many tomatoes and not enough space I had my husband build me a “garden bump out” It’s a fence with 3 sides that goes on the outside of my garden. It’s also mobile so it can be moved to a new location every year. I keep a border of flowers and herbs outside the garden and the bump out allowed me to move the tomatoes along that border where there was no vegetable crops before.

Another way to get creative about adding garden space is to start growing vegetables in your flower or landscape beds. I planted tomatoes all along a previous flower bed. While they aren’t fenced, I do have them caged and in an area deer don’t often come around to snack in my yard. So far this has been quite successful (except for a bit of munching from my chickens haha!). These are plants I would have otherwise thrown away so I figured there was no harm in planting in my flower beds.
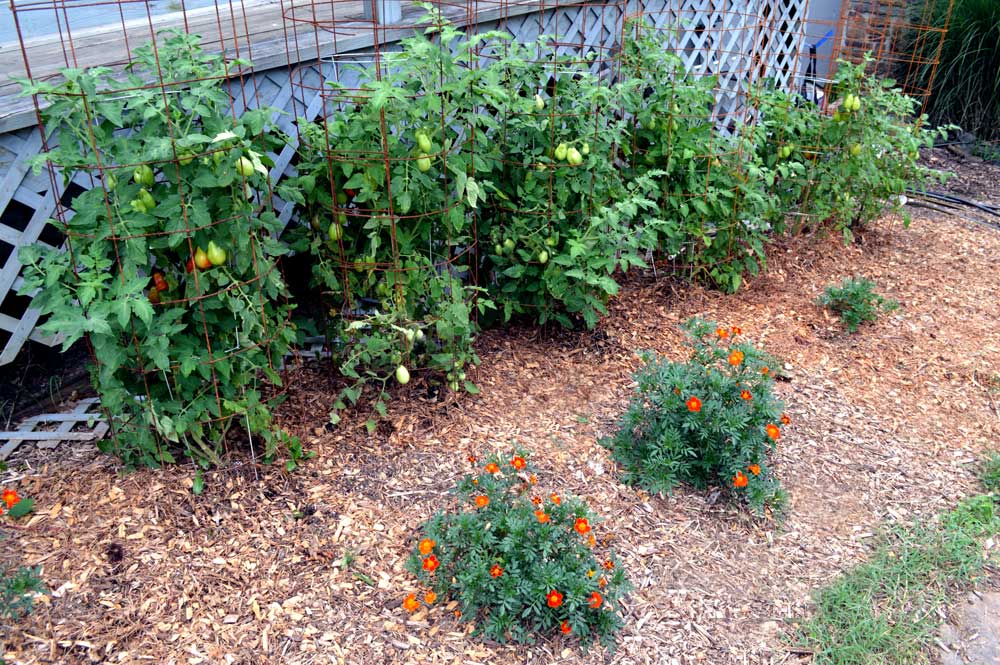 Tomatoes in Flower Beds along the side of my House
In effect I did end up adding more space to my garden mentioned in idea #1 but it had to be done in a creative way.
#3 Manage Your Space Better
My 40 x 80 foot garden originally looked very different than it does today. My raised beds have fixed spacing but the back of my garden had no barriers except the fence on the perimeter. Originally, I had a lot of extra wasted space in the back of my garden.
I spaced my blueberries out according to the plant directions that were sent with the plant. While the spacing between plants is now perfect that they are full size, the spacing between rows is way too much (I did 10 feet). I added two 4×16 foot garden beds south of the blueberries where there was none before! This year I added garden beds all along the sides of the garden.
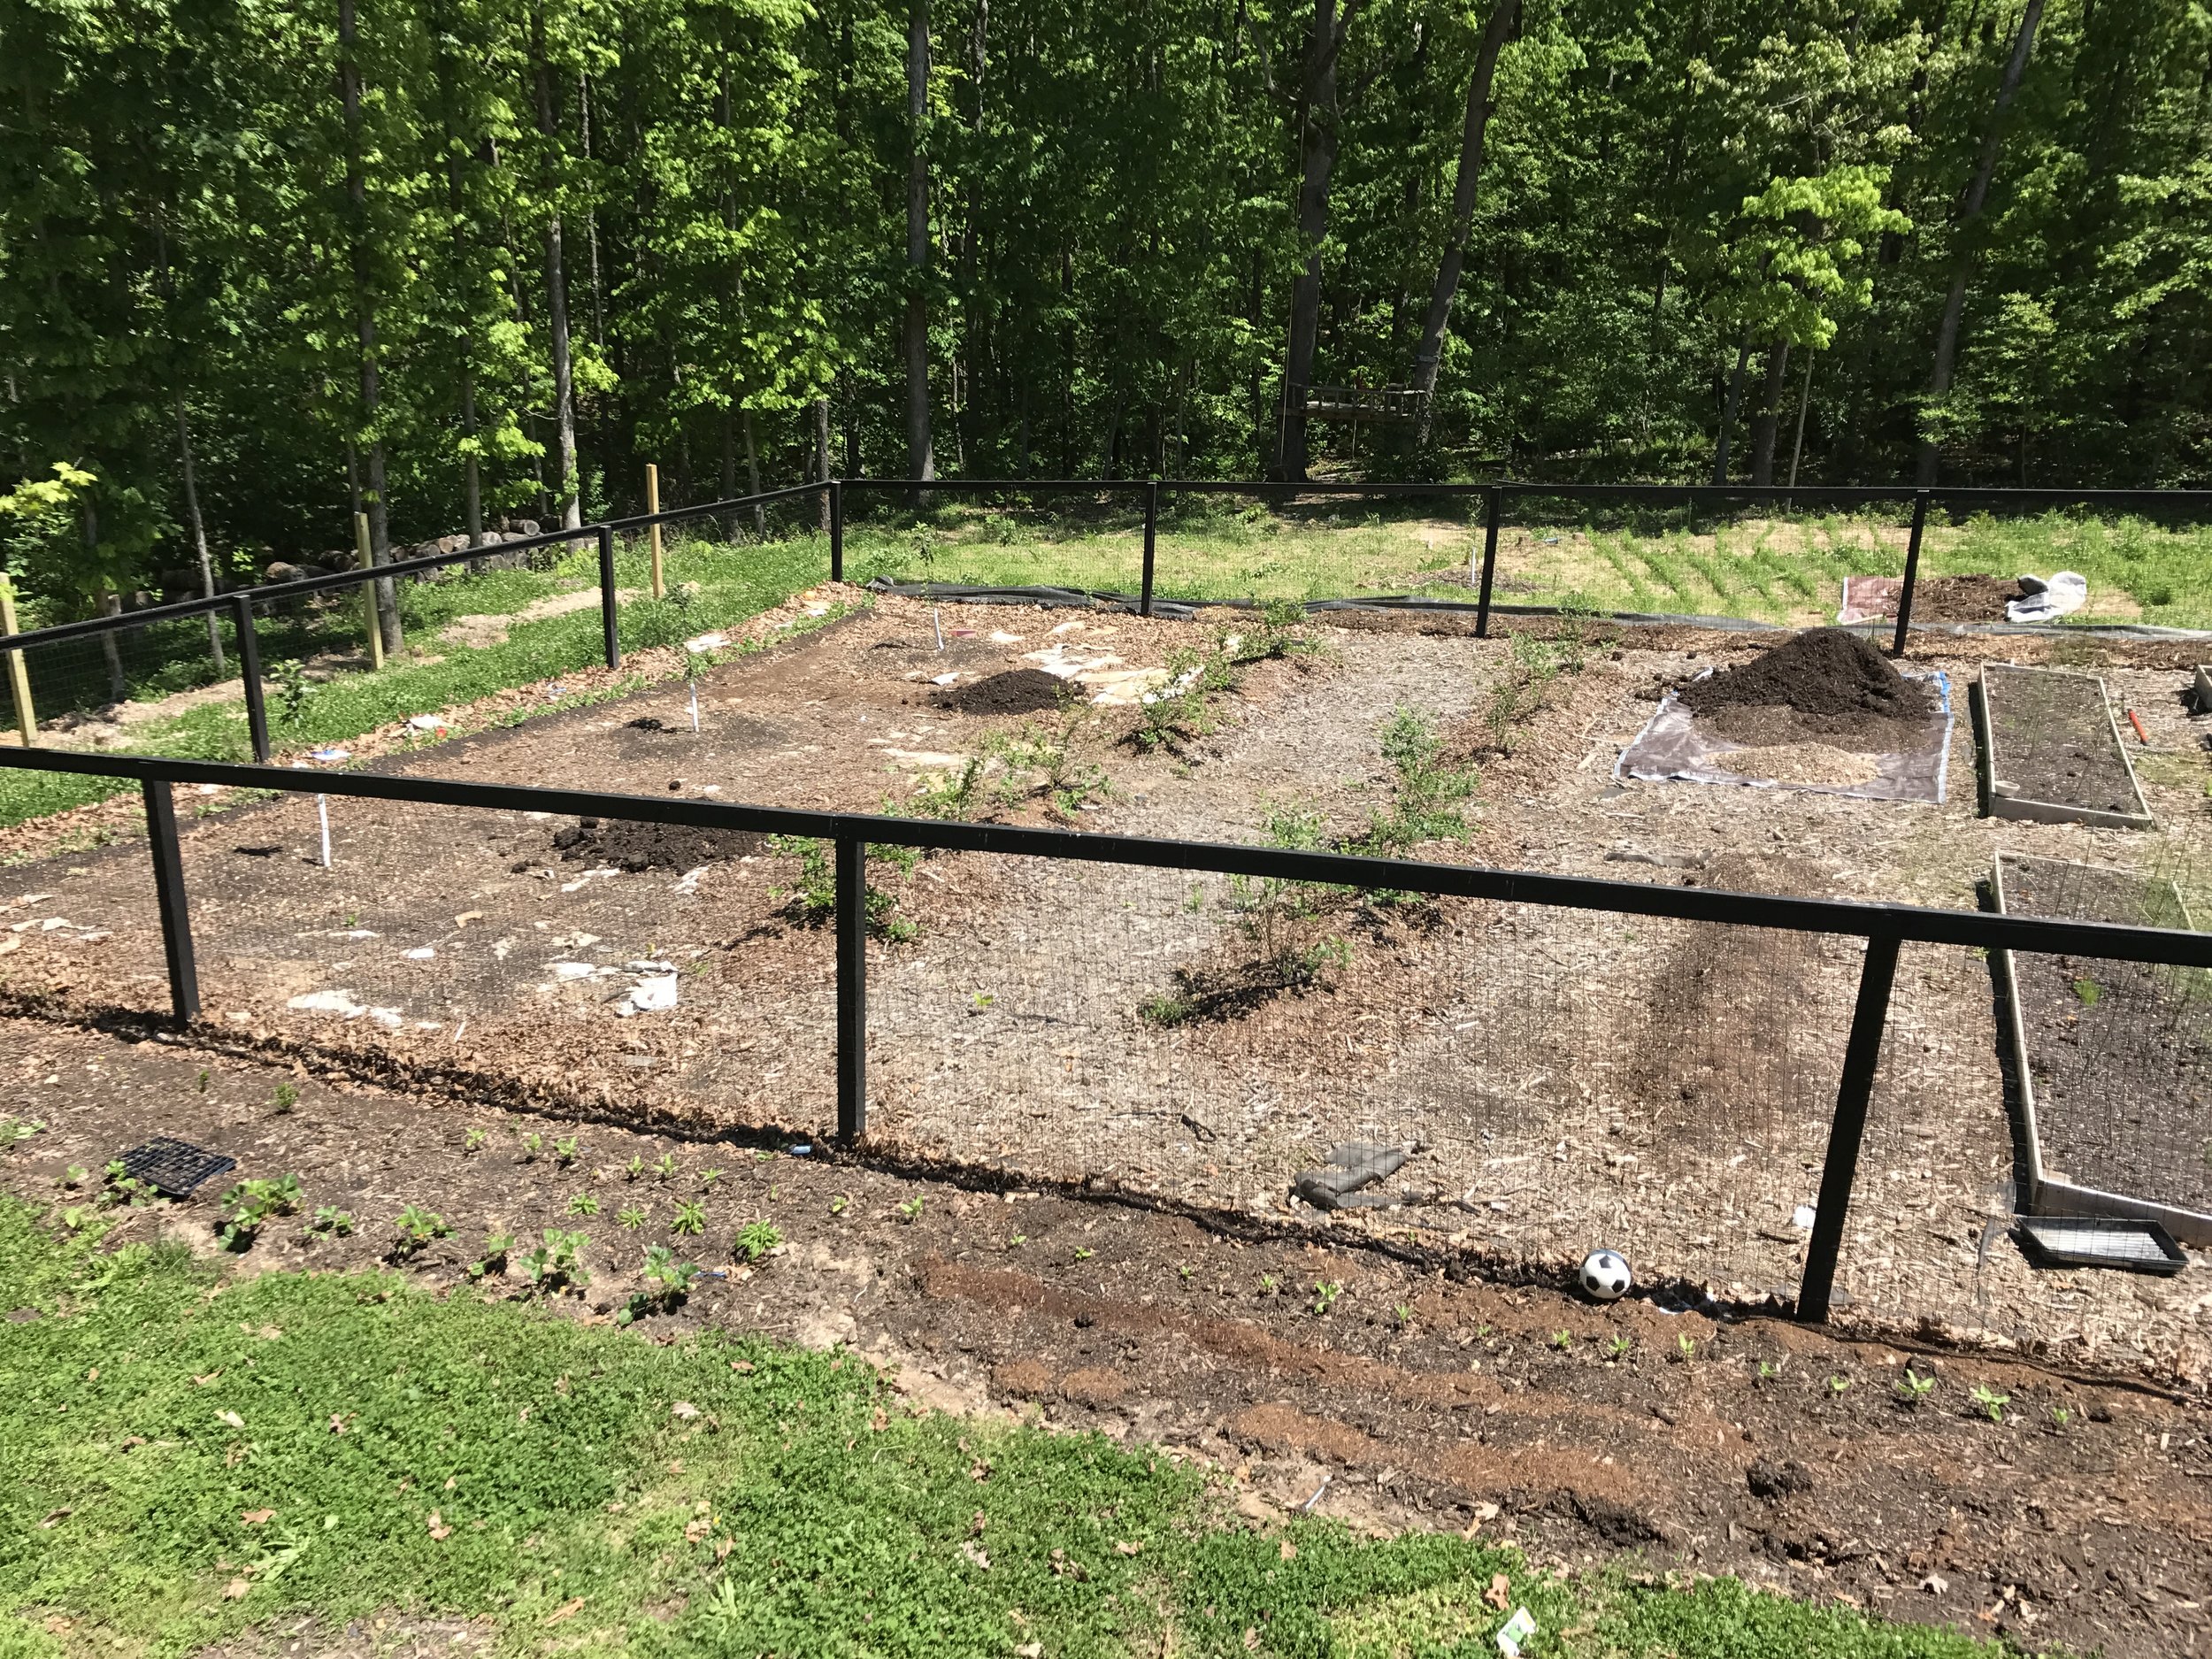 Back of Garden Spring 2017
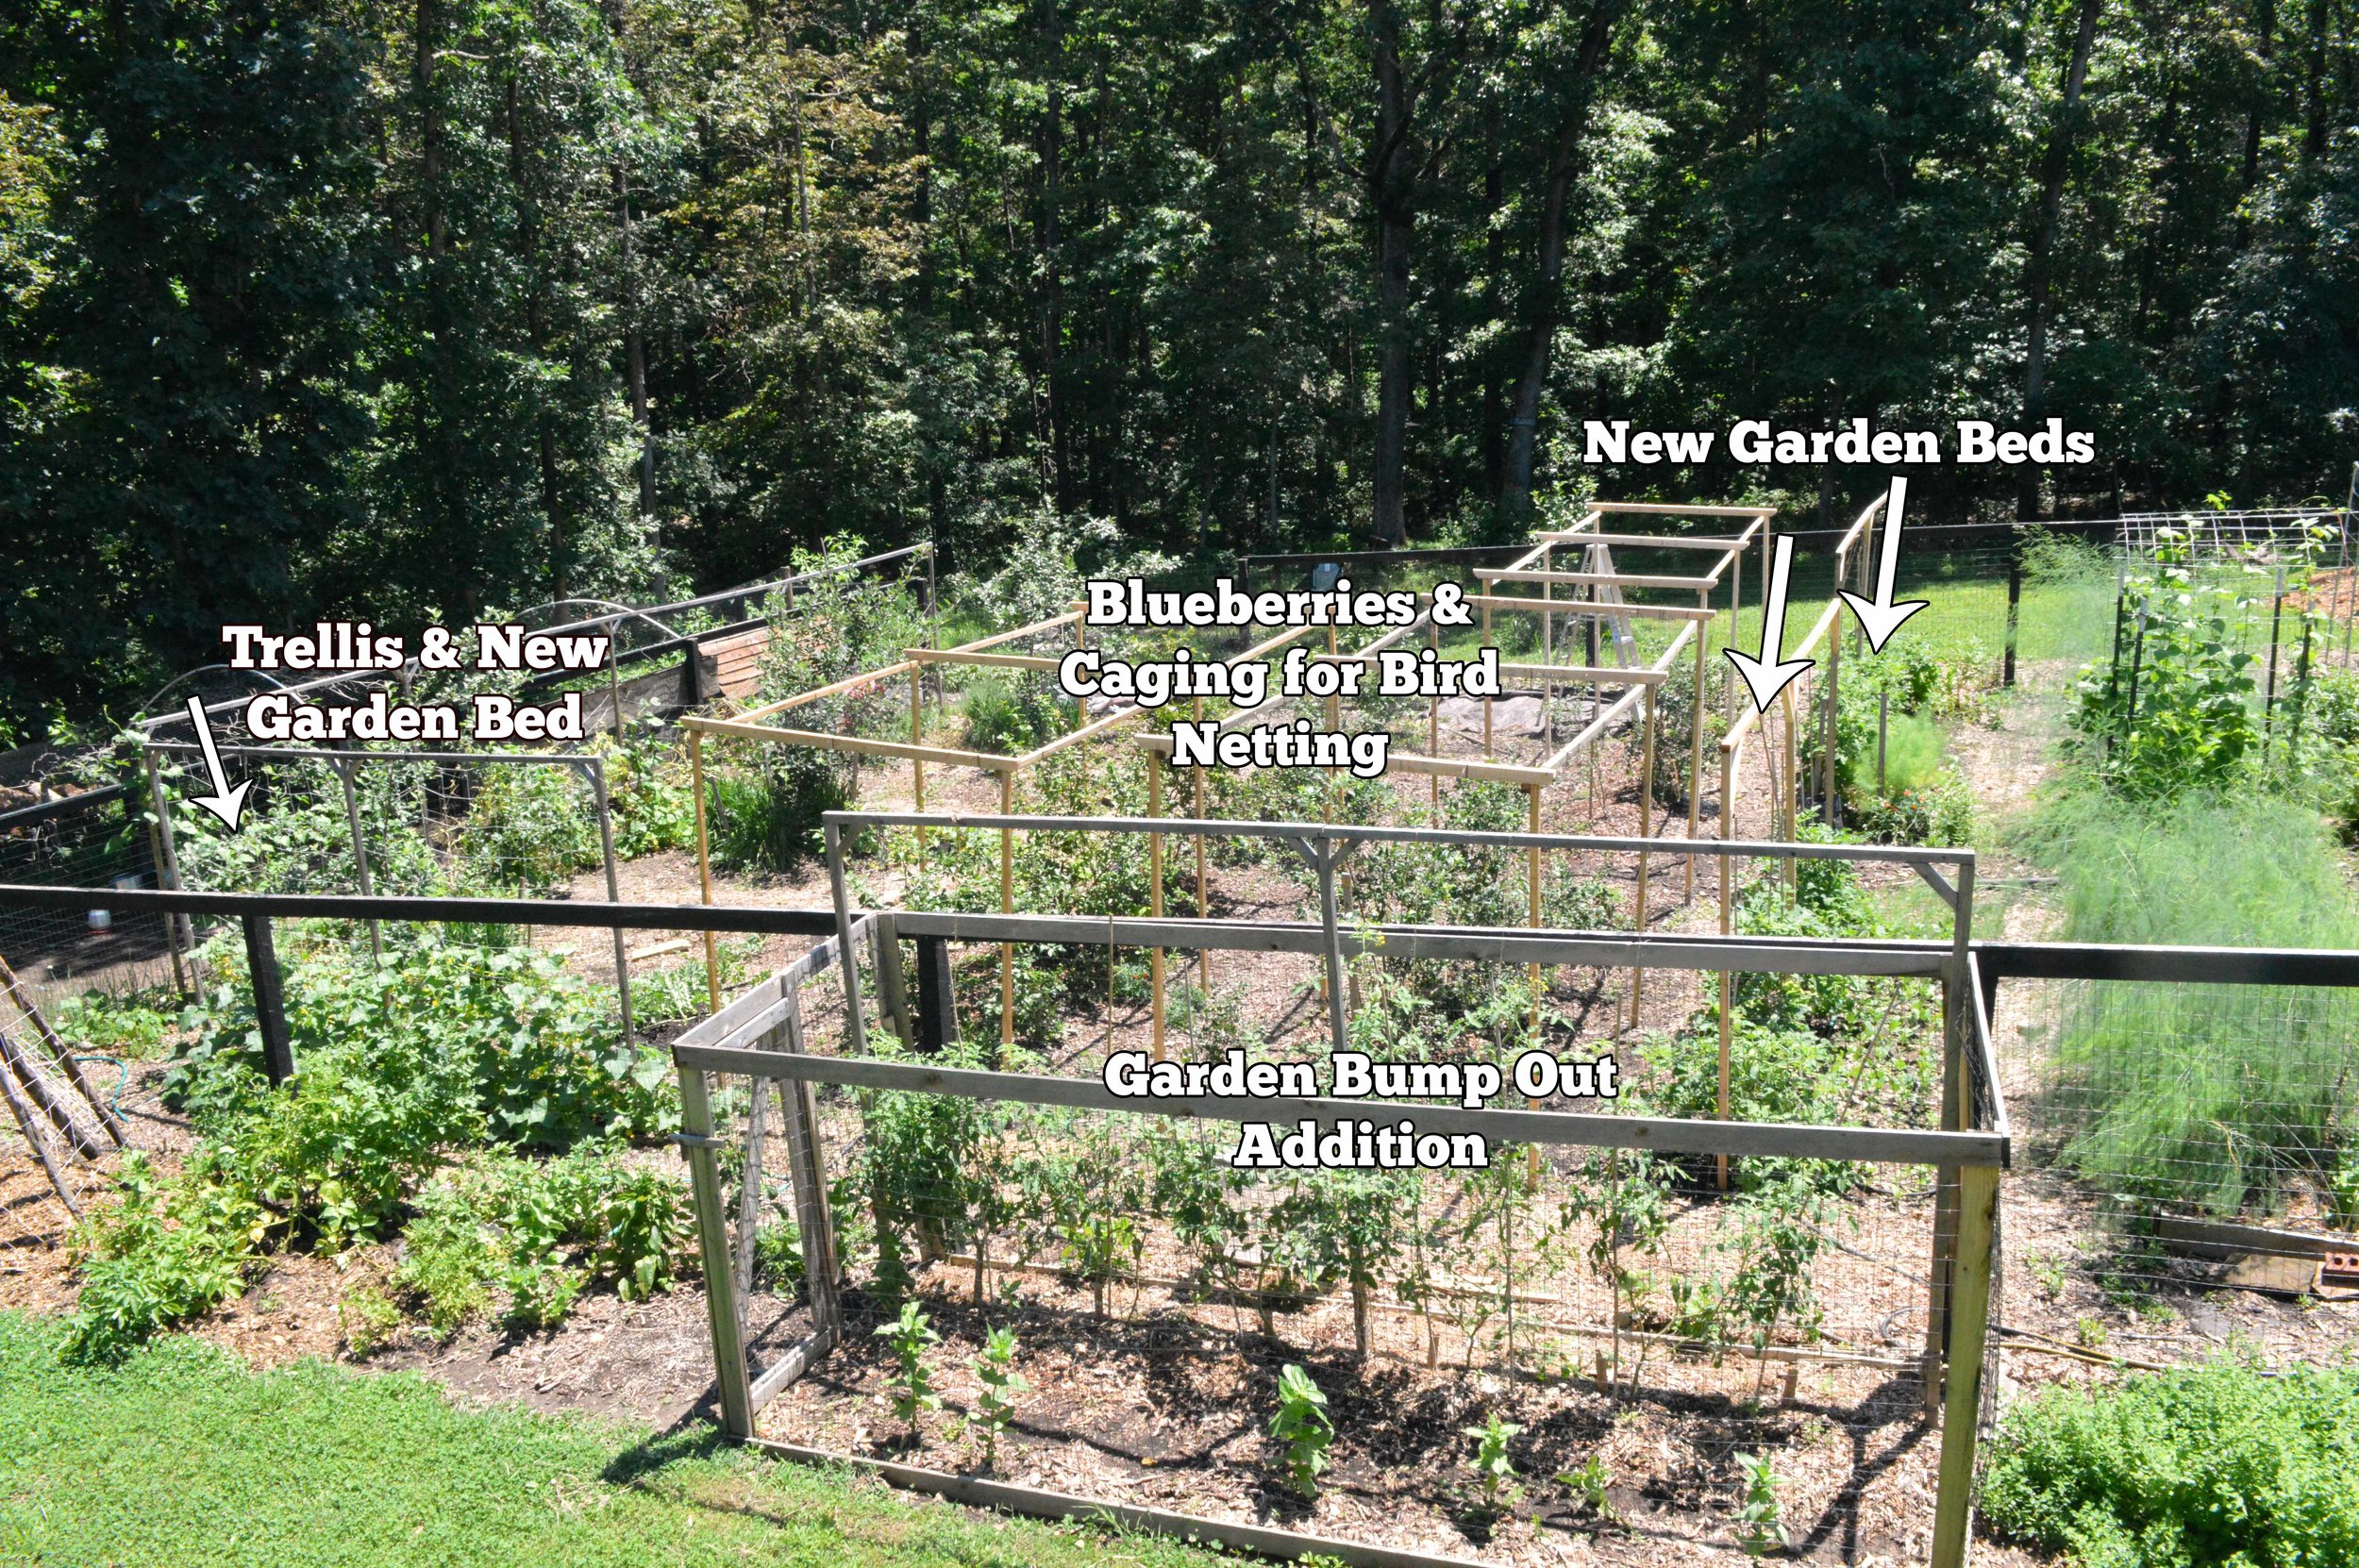 back of Garden 2019
In the photos above, you can see the difference between the 2017 garden and the 2019 garden. I’ve made many additions to the garden without actually increasing the footprint of the garden. There are also two other garden beds on the opposite side of the garden (not visible).
#4 Grow bags
I never thought I would do any container gardening but I’m trying grow bags this year. There are all different types but the kind that I chose was a sewn fabric bag. It is permeable and allows air and water to flow through the bag. Because of this it is also much less likely for the roots to get rootbound.
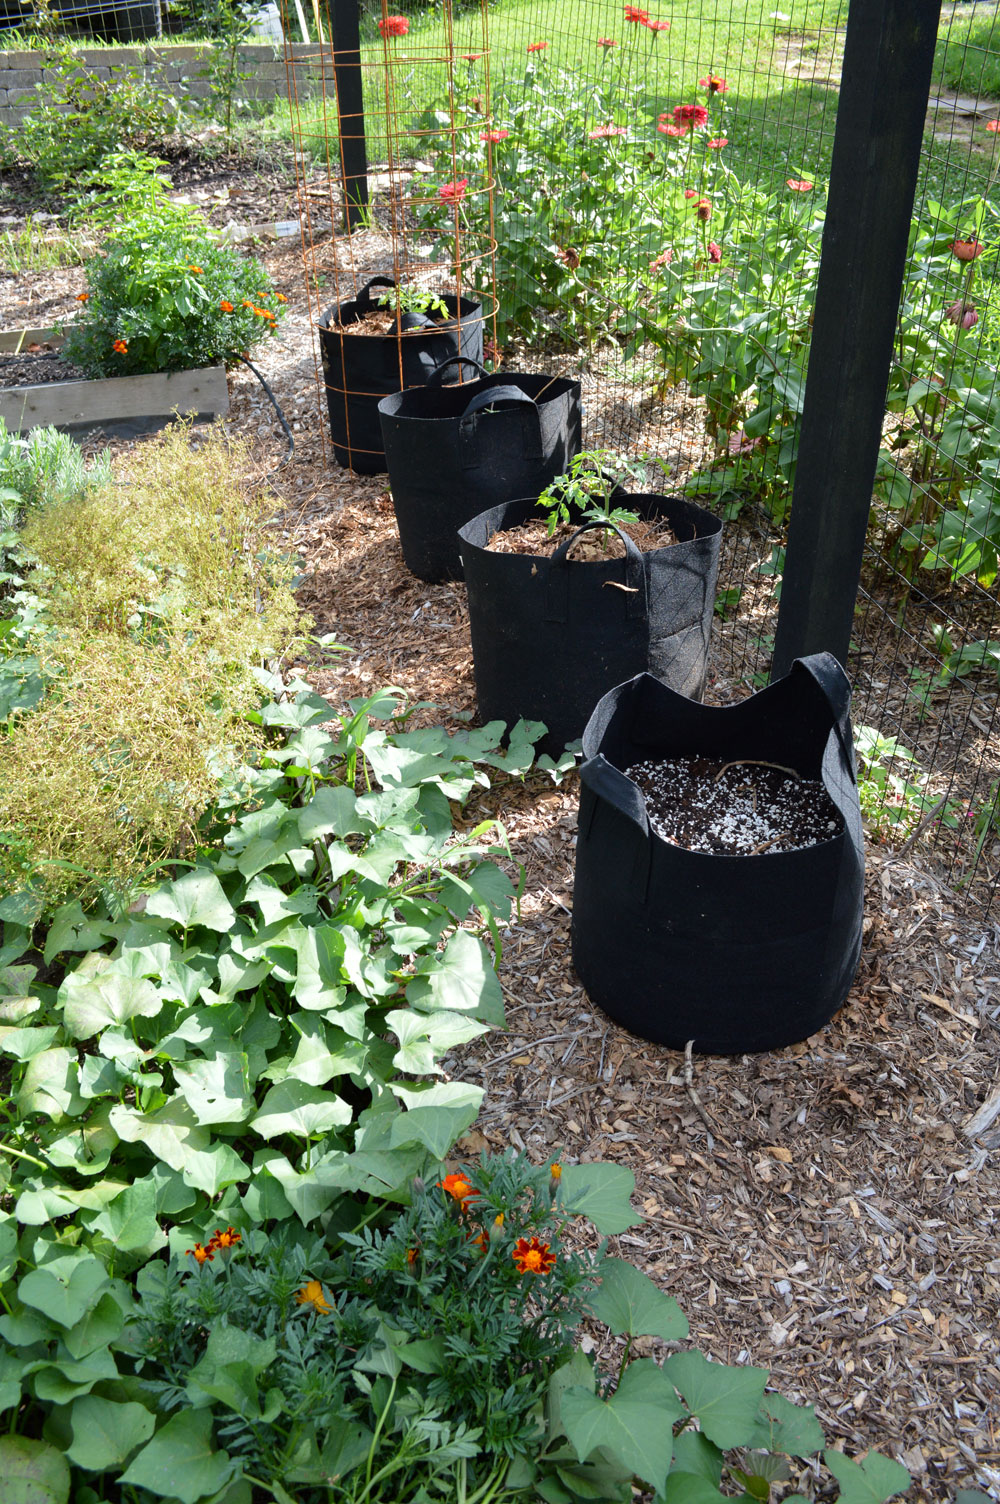
The benefit of grow bags or any container gardening is the ability to put new potting soil in every year. The result of that is you don’t have the problem of disease building up in the soil. And therefore no need to rotate crop families around the garden.
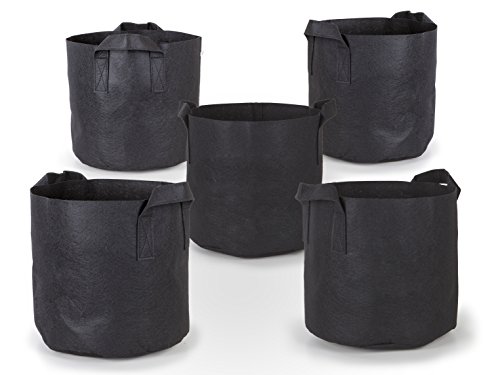
Below is the kind I like best, I bought two different types of grow bags to test and these are better quality with nice thick material.
Craig LeHoullier author of Epic Tomatoes, uses all container gardening for his tomatoes and they just grow in his driveway! This shows how creative you can get with locations for your containers, truly any place with full sun will work. Craig grows hundreds of tomatoes each year to eat and to save seed.
#5 Improve your growing conditions: Healthy soil, full sun, consistent watering, etc.
You need less nightshades or other crops if you improve your growing conditions. The main three I would focus on is healthy soil, full sun, and consistent drip irrigation. The implementation of these three things will increase your yields WITHOUT the need to increase the number of plants and the space they occupy.
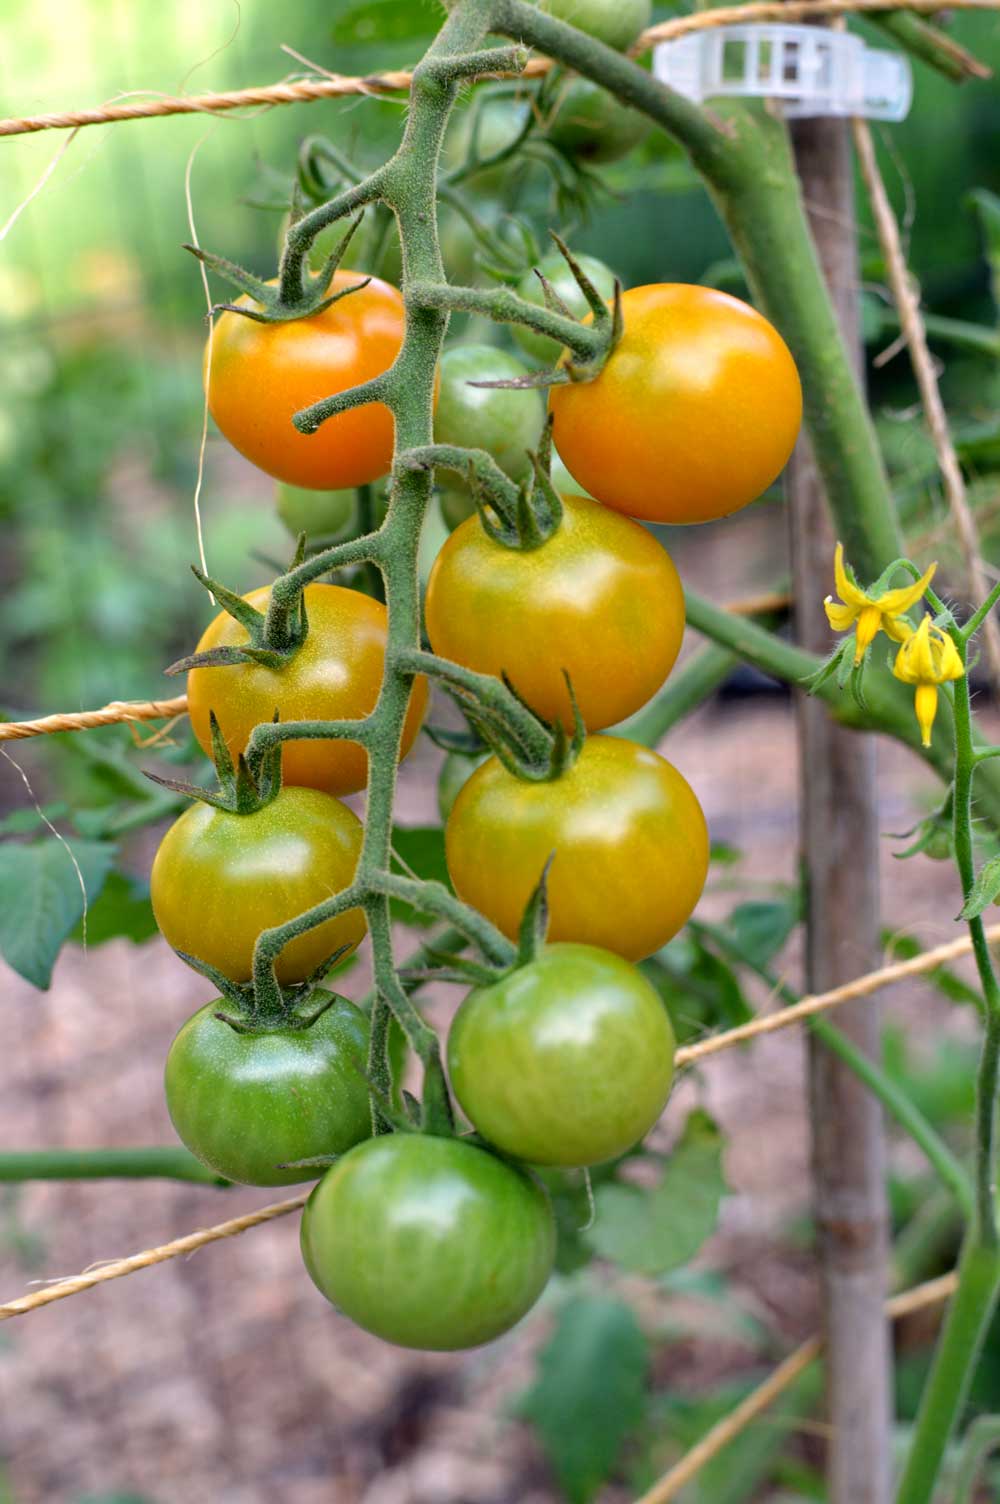
 succession planting of tomatoes
This is a big lesson that I’ve learned this year. I’ve been so focused on succession planting and growing as much as possible, I forgot what a huge difference improving the soil makes. Plants grown in healthy soil are less susceptible to diseases and pests.
I took the time to grow a cover crop of oats and peas in one of my garden beds prior to planting. Then I planted tomatoes in that location after the cover crop was finished. I’m so amazed at how healthy the plants look in comparison to the tomatoes planted earlier in the season. My tomatoes planted earlier never looked that good.
So take the time to build and improve your soil. Though cover crops aren’t the only method to improve soil they never fail to amaze me with the results. You can also add compost and make sure you get your soil tested every few years.
6 comments
Becky,
Thanks for the ideas. This is definitely my biggest challenge. The first several years that I gardened I didn’t rotate my nightshades very well at all, and as a result in a few of the beds there is a buildup of root knot nematodes. The last time I grew tomatoes in these spots was a few years back, and they did produce very well, but towards the end of the year they started looking real bad. When I pulled them up I noticed the knots on the roots and then I understood why they were so unhealthy. Once an area is infested with nematodes, do you have any recommendations on what to do?
Thanks,
Derek
Hey Derek. My first thought is to grow a cover crop over the area. Some cover crops increase the nematode population and some decrease it. This article may help you- https://edis.ifas.ufl.edu/in892, but I’ll sum up the important parts below.
In a nutshell it was saying the best cover crops to decrease the nematode population in Summer are Cowpea, sunn hemp, sorghum-sudangrass, marigold, jointvetch, velvetbean, hairy indigo (Indigofera hirsuta), castor (Ricinus communis), sesame, and some grasses. I find marigold an interesting addition to that list. If you wanted to make the most of the space you interplant marigolds with another crop that isn’t susceptible to root nematodes for the time being.
The best winter cover crops to try to keep root knot nematode populations low are rye and oats.
Another thing to try is using nematode resistant tomato varieties. Just look for the capital "N" on the seed packet or seedling description. This means the variety is resistant to nematodes. I would probably do a combination of both the cover crops and the resistant tomato varieties until the problem seems to be under control.
Becky,
Thanks so much for the follow-up. I will give this a try.
Derek
Becky,
Thanks for the ideas. This is definitely my biggest challenge. The first several years that I gardened I didn’t rotate my nightshades very well at all, and as a result in a few of the beds there is a buildup of root knot nematodes. The last time I grew tomatoes in these spots was a few years back, and they did produce very well, but towards the end of the year they started looking real bad. When I pulled them up I noticed the knots on the roots and then I understood why they were so unhealthy. Once an area is infested with nematodes, do you have any recommendations on what to do?
Thanks,
Derek
Hey Derek. My first thought is to grow a cover crop over the area. Some cover crops increase the nematode population and some decrease it. This article may help you- https://edis.ifas.ufl.edu/in892, but I’ll sum up the important parts below.
In a nutshell it was saying the best cover crops to decrease the nematode population in Summer are Cowpea, sunn hemp, sorghum-sudangrass, marigold, jointvetch, velvetbean, hairy indigo (Indigofera hirsuta), castor (Ricinus communis), sesame, and some grasses. I find marigold an interesting addition to that list. If you wanted to make the most of the space you interplant marigolds with another crop that isn’t susceptible to root nematodes for the time being.
The best winter cover crops to try to keep root knot nematode populations low are rye and oats.
Another thing to try is using nematode resistant tomato varieties. Just look for the capital "N" on the seed packet or seedling description. This means the variety is resistant to nematodes. I would probably do a combination of both the cover crops and the resistant tomato varieties until the problem seems to be under control.
Becky,
Thanks so much for the follow-up. I will give this a try.
Derek