

Not long ago, my Dad came to my house and we were out in the garden. I was talking about growing dried beans and he asked me about what the plant looked like. When you’ve only seen beans in bags from a grocery store, it totally makes sense. I remember wondering how dried beans grew too! I actually find that quite a few people who visit my garden find the dried beans fascinating. I hope this guide dispels all the mystery and helps you feel confident in growing dried beans!
Soil Requirements
What does your soil need to grow dried beans?
-
Well drained soil with consistent moisture. Well drained soil means that after heavy rains the water doesn’t sit and puddle up. On the other hand, you also don’t want it drain so fast that it dries too quickly.
-
PH of 6.0-6.8. (For more information on budget friendly ways to check your soil ph just click HERE)
-
Soil with average fertility is adequate. No need to add extra fertilizers unless you have very poor soil. When I started my garden, my soil was so poor in nutrients that my beans turned yellow! They needed nitrogen and and compost to bounce back. However, in most cases, you will not need to add nitrogen. If your worried you may need something more, a bit of compost will do the trick.
Starting Seeds

Beans are tender annual plants. They do not tolerate frost and should be planted after all danger of frost has passed. The best germination is achieved with soil temperatures of 70-80ºF.
This is usually when daytime temperatures are averaging about 60ºF.
Direct sow outdoors, planting the seed 1 inch deep in the soil. Soaking the seeds prior to planting can damage the seed resulting in poor germination.
I have tested both soaking and not soaking bean seeds in my own garden and have found that I have better germination by not soaking the seeds.
Dried Beans or Dual Purpose
When growing for dried beans you can either grow beans that are only good dried or a dual purpose bean.
Dual purpose means they can be eaten in the fresh green stage as a snap bean or they can be left in the pod to dry.
Dried beans are grown exclusively for the purpose of eating dried. For this type, the bean is usually too tough and stringy to eat even when young and green.
Not sure which kind your growing? It will usually say on the seed packet whether or not it is a dual purpose bean. If it doesn’t say, you can do your own experiment and seed whether or not the pods are worth eating green as well. Pictures on the seed packets also indicate what kind of beans you can expect by having a picture of a dried bean instead of a snap bean.
If your short on space, a dual purpose bean can be great for giving both snap and dried beans without the added space. You’ll never feel guilty about missing a snap bean again with dual purpose types.
Growing Habits
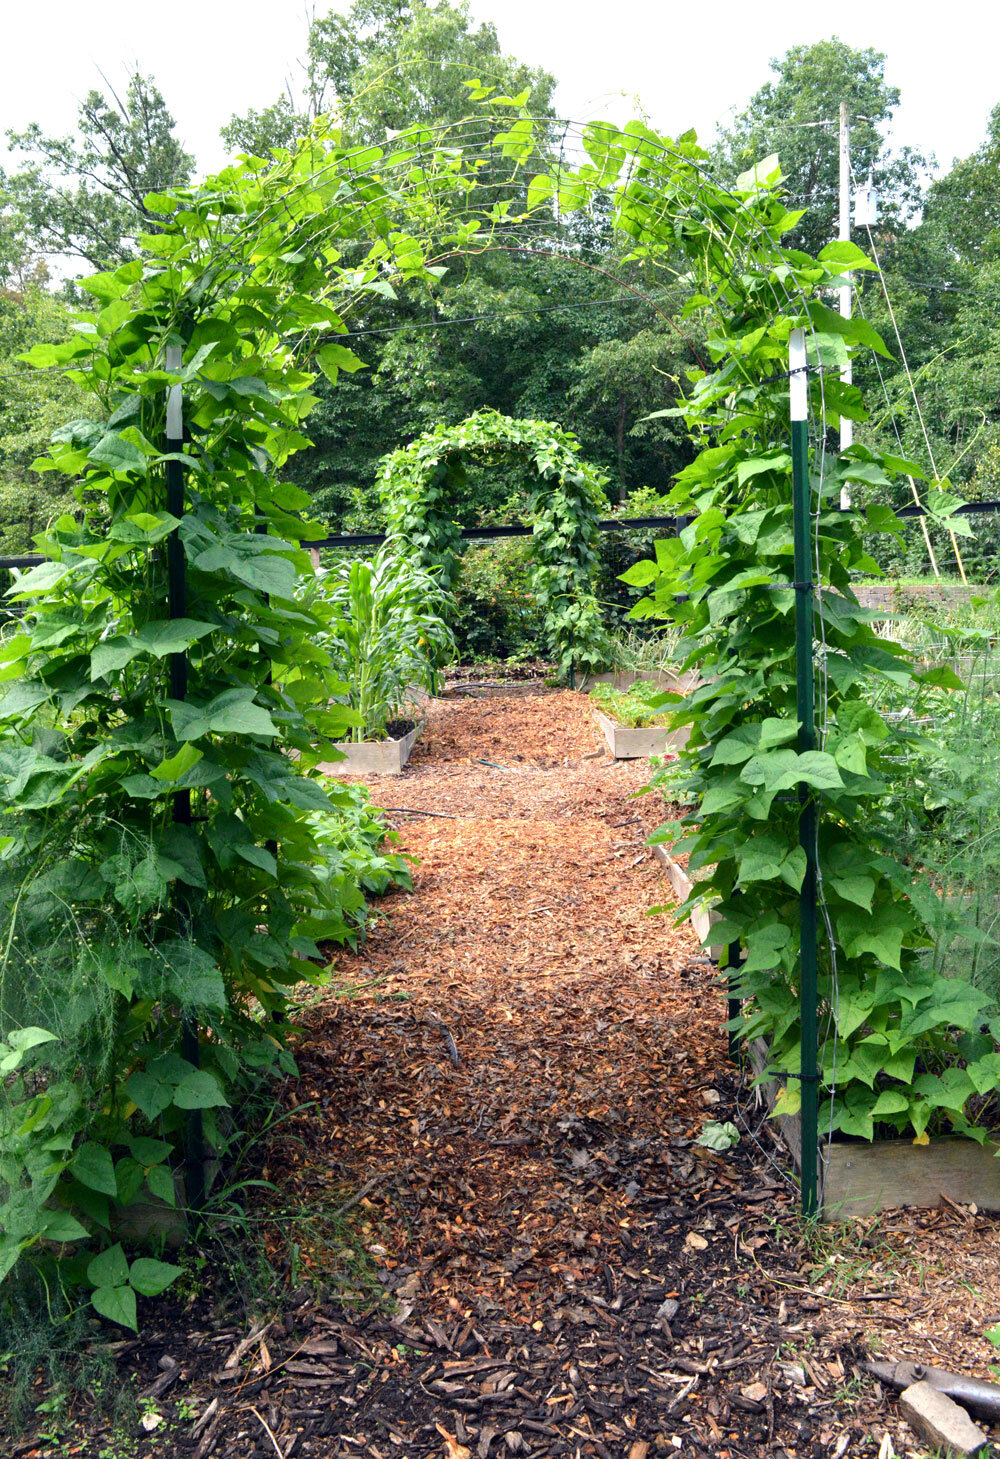
Pole Beans on an arch trellis
Each variety also has different growing habits and it’s important to know each one so you can prepare your growing site accordingly.
Bush beans are short enough that they do not need a trellis. The harvest period is shorter and they generally don’t produce as much as pole beans.
Half Runner is in between pole and bush height. You’ll need a trellis for these since they usually grow to around 5 feet.
Pole beans grow so high they need a trellis to support them. I’ve had pole beans grow to 10 feet so be prepared! They have a longer harvest period and produce more beans for the space they use.
Spacing
Intensive spacing for raised beds
Bush Beans- 6 inches between plants in all directions
Normal Spacing
Bush Beans- 5 inches between plants and 18 inches between rows.
Pole Beans- 6 inches apart on a linear trellis design. 4 feet in between trellis rows.
Maintenance and Care
Beans like consistent soil moisture. Make sure they are getting watered about an inch per week, especially during dry weather.
Mulch under the plants once they are a few weeks old. Mulch will help keep the soil moisture consistent and help prevent diseases from spreading.
If you are growing a dual purpose type for fresh eating as well, succession plant the harvest, planting a new batch every two weeks during the spring and summer.
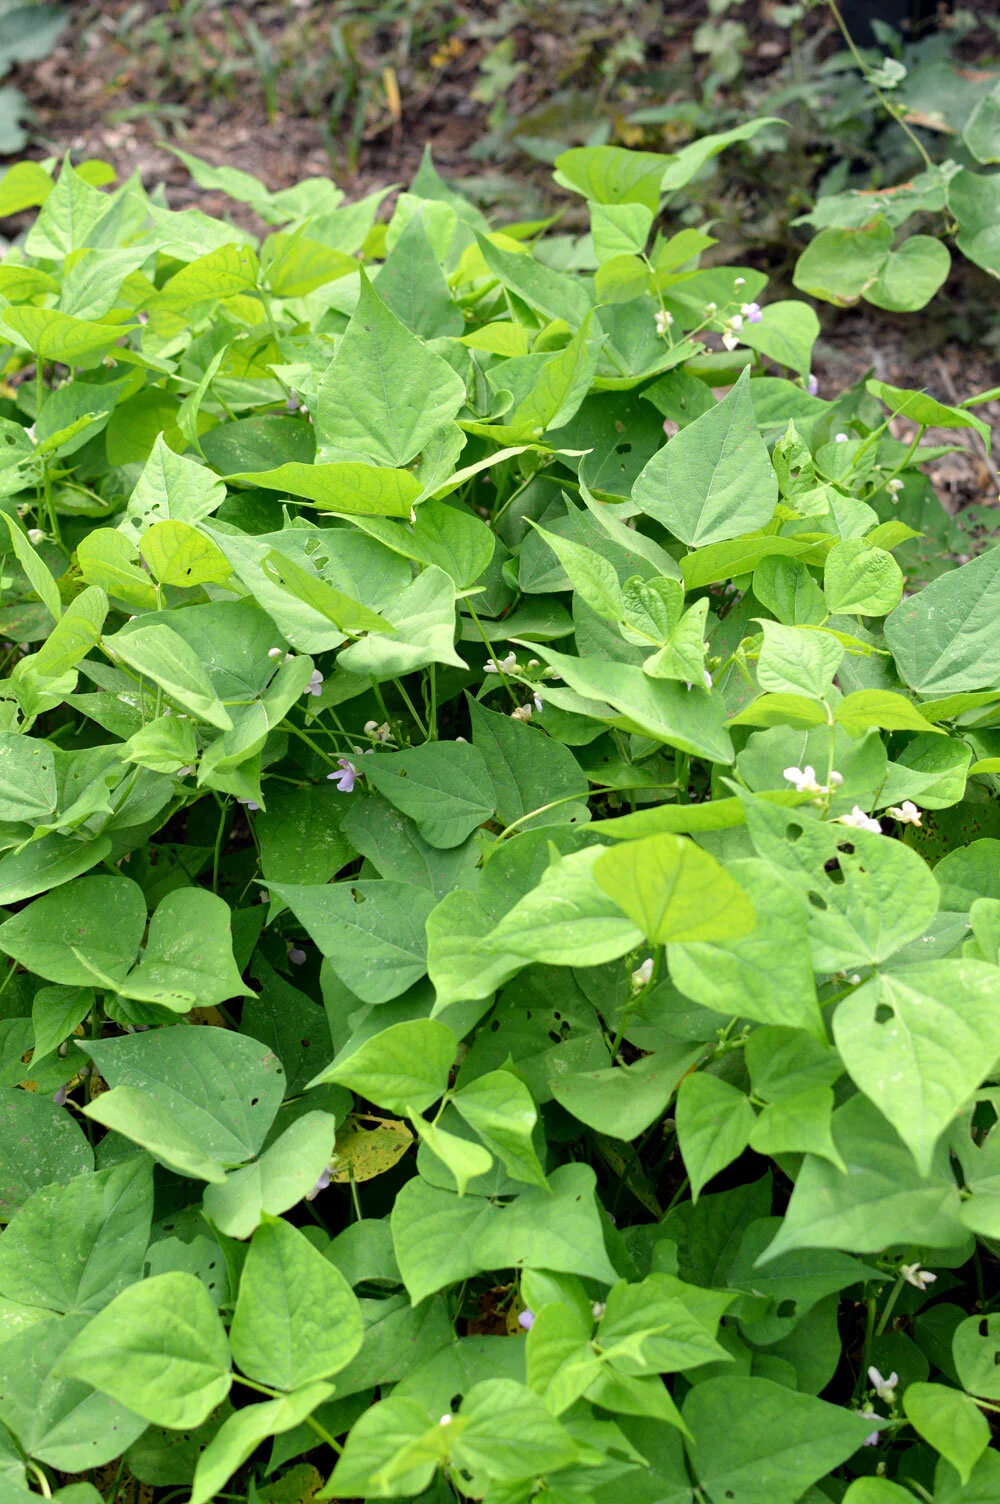
At the first sign of disease, hand pick diseased leaves and destroy. Destroying means burning or bagging so no spores escape and infect the rest of your garden. Continue to pick off diseased portions of the plant if necessary.
Pests
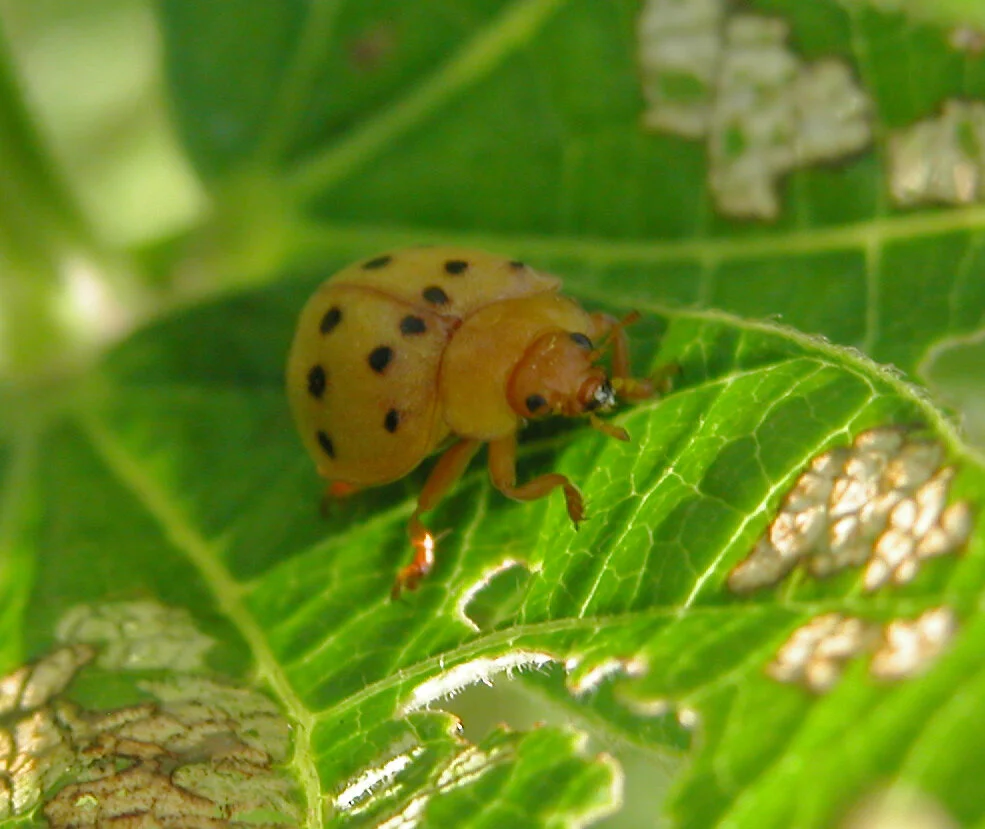
Photo Courtesy of Judy Baxter
Mexican Bean Beetle– Mexican bean beetles are often mistaken for lady beetles because of their shape and spots. However, they are a copper color over their entire body that is distinct. They will skeletonize the leaves of a bean plant with severe infestations. The nymphs are orange and have spiny bodies. You can find the eggs in groups on the undersides of leaves.
Leafminers– Adults are tiny black and yellow insects. Larvae will tunnel through the leaves of the bean plant, leaving translucent tunnels. Remove and destroy mined leaves. For large and consistent problems with this pest use a floating row cover immediately after planting.
Spider mites– Spider mites are very tiny and appear on the undersides of leaves as light or dark specks. Under close inspection, they are spider like and occasionally you will see a fine webbing left by the mites. To control them spray plants with water in the evening.
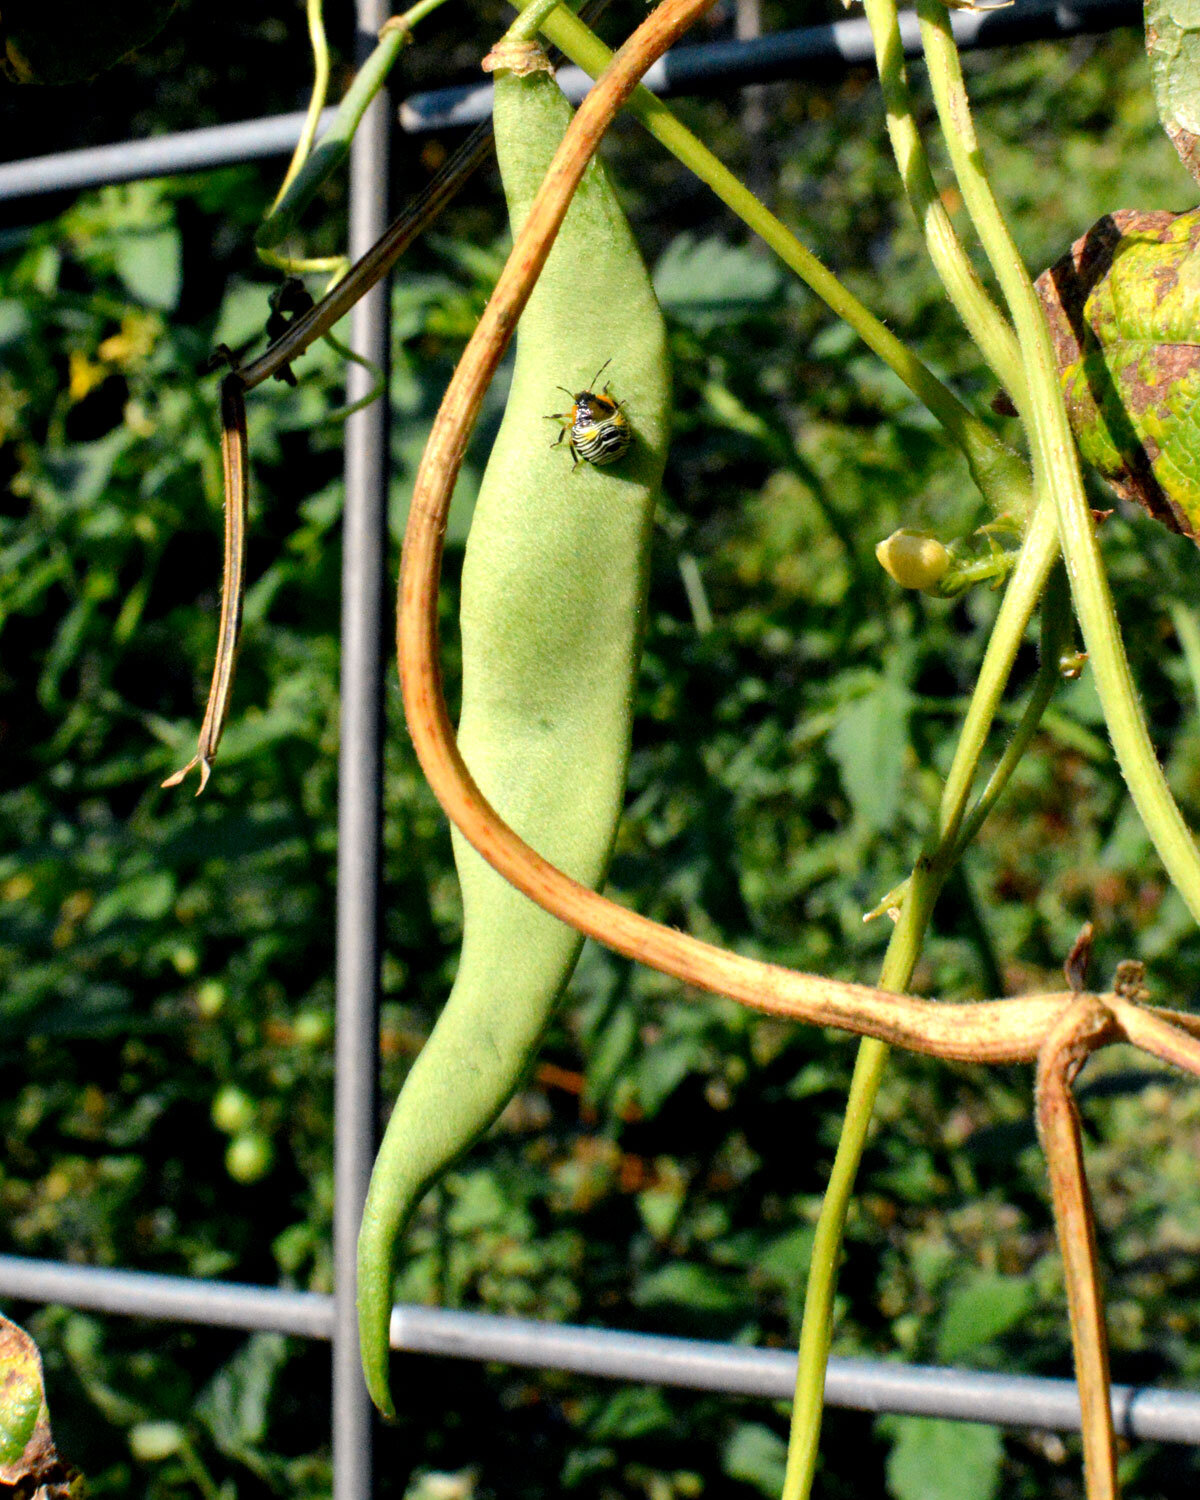
Green Stink Bug Nymph
Green Stink bugs– Adult green stink bugs are light green and have a shield shape body. The nymphs look quite different than the adults and have colorful markings (See image above). Stink Bugs have sucking mouthparts and can cause pod distortions. During the bud and bloom phase of the plant, stink bugs can cause blossom drop which reduces yields. They can also cause pitting or wart like pimples on a bean pod.
Diseases
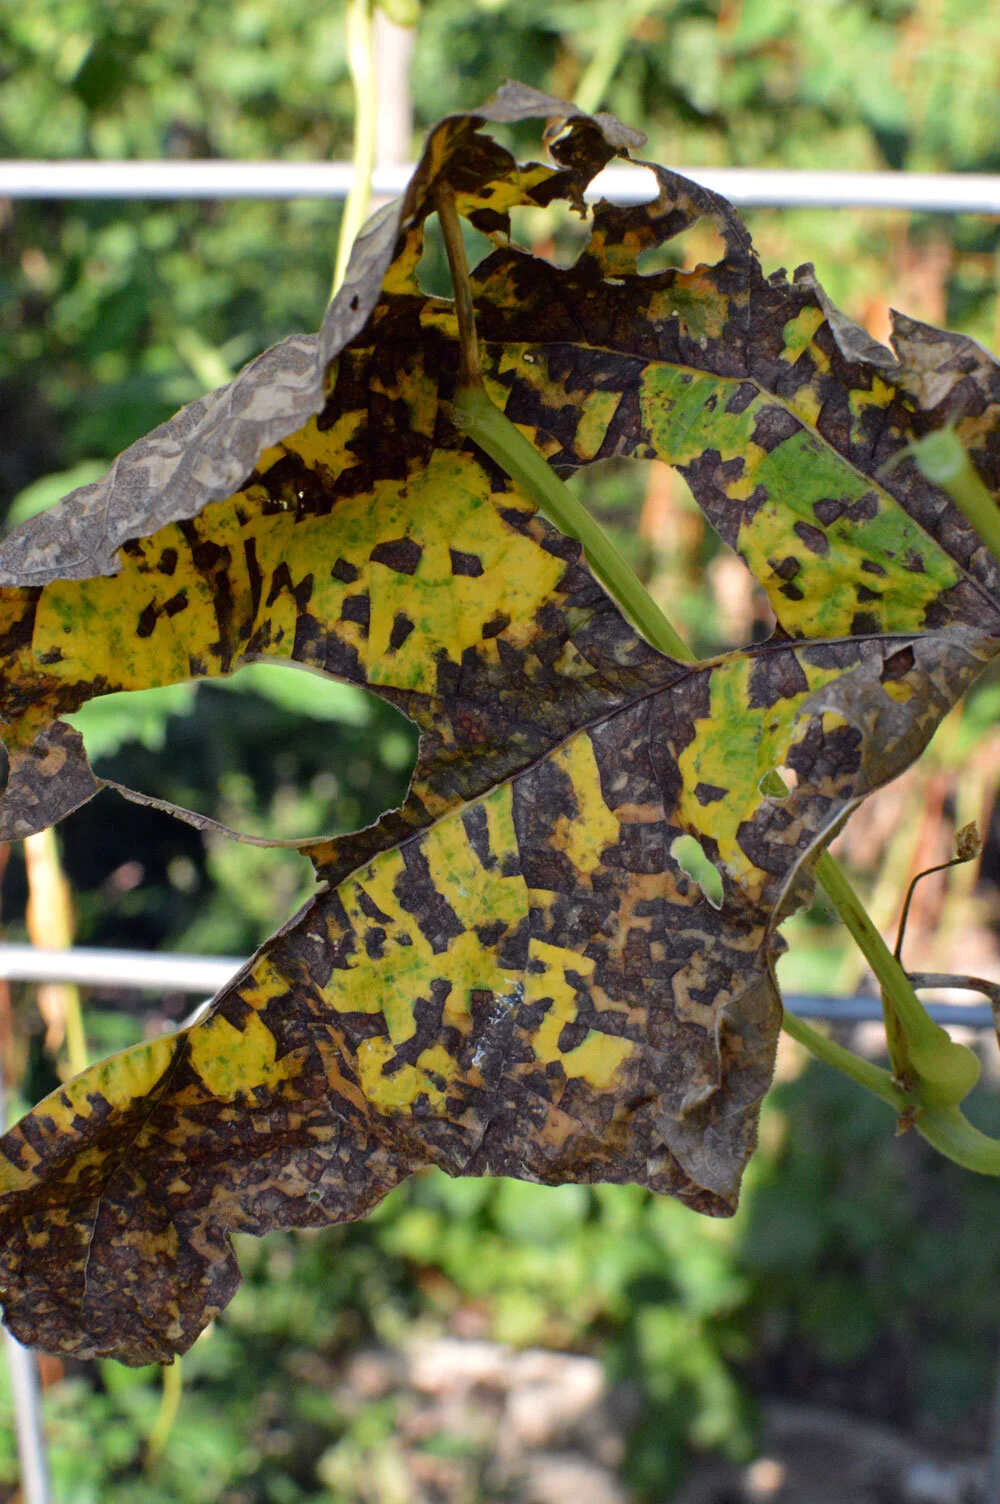
Angular leaf Spot on Beans
Bean Mosaic Virus– Leaves have splotches of color and are curled and malformed. The plant may appear stunted. Remove and destroy infected plants and plant resistant cultivars in the future.
Angular Bean Leaf Spot– This is a fungal disease of the bean plant where spots originate at the base of the plant and work their way up. Small dark spots have an angular appearance and can join together. It creates a checkerboard appearance. Remove and destroy infected leaves as you see them. Practice 3 year crop rotation.
Bacterial Blights– Small irregular lesions grow to form larger ones connecting to the edge of the leaflet. They are dark brown in color with a yellow halo and appear water soaked.
Powdery Mildew– Cause by fungi, leaves develop a white powdery or fuzzy coating. To control, plant resistant cultivars, or try all natural milk or baking soda spray.
Harvest
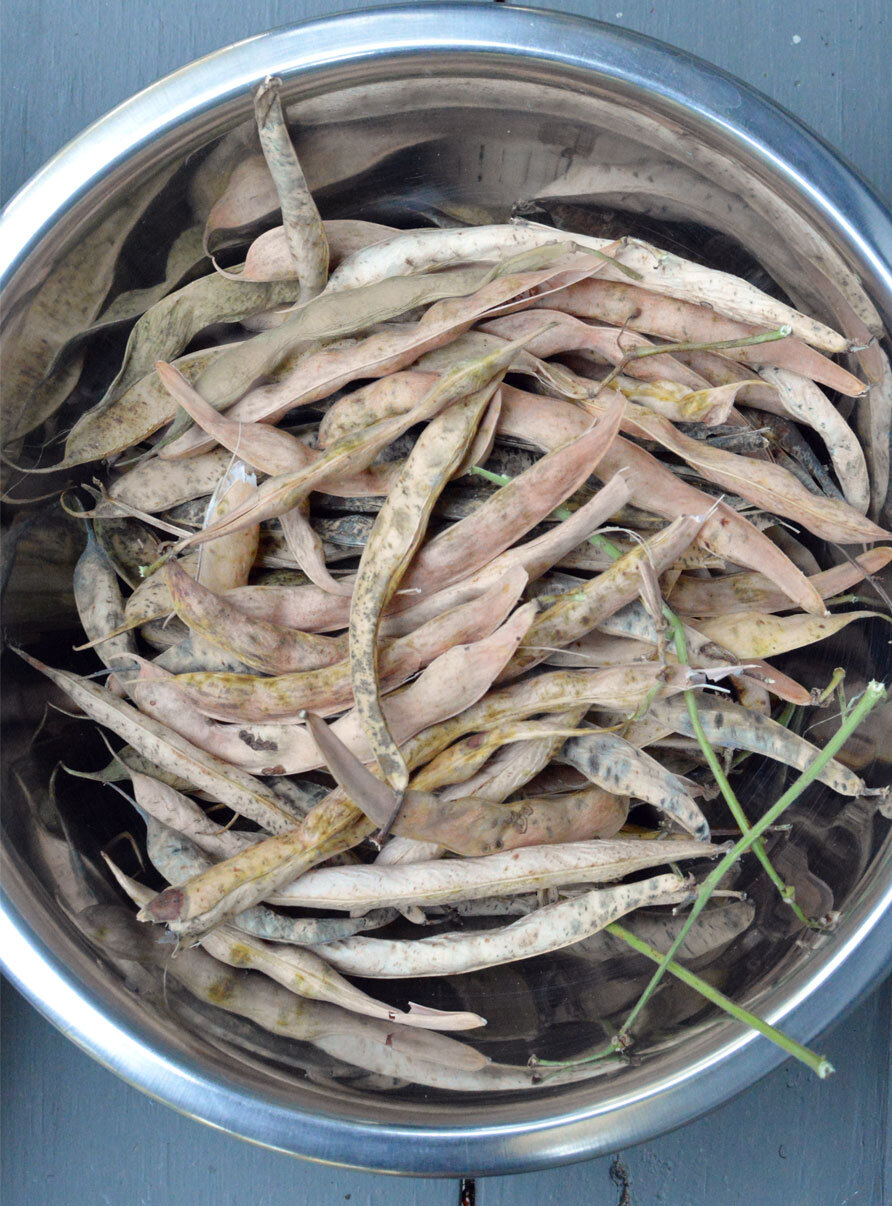
Common practice is to leave the pods on the plant until the whole plant is mature and dry. Leaves will all fall off and the entire plant including all dried pods can be harvested.
I personally find this method has a few flaws. One problem is you need to have a very long season to wait until the entire plant has browned and dried in the garden. The other issue I find with waiting to harvest the entire plant is you need to have a very dry climate to avoid moldy beans or sprouting beans in the pods.
Alternative Harvest Option #1: If your plants are not yet completely dry and frost is threatening, harvest the plants immediately. Take up the entire plant including the roots and hang in a warm dry place to allow beans to finish drying.
Alternative Harvest Option #2: If you live in a wet, humid area you may want to harvest the beans as they dry. In my area, consistent rain makes it so the beans dry on the pod, then get wet, then dry, and then get wet again. This can result in two problems. One problem is a moldy pod. The other problem is beans that start to sprout within the pod.
The only caveat with this method is that you must wait until the bean pods are fully dry- I can’t stress that enough.
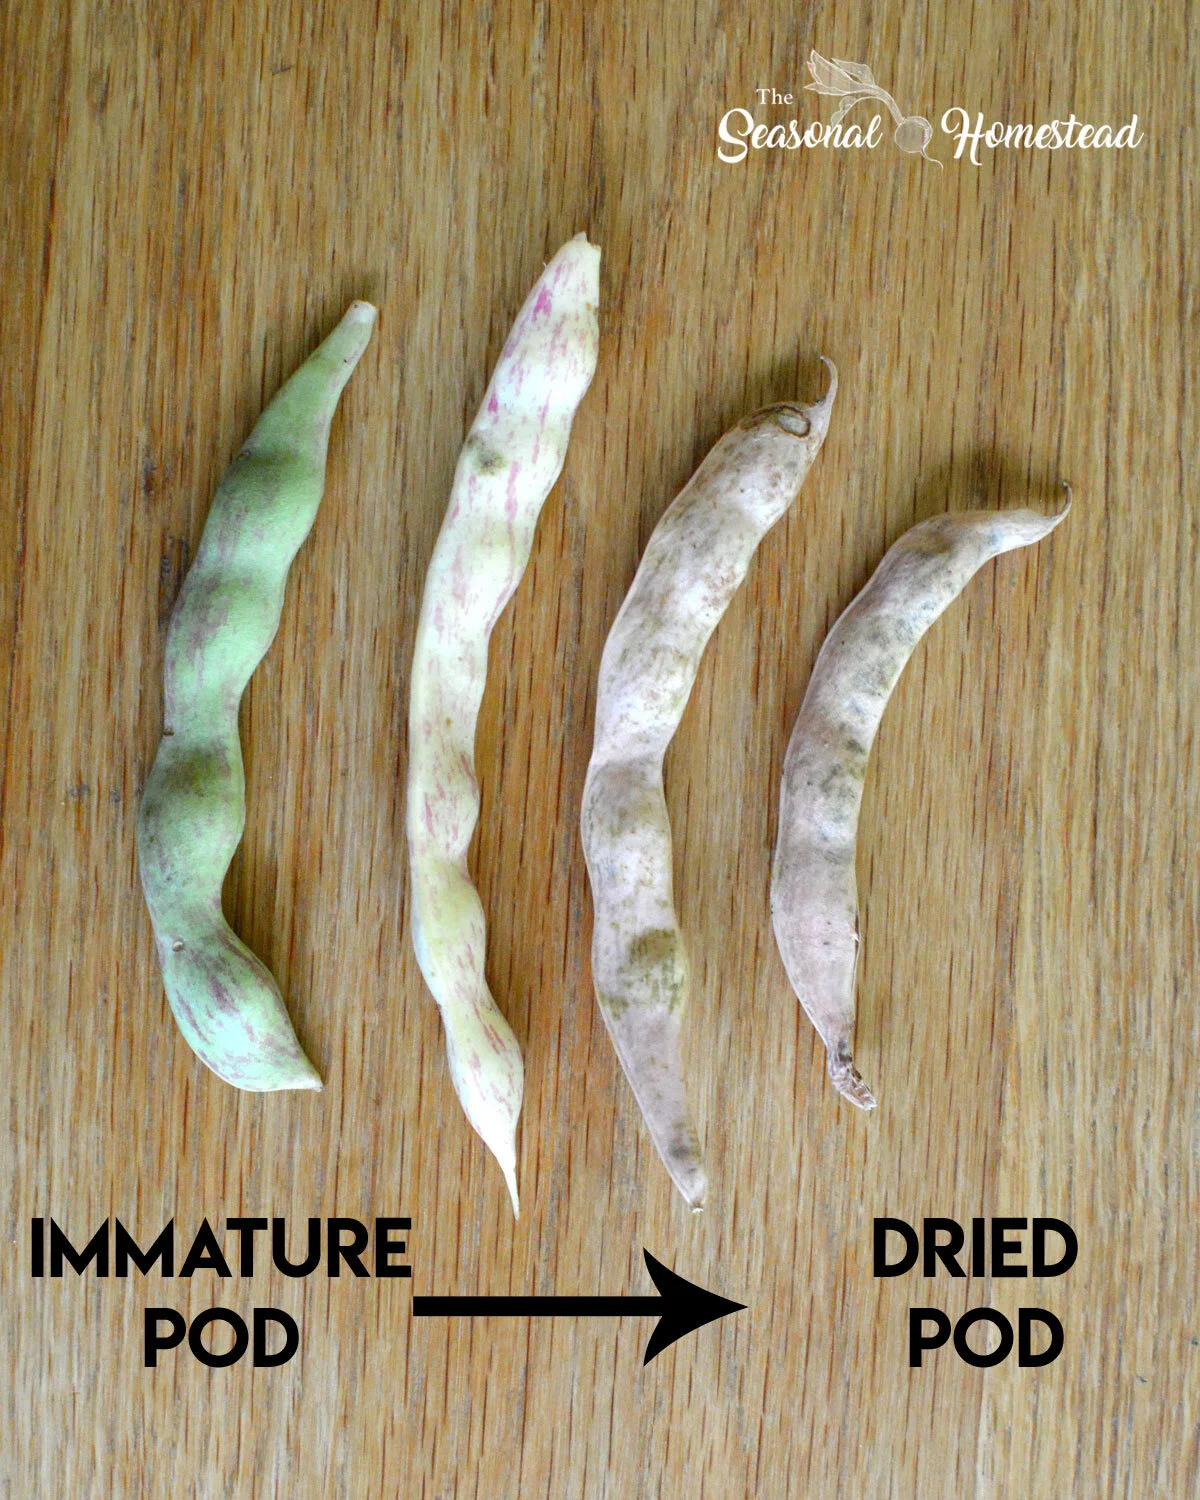
A completely and fully dry bean will be very crispy on the exterior pod and should have no moisture remaining. It will be tan in color. See photo above.
Upon opening the completely dry bean, the bean seeds should be rock hard and you shouldn’t be able to dent them at all with a fingernail. If you give them a squeeze they will feel hard and not spongy. You can also notice from the photo below that as the beans dry they get smaller.
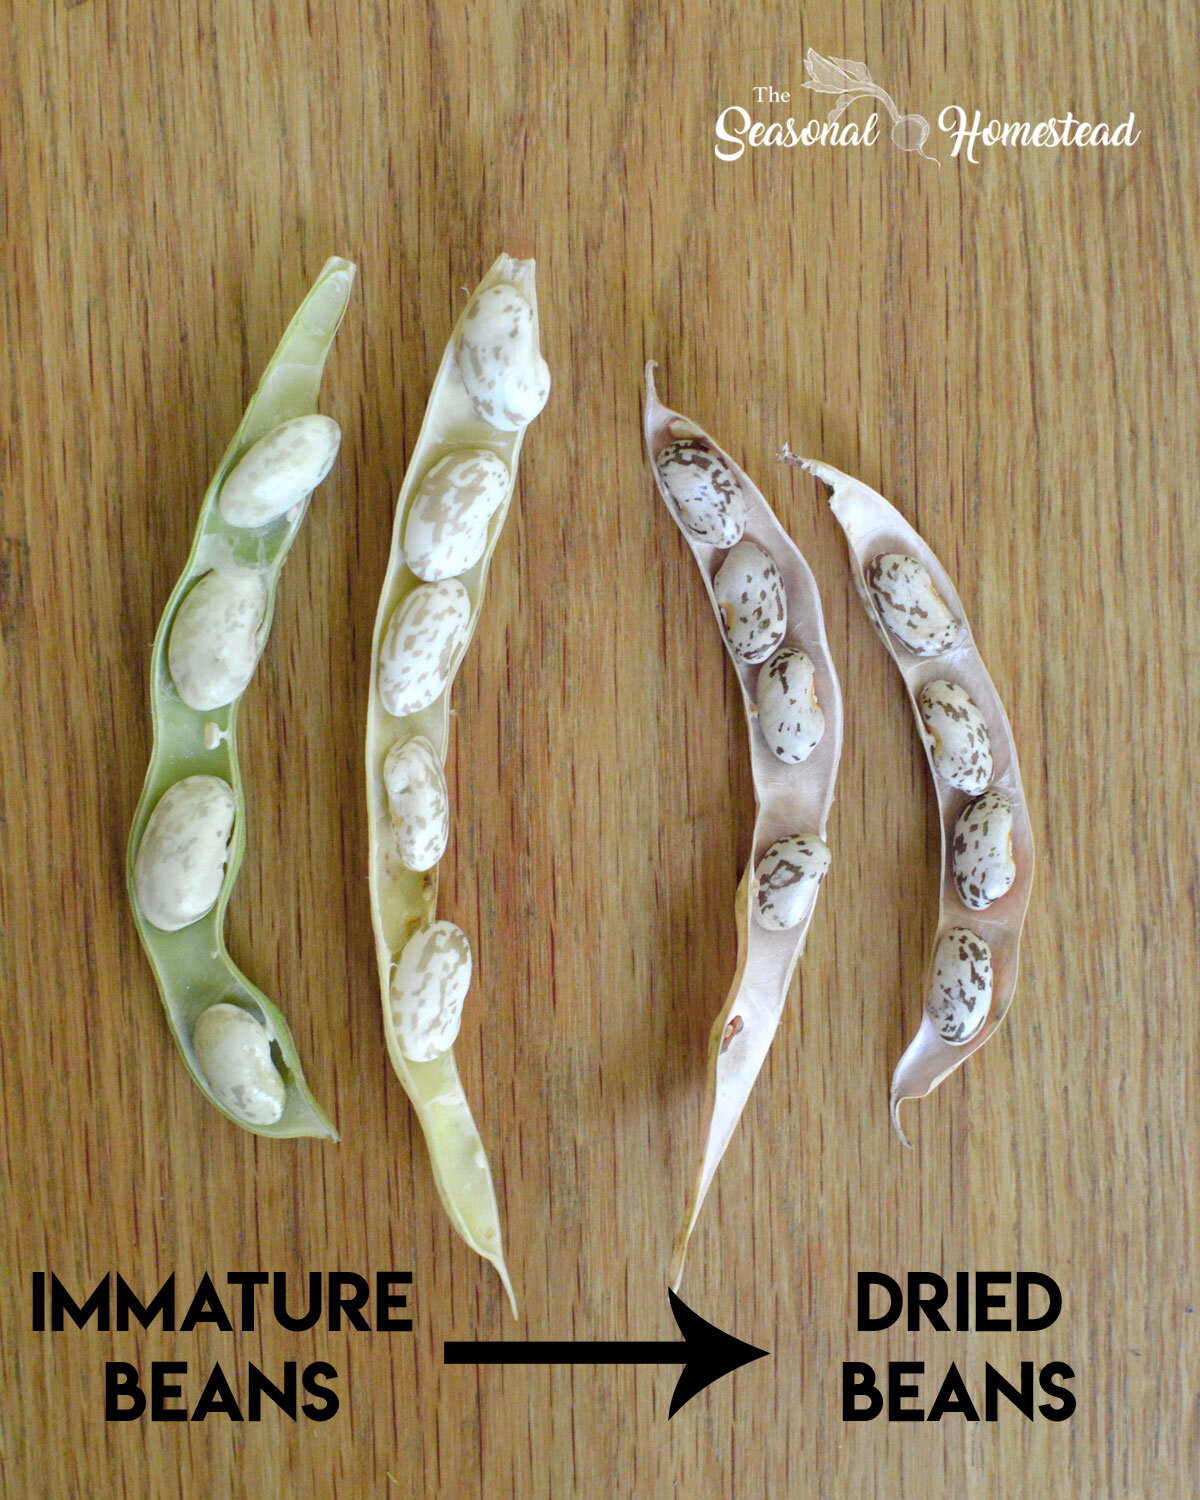
Quincy pinto bean from snap to dried bean
If you mistakenly open a not completely dry bean, it will compromise the quality and storage ability. If they are very close to being completely dry, it usually won’t cause a problem. However, you will need to let them dry on a screen in a warm place with plenty of ventilation until very hard and dry.
If it’s harvested very prematurely, oftentimes it will dry and have a wrinkled appearance. While these beans can still be eaten, I would make sure to eat it first and not put it with the long term storage beans.
Storage
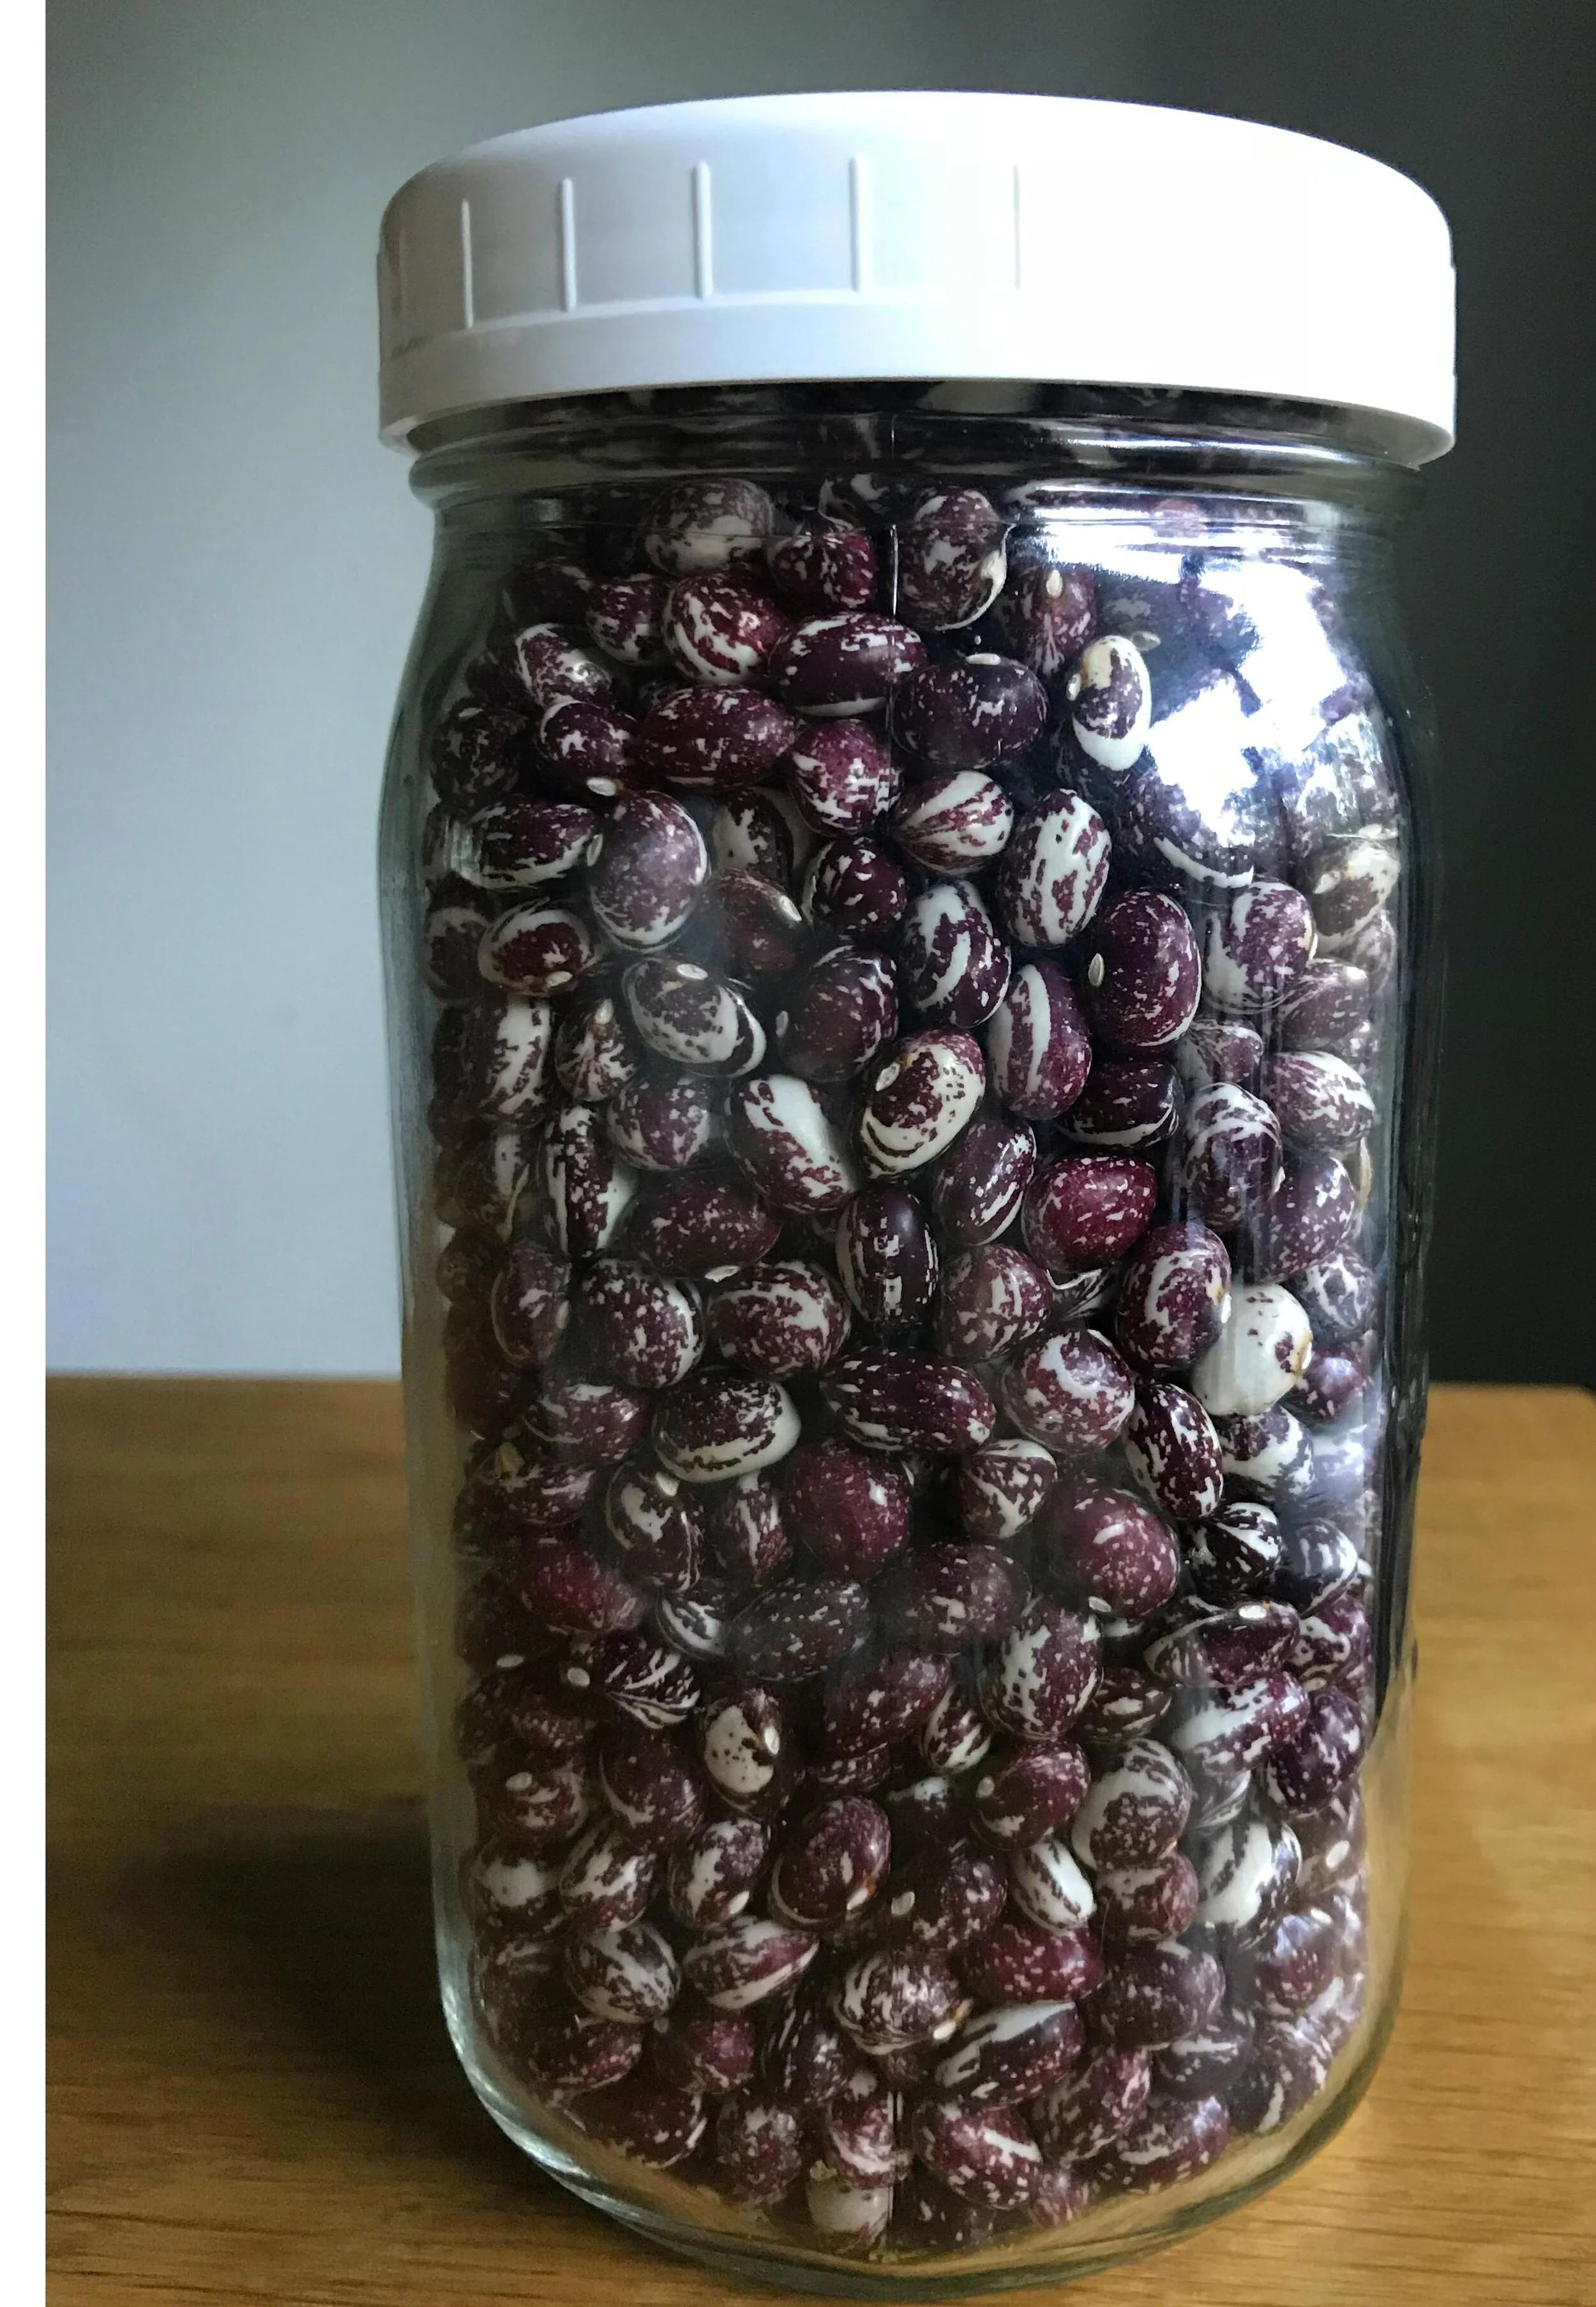
Once your beans are completely dry, you need to store them in an airtight container. I usually use a mason jar. Beans will store well in an airtight container for one year. Longer storage of beans using this method, can result in pods not fully rehydrating and remaining hard and mealy even after cooking.
However, there is ways to extend the shelf life of beans. Storing beans in mylar bags or #10 cans with oxygen absorbers can increase the shelf life. They are said to remain viable for up to 10 years (Source).
Recommended varieties
Disease Resistant: Quincy Pinto Bean, Light red kidney bean, Eclipse Bean, Ojo De Tigre
Dual Purpose: Borlotto di vigevano bean, Henderson’s Black Valentine, Dragon Tongue
Short Season: Vermont Cranberry Dry Bean, Kenearly Yellow Eye
Gorgeous: Good Mother Stallard Bean, Jacobs Cattle, mbombo
Great Flavor: Black Turtle Bean, Good Mother Stallard Bean, Jacobs Cattle
High Yield: Eclipse Bean, Quincy Pinto Bean, Light red kidney bean, Cannellini
