Getting Started with a Year Round Garden Part 2: Layout
I believe that layouts for the home garden are not explained or talked about enough in gardening books. I would guess this would be because of the variation of landscape makes it so no garden plot is the same and therefore it is difficult to duplicate garden designs.
The other reason is perhaps because most garden design is based on personal preference and very subjective. For example, some people thrive with a permaculture layout where plants are sporadic but as a whole work together, and others may do best with a more formal layout. And then there is the battle between using a raised bed versus using rows.
Despite the differences of preference of layout preference, I find there are some universal truths when speaking of efficiency for a year round garden and lessons to be learned from experienced gardeners.
One example of a garden layout that works comes from organic market gardeners (JM Fortier, Eliot Coleman, Etc). They have developed very streamlined layouts because they are working with a large scale garden. Instead of raised beds, they use garden rows. I plan to implement some of those layout ideas in my own garden because in a large garden, they reduce the time needed for upkeep and increase yields. That being said, the decision is ultimately yours to make. Here are some things to consider when deciding between raised beds and rows.
Row Benefits
-
Wide rows around 30 inches (as opposed to single rows) are very space efficient
-
Inexpensive
-
Retains more soil moisture
-
Easy to adjust to accommodate for space consuming crops
-
Easier to irrigate
-
Flexibility to change garden design
Row Drawbacks
-
Soil stays cooler for longer (could be a benefit too, depending on where you live)
-
Not as tidy
-
Easily stepped on by garden visitors and children
![]()
Raised Bed Benefits
-
Keep the garden tidy
-
Clear line of where the garden bed is located so people don’t step on it.
-
Soil warms up faster than in ground beds
-
Makes small gardens easier to manage
Raised Bed Drawbacks
-
Can be very expensive depending on how many you have
-
Soil dries out faster
-
In warm climates it may warm up the soil too much
-
Take a lot of work to build
-
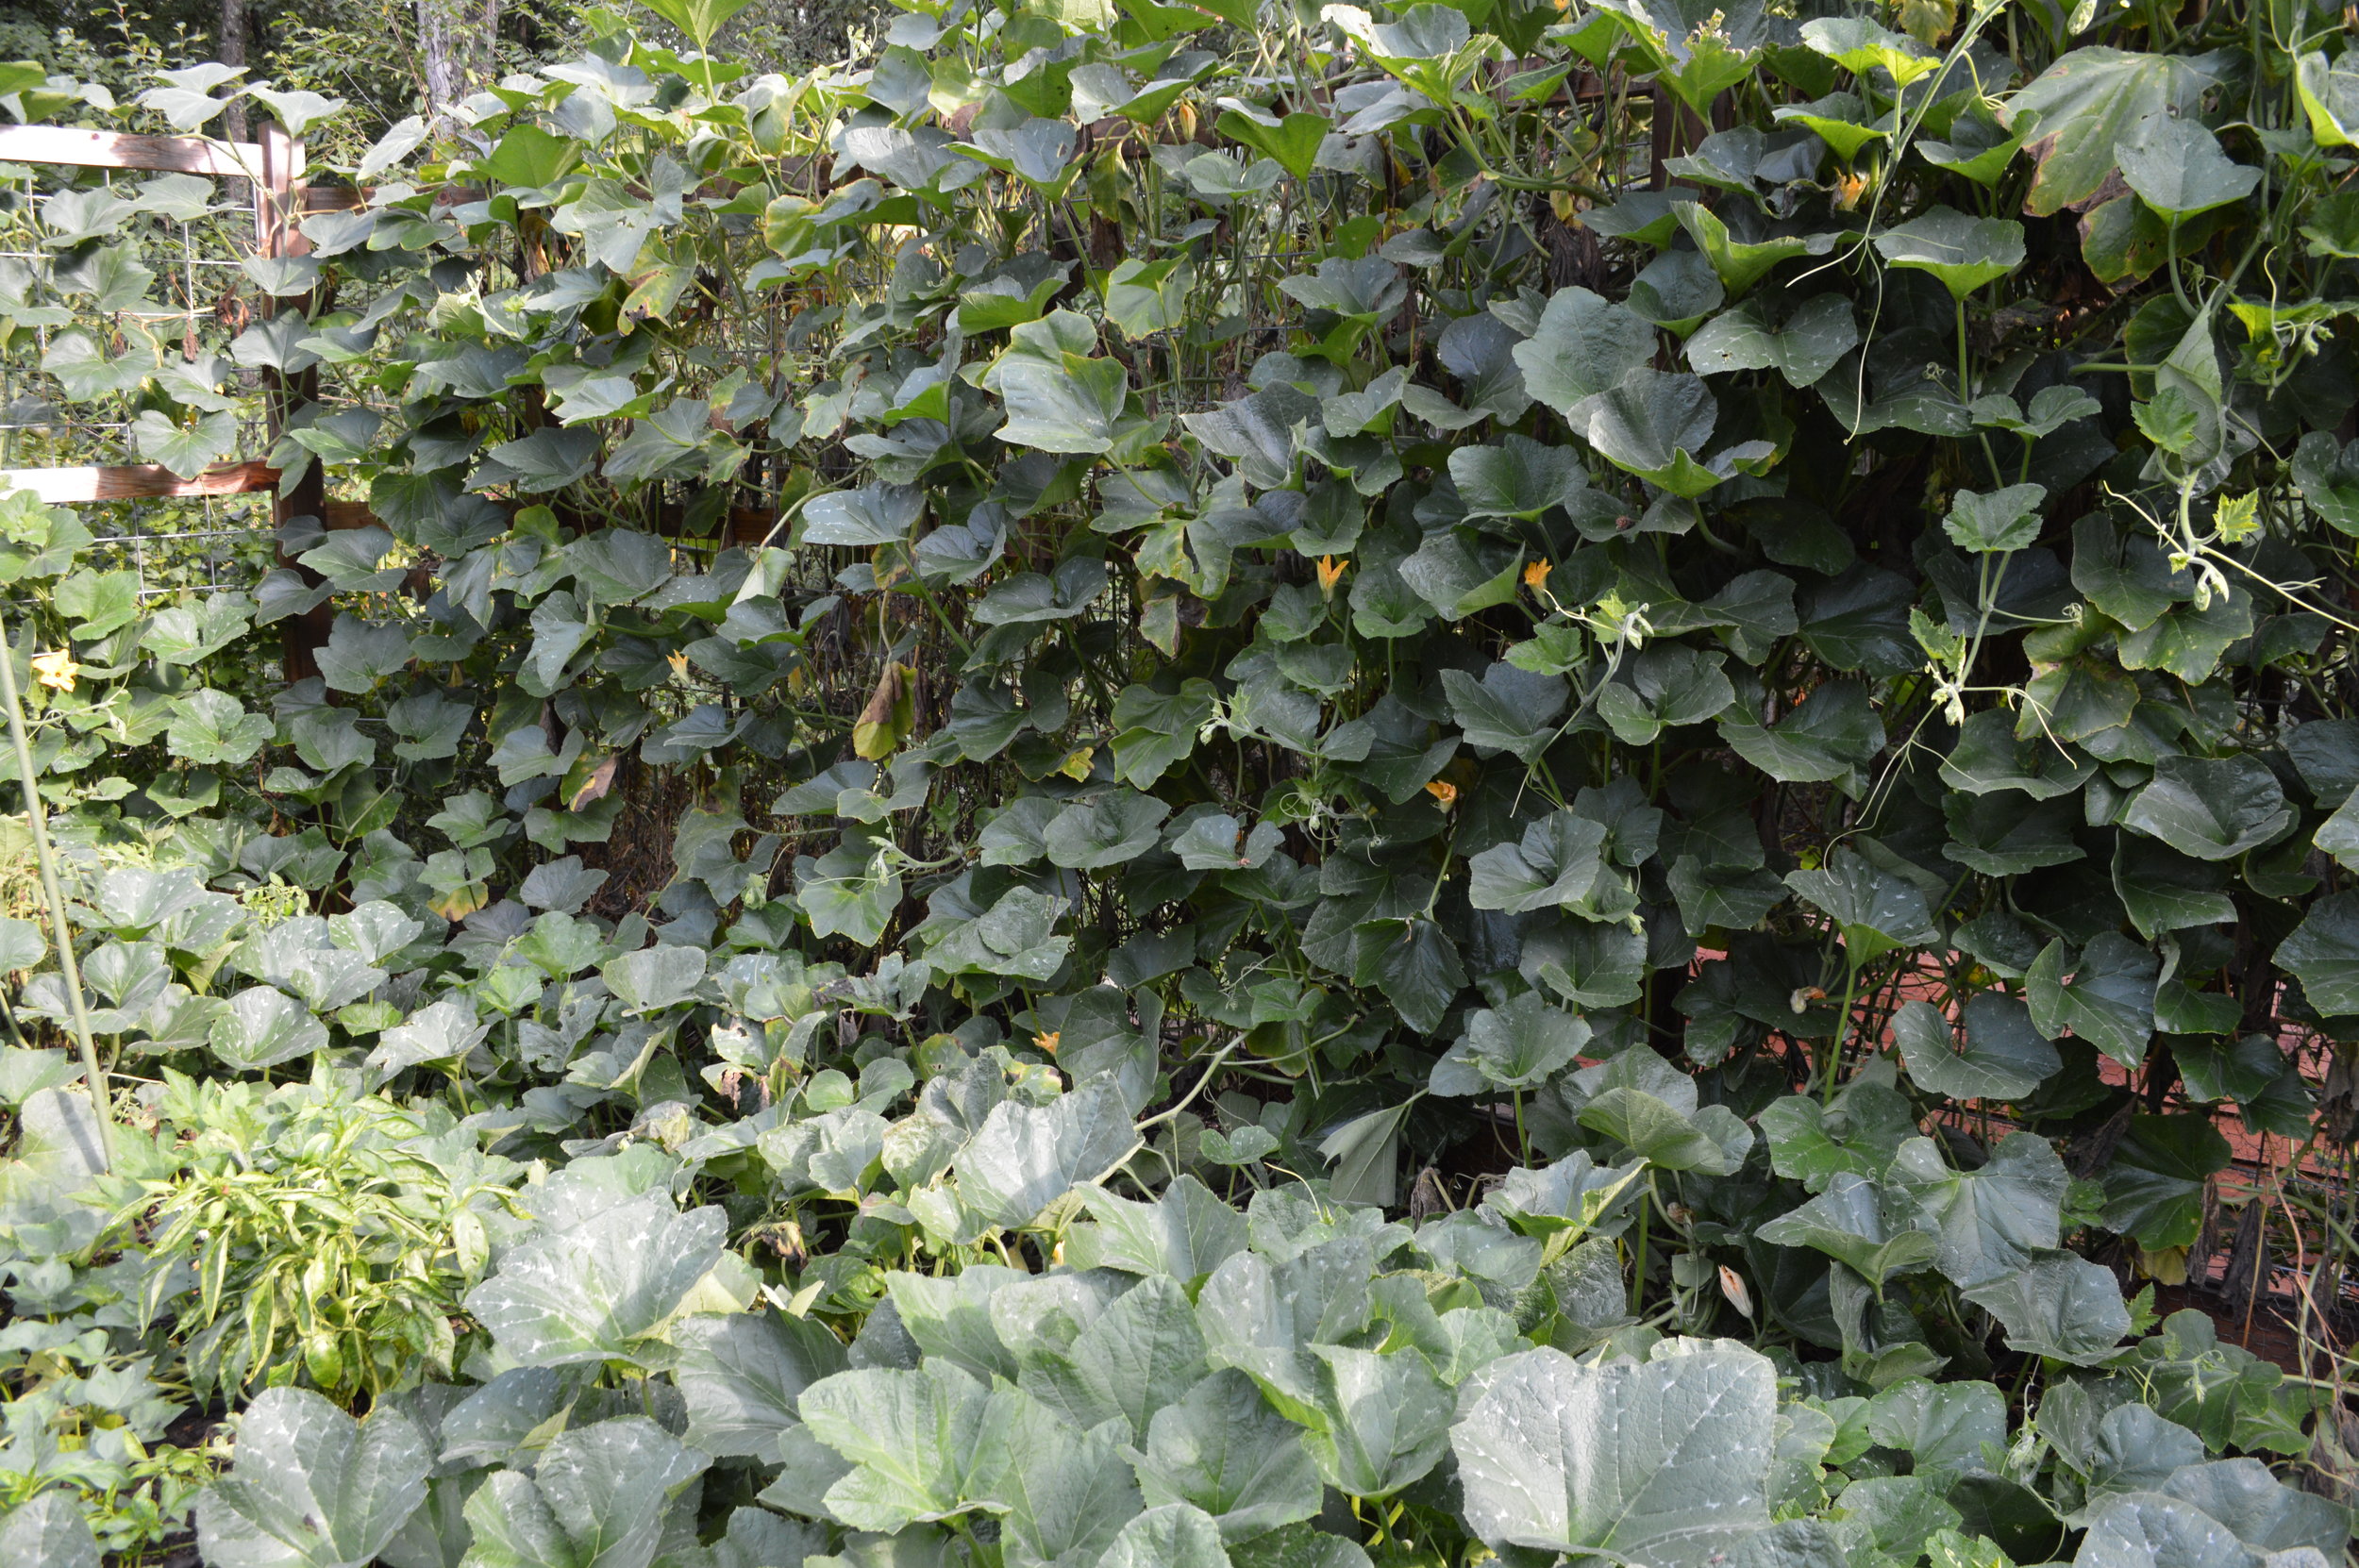
Doesn’t work well for space consuming crops like corn, squash, potatoes, and beans
-
Watering from the ground with drip irrigation can be tricky
-
Difficult to change garden design
Even though it is a personal decision on what type of garden bed you use, practicality makes a strong case against using raised beds in a garden larger than 2000 square feet. The cost and work needed to create raised beds in a garden that large can be prohibitive.
My Garden Layout Evolution
In an effort to keep my garden tidy, I did a combination of half raised beds and half rows (albeit quite random) because I did not want kids to step all over the garden beds. The rows help serve my needs for the space consuming crops.
And yet the layout I have today wouldn’t be my ideal garden layout. I’ve learned a few things about what works best for my year round garden and I’ll take you through where I was 12 years ago to my current garden.
When I started my first garden in Arkansas, I had a small garden 200 square feet in size. It was a few raised beds and I grew the basics- tomatoes, cucumbers, and lettuce with a few strawberry and raspberry plants mixed in. Because of the small size, the layout of the garden was not as critical.
At our next and current house, I started another small garden. It had four 4×10 raised garden beds with 15 inches between them. It also worked well. But when I tried to grow a pumpkin plant or on occasion a squash plant, it would completely take over the garden beds and paths.
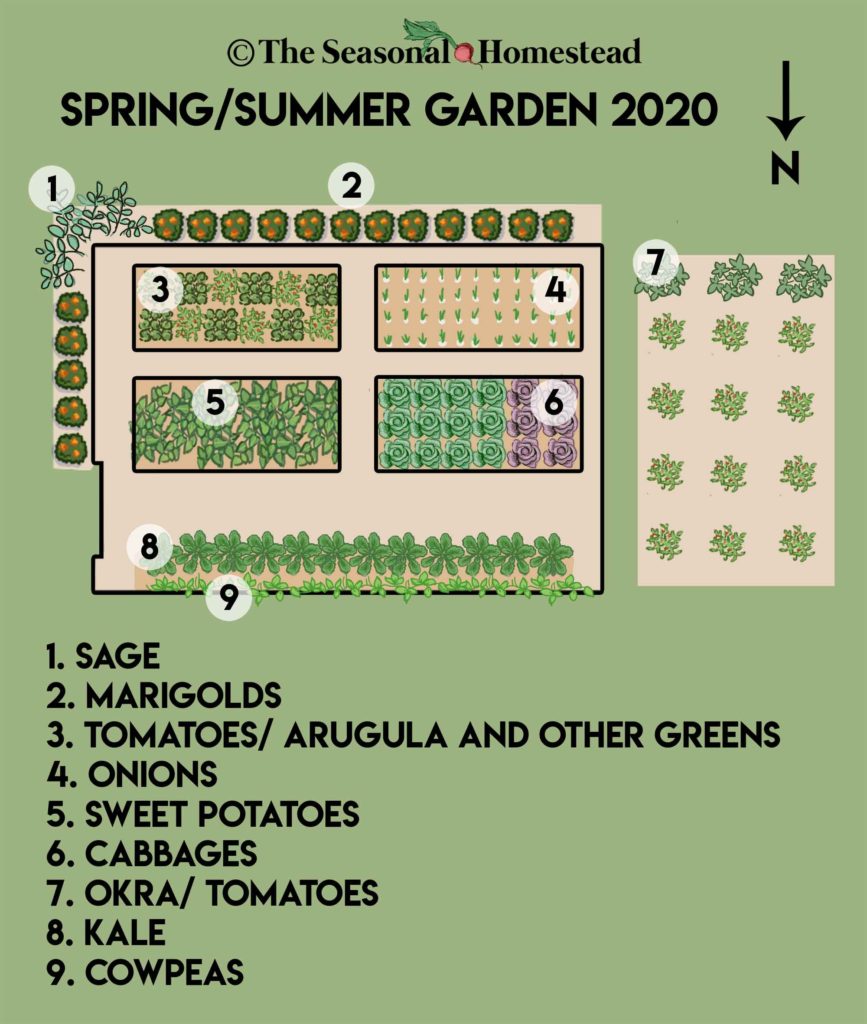
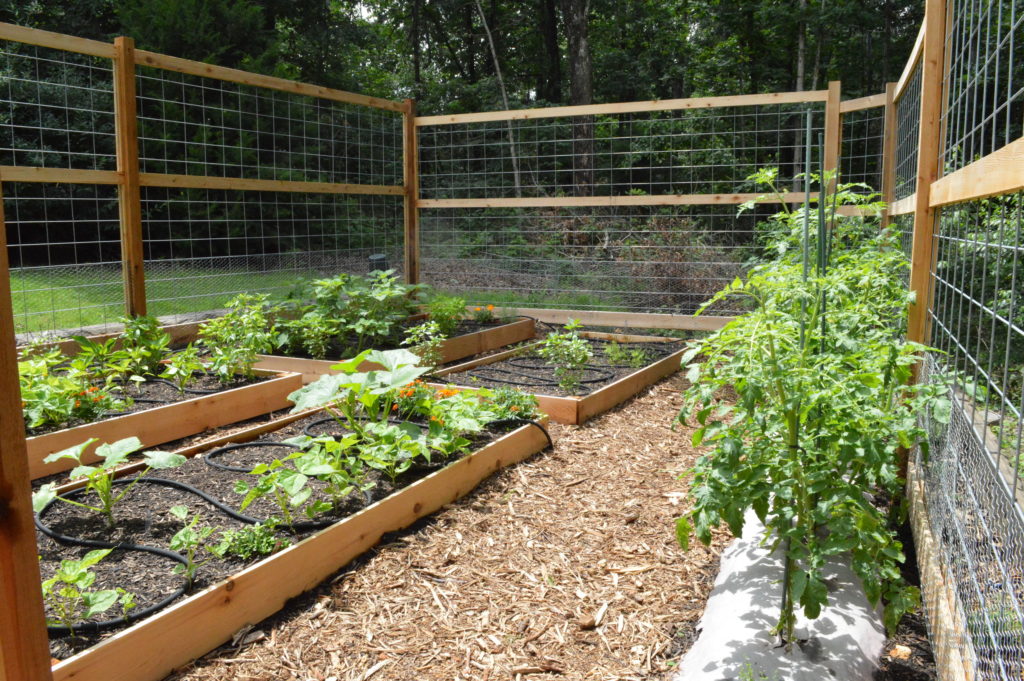
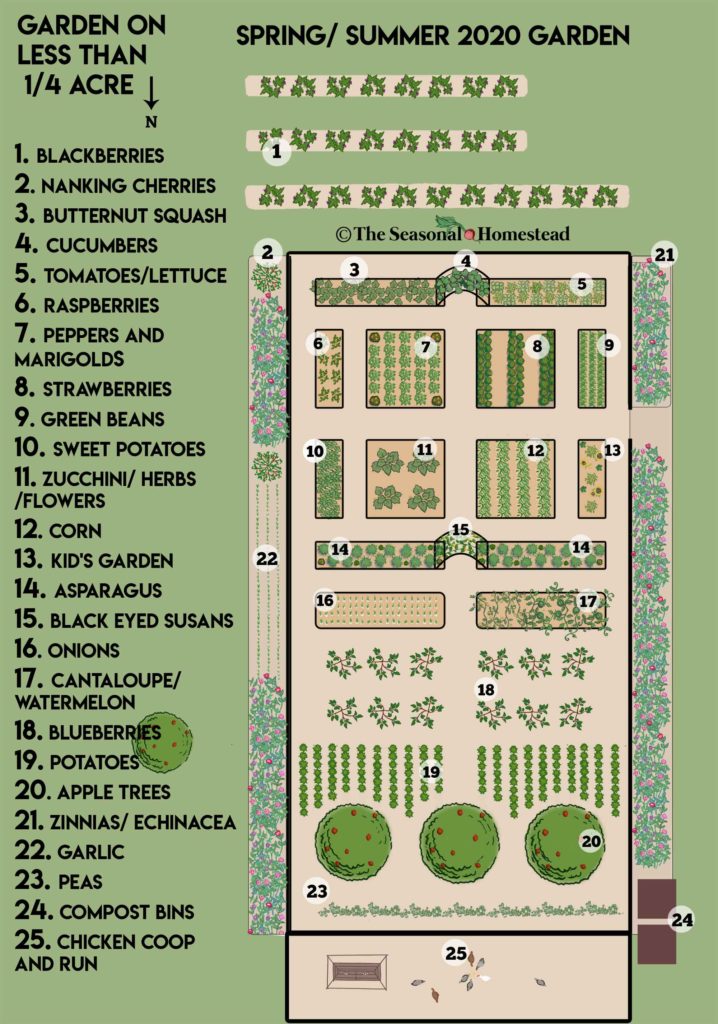
In a few years, we cleared the quarter acre lot next to the house and put in another garden, 40×80 feet and fenced. I created the front portion to be vegetables in a formal design, again using raised beds, and the back of the garden would consist of fruit trees, berries, and some raised rows.
I also added larger walkways because I wanted plenty of space for sprawling plants.
When we scaled up in size, suddenly the layout played a crucial role in the productivity of both the garden and the gardener.
When I designed my large garden, I focused on creating a beautiful design. Even though I had functionality in mind and enjoyed raised beds in my previous gardens, they proved to be very limiting in my current garden. I wanted to try new design ideas and I couldn’t change the layout.
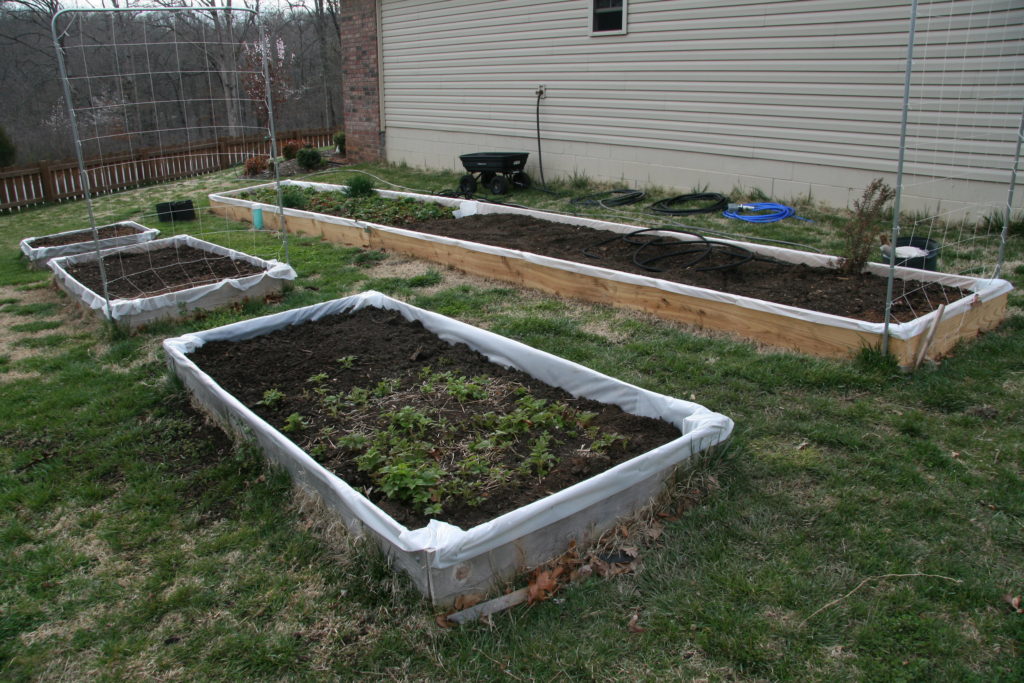
The first time I really ran into a problem with the raised beds was when I started doing a large fall and winter garden. I used low tunnel frames covered with row covers over existing garden beds. Since my raised garden beds are all different sizes (3,4, and 9 feet wide and 9, 10, and 15 feet long) it became complicated to use row covers multiple years in a row because they are all cut to different sizes.
And now that brings me to tip #1 of creating a garden layout for a year round garden.
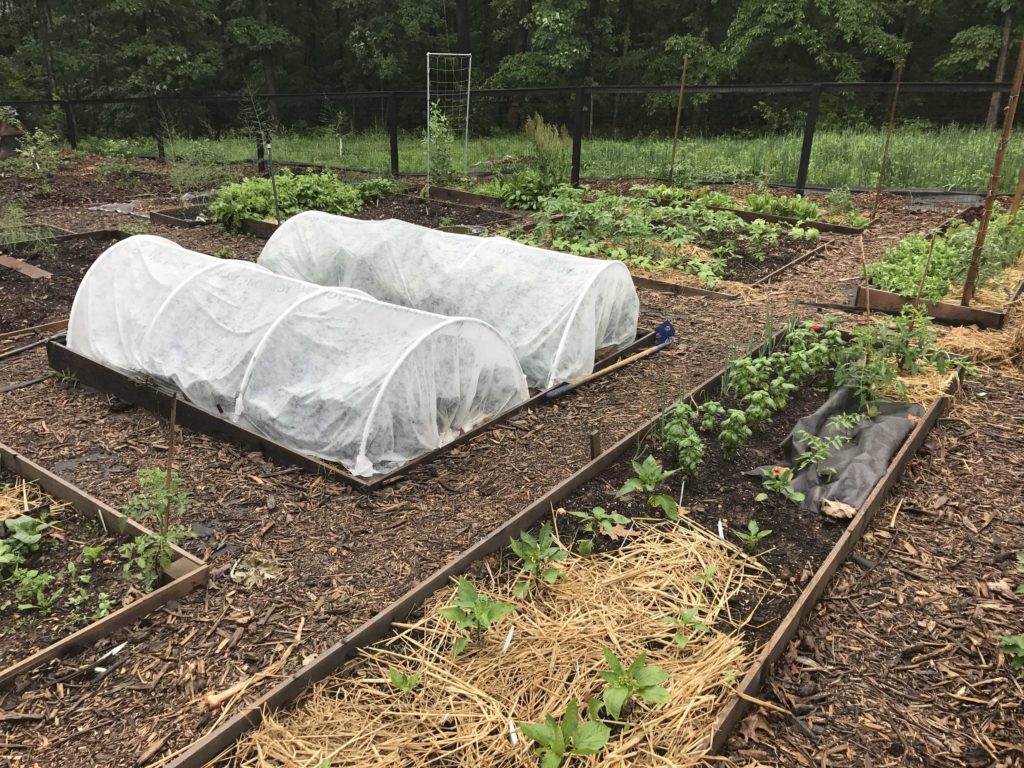
Year Round Garden Tip #1: Make all your garden beds the same size or able to be divided into the same size. This includes length and width.
Using one size garden bed is key to being able to simplify your process and save a lot of money when using row covers and plastic to cover your garden beds. When you have, for example, all 3 ft by 9 ft raised beds, all the row covers and season extension tools can be used universally on any garden bed. Or if you need a wider area for vegetables, I would create a 6 ft by 9 ft garden bed and you could divide your row covers into two separate areas (see photo below), both 3 x 9 ft and still use that universal sizing.
Year Round Garden Tip #2: Don’t make your garden beds wider than 48 inches, 30 – 36 inches is ideal.
I know in the paragraph above, I mentioned you could create wider garden beds and divide them into two when using row covers. However, it isn’t ideal because you can’t easily access all the areas. I have some that are 9 x 9 ft which I planned for space consuming crops and I have to lay a board down the middle to be able to access all areas of this raised bed.
If you have a small enough garden and decide raised beds are still for you, I would go with a 36 inch wide raised bed. I’ve had many different widths of raised beds and 3 feet wide is by far my favorite.
If you are doing rows or raised rows, the best size is 30 inches wide.
Why 30 inches? This is the common width used by market gardeners (mentioning them again because they have a lot of experience with efficiency). It is easy to access the middle and straddle the garden bed to plant or hop across a garden bed without going all the way around.
The smaller width makes it easier to weed as well. If you want to use any of the tools developed for market gardeners, such as the broad fork, or a tilther, they are made to go across a 30 inch bed in one pass. Common row cover sizing for season extension is 83 inches which perfect sizing for hoops over a 30 inch garden bed. They also sell 10 foot wide row covers and these are great for the larger 3 and 4 foot width garden beds.
I can grow tons more food per square foot. There is flexibility for me to change the layout because there are no frames.
Length
As I mentioned above, the most important thing is to have the same length at every garden bed. For raised beds length will be your choice. Since raised beds are better utilized in a smaller garden, keep the length manageable. Anywhere from 4 to 16 feet is common for raised beds. If you choose to do rows, I would do 25 or 50 foot length. This would be for a very large home garden of course, but it really simplifies everything because row covers come pre-cut to these sizes.
Paths
You need both main paths for transporting garden material in wheelbarrows and smaller paths in between individual garden beds. Main paths should be at least 3 feet wide. I find my four foot wide paths to be ideal to maneuver around a wheel barrow.
Side paths are the gardeners choice. Smaller 15 inch paths can be used for beds with compact crops like salad greens, cabbages, and root crops. You may want larger side paths for squash, sweet potatoes, cucumbers, tomatoes and more.
Update December 2021: Since we moved to our new property I have implemented mounded rows 30 inches wide and 100 feet long.
At first I started with 18 inches in-between rows but Cameron complained he could barely walk down them so I switched to 24 inches. Overall, I absolutely love them.
I am able to use all the tools that market gardeners use and it makes the job so much easier! My garden is about 14,000 square feet.
Conclusion
-
Determine what size garden you will be growing.
-
Once you know the size, choose row gardening, raised bed gardening, or a combination of both.
-
Keep all your garden beds the same size to be efficient and cost effective with row covers and season extension tools.
-
Don’t go any wider that 4 feet with a garden bed.
-
Size paths according to the crops you grow, if doing row gardening.