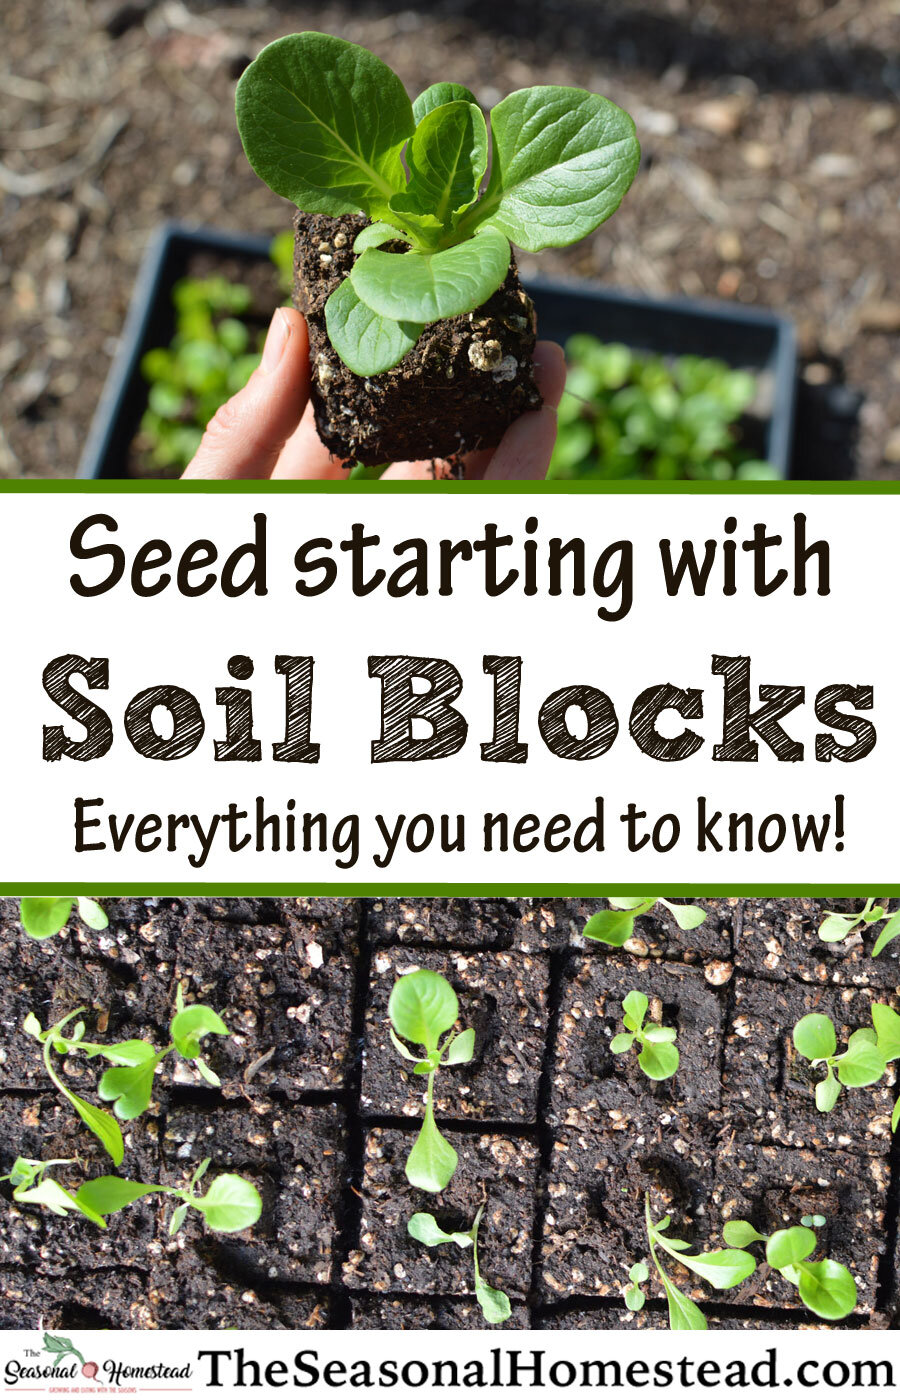
How To Make Soil Blocks – A Complete Guide to Start Seedlings
Soil blocks are a unique way to start seedlings without the need of containers. I’ve been using soil blocks for 10 years now and have learned a few things along the way. Here’s a complete guide of how to make soil blocks.
What are Soil Blocks?
A “soil block” is a square of potting soil that is compressed into a mold forming a block. It is a method of starting seeds and transplanting them later. Instead of using container to contain the soil as is usually the case with starting seeds indoors, the compressed soil serves as both the container and the soil medium all in one!
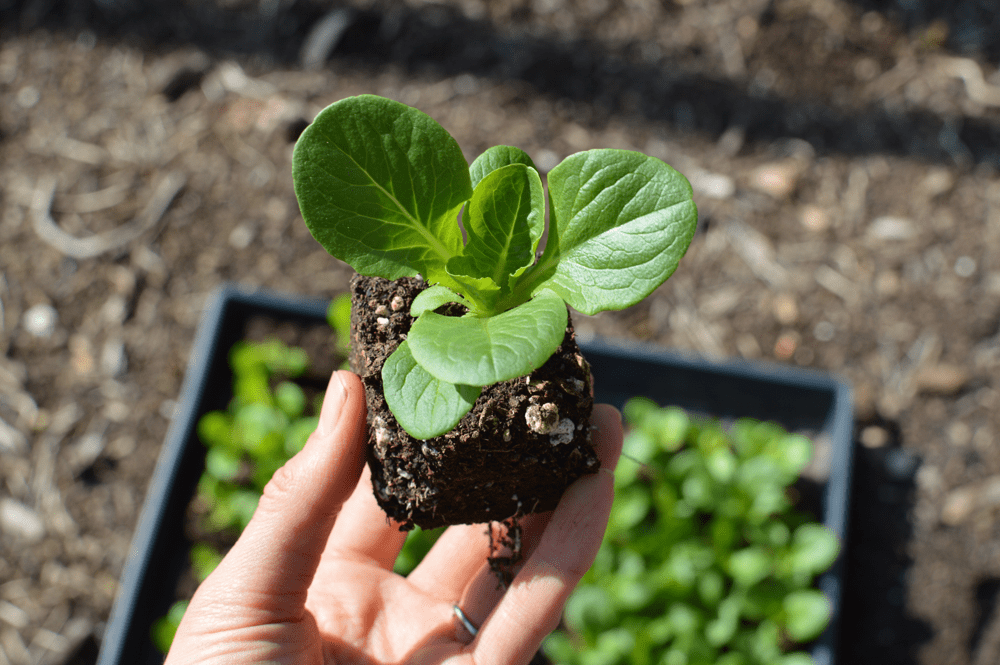
Usually roots will encircle a container once they reach a certain size. With a soil block, instead of roots encircling a container, they are “air-pruned”. This allows for a seamless transplant with virtually no transplant shock.
The History of Soil Blocks
Evidence of humans growing plants in cubes of soil goes back 2000 years or more! However, many of the soil block makers widely in use today were developed by Michael Ladbrooke, a British Engineer and gardener.
In the US, soil blocks owe much of their popularity to garden and farm guru, Eliot Coleman. In 1976, Eliot Coleman saw the soil block idea being used while visiting a European farm and soon started using it on his own farm. Eliot eventually developed both a mini soil blockers (¾ inch) for germination and a large (4 inch) soil blocker.
This post contains affiliate links. Full disclosure can be found here.
Benefits of Soil Blocks
- No transplant shock
- No plastic containers
- No transplant shock
- Eco-friendly
- Saves Money
- Allows for pre-starting plants which don’t like transplanting. For example: Watermelon, squash, and cucumbers
Best Type of Soil for Soil Blocks
In most cases, soil blocks need specially formulated soil for the best results. You want a mix that can retain water, retain the shape of the block, and also be light enough that roots can easily grow. You can use a store bought mix, modify a store bought mix, or make your own soil block mix.
For a store bought mix formulated for soil blocks, try Johnny’s 512 mix.
To modify a store bought mix, buy a very basic peat moss and perlite mix (most will already have fertilizer). You will need to add compost. The amount of compost added depends on how much pre-made soil you are using. The only widely available option I’ve found is THIS POTTING MIX. For every 32 quart bag of mix, add 20 quarts (fill a 5 gallon bucket) of compost.
To make your own soil block mix, see the section below.
Soil Blocks Recipe
Eliot Coleman has a fantastic soil block recipe that can be found HERE. If you want lots of tips and tricks on how to make this recipe, my personal tweaks, as well as links to all the ingredients needed go into homemade soil mix, go to my blog post HERE.
If you use the mini ¾ inch soil blocks, a different soil recipe is needed. Use sifted peat and add lime. Then add a small amount of compost, bone meal, and greensand. If you don’t have greensand omit it.
If you just want to buy a mix and add your own compost, I recommend THIS widely available mix for the mini soil blocks.
Soil Block Flats or Tray Options
You will need a hard surface to place the trays on once the soil blocks are formed. Below are some options with pros and cons of each one given.
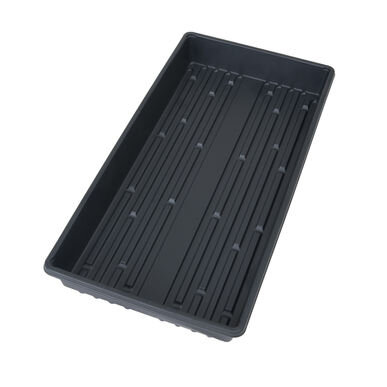
Option #1- 1020 Greenhouse Trays.
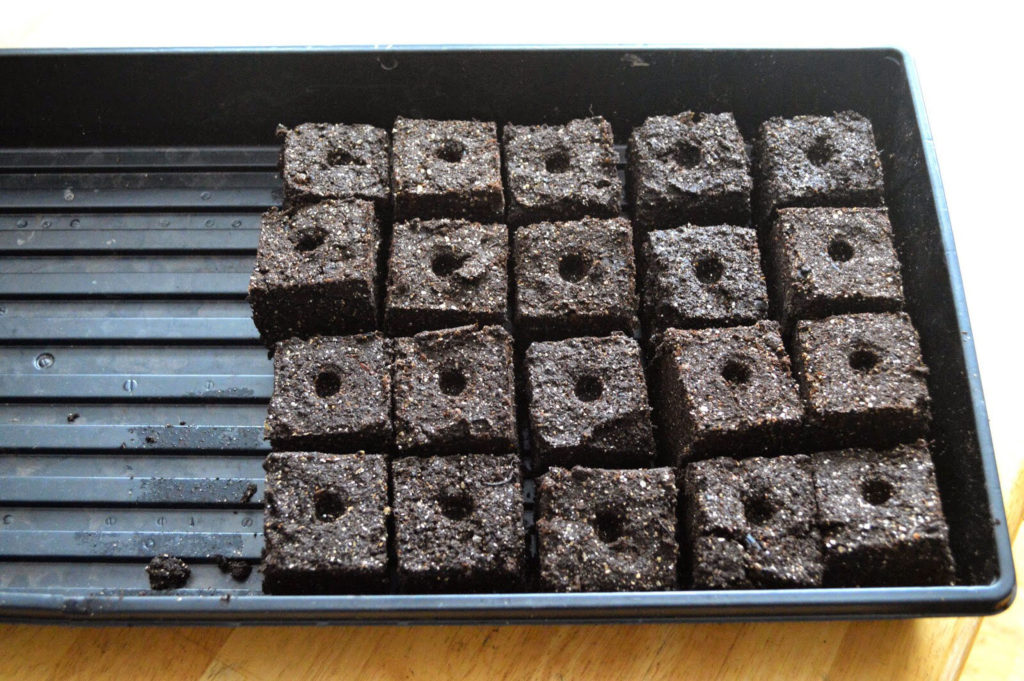
The 1020 trays will fit 50 two-inch blocks. There are definitely some reasons to consider this option. You can water indoors without the excess water leaking out. The other nice aspect of a solid tray is you can pour a stream of water down the side of the tray, filling the bottom. The soil blocks will soak up the water from the base and not from above. This is especially important when growing tomatoes to prevent disease.
Negatives of the plastic greenhouse tray is that they crack and break easily. They also have a tendency to bow a bit from the weight of 50 two inch blocks if you carry them around. The plastic trays can’t be used for the four inch soil blocks.
Find 1020 Greenhouse flats HERE.
Option #2- Three Sided Wooden Flats
This is the method of flat recommended in the book, The New Organic Grower, by Eliot Coleman. He says, “The inside dimensions are 18 ¾ inches long by 8 inches wide by 2 inches high. Three- quarter- inch stock is used for the sides and ½-inch stock for the bottom.”
One flat holds 36 two-inch blocks. The three-sided design allows for easy removal of the blocks. The con of this type of flat is that it is quite a bit more bulky to store in the off season. It is difficult to bottom water these unless you use some kind of wicking mat at the base of each tray.
Update: after making these trays and trying them out they are my new favorite tray. Even though they are heavy to carry around they don’t bow or crack like plastic does.

Option #3- Plywood Flat
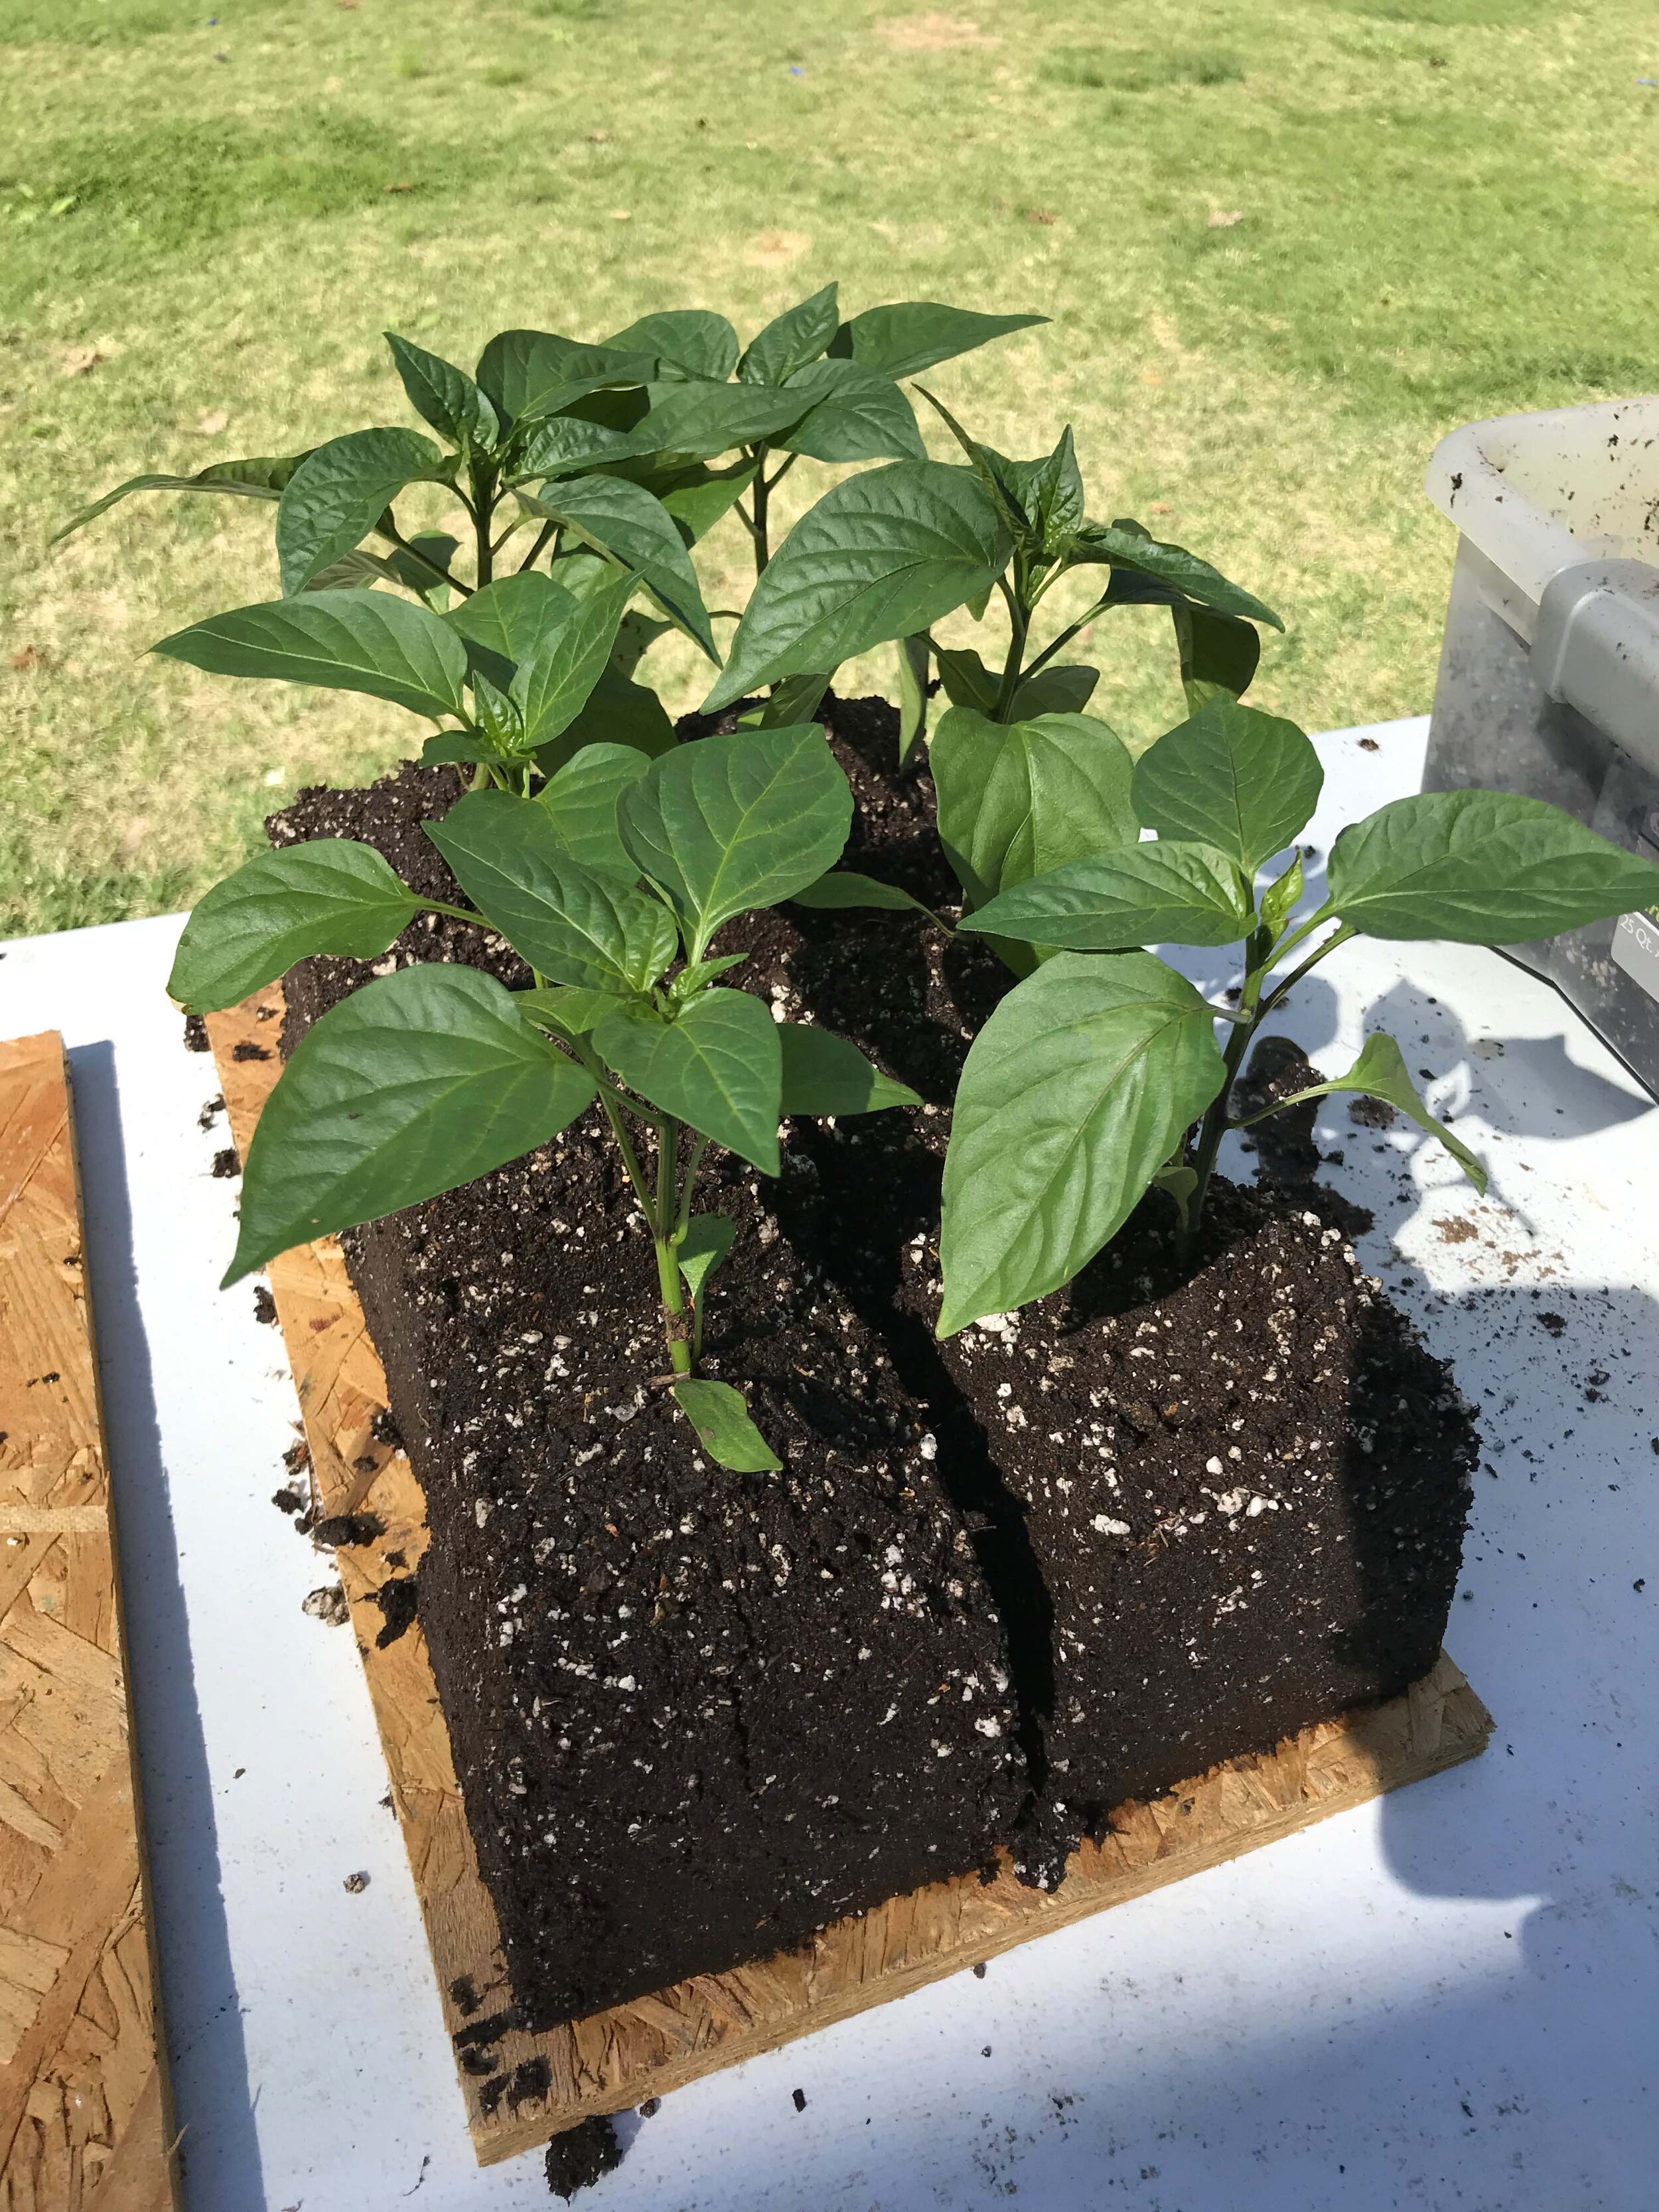 My husband Cameron cut me a sheet of ¾-inch plywood to use as a flat for the large 4 inch soil blocks. This was essential as the blocks weigh so much they needed strong support when being transported.
Cons of this method is the same as mentioned above, it is difficult to water from below and they must be watered from above.
Option #4- Polycarbonate Flat
As I was doing so research I saw this quote in a recent article by Eliot Coleman, “Many years ago we made special three-sided wooden flats to hold the blocks. Since then we have decided that an 18-inch x 8-inch piece of polycarbonate, cut from the scrap left over after putting polycarbonate end-walls on a greenhouse, makes a simpler and perfectly adequate flat.”
Option #5- Bread Trays or Mesh Flats
Mesh Flats are great for allowing air to flow through the seedlings on all sides. The negatives are that you need to water from above and outdoors to allow dripping to go to the ground. They would be great in a greenhouse setting.
You can buy Mesh Flats HERE.
Option #6- Old Cookie Sheets or Trays
When making the mini (3/4-inch) blocks the corrugated surface of the 1020 greenhouse trays doesn’t work well. You need a flat surface for mini blocks. My favorite is old cookie trays because they have a small lip allowing bottom watering.
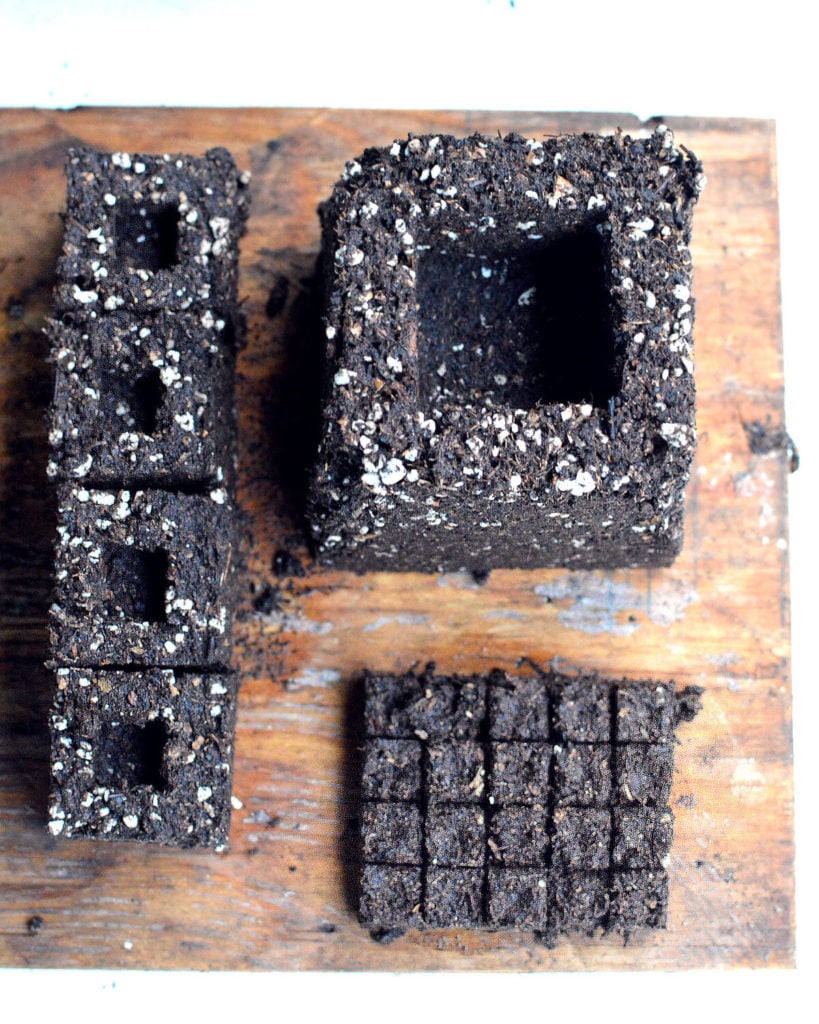
Types of Soil Block Makers
(Links to all tools are found at the bottom of this post)
¾ inch Soil Block Maker
I really love having a 3/4 inch soil block maker because it saves so much space and soil. If you have a seed that doesn’t germinate, that can be frustrating with the larger blocks. With the mini blocks you don’t feel bad tossing the block that didn’t start into the compost pile. The mini blocks make it so easy to get a lot seeds started without the wasted soil.
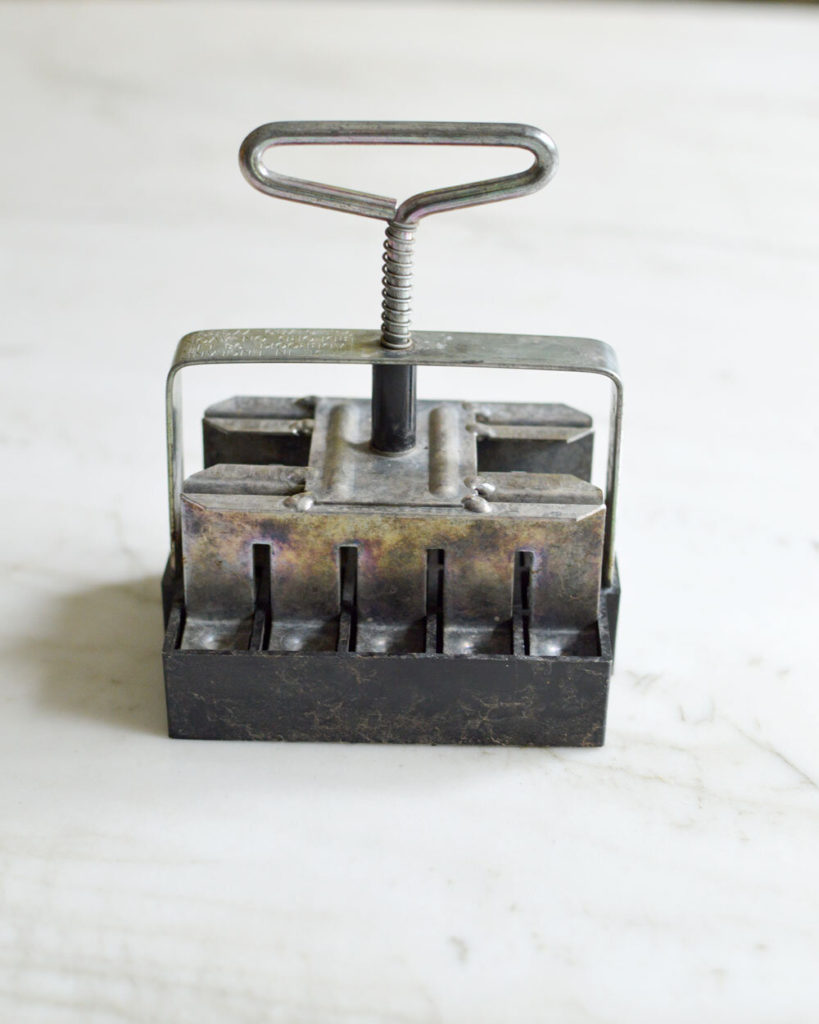
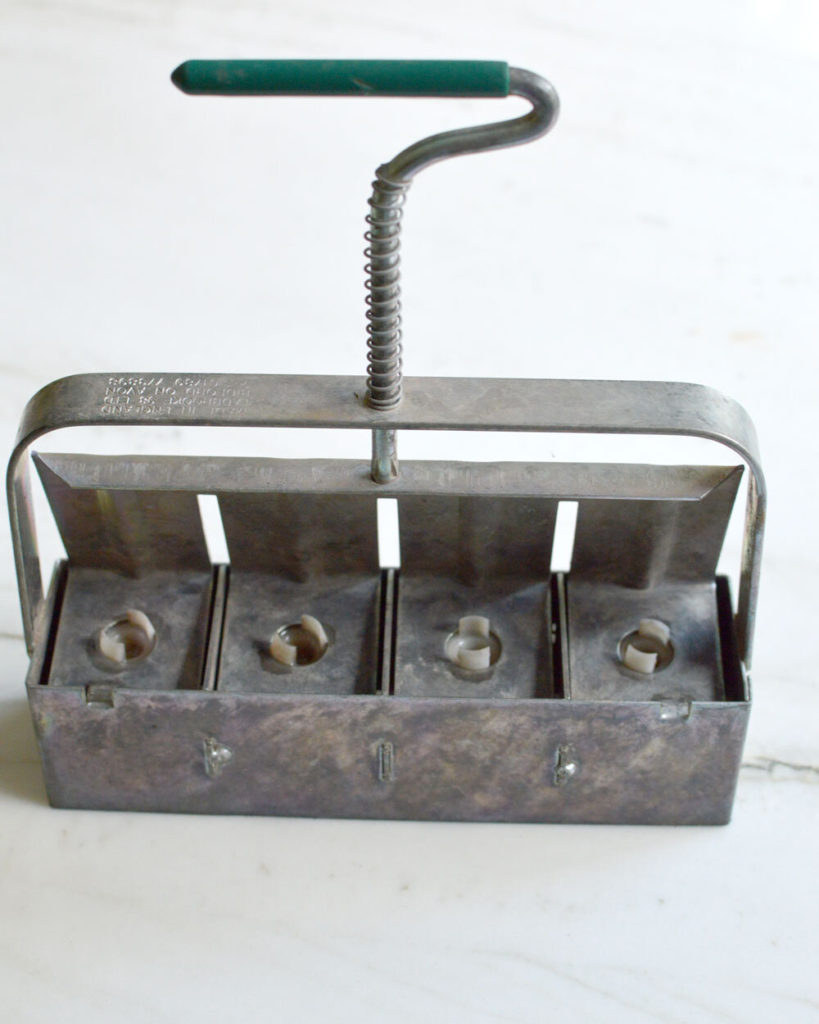
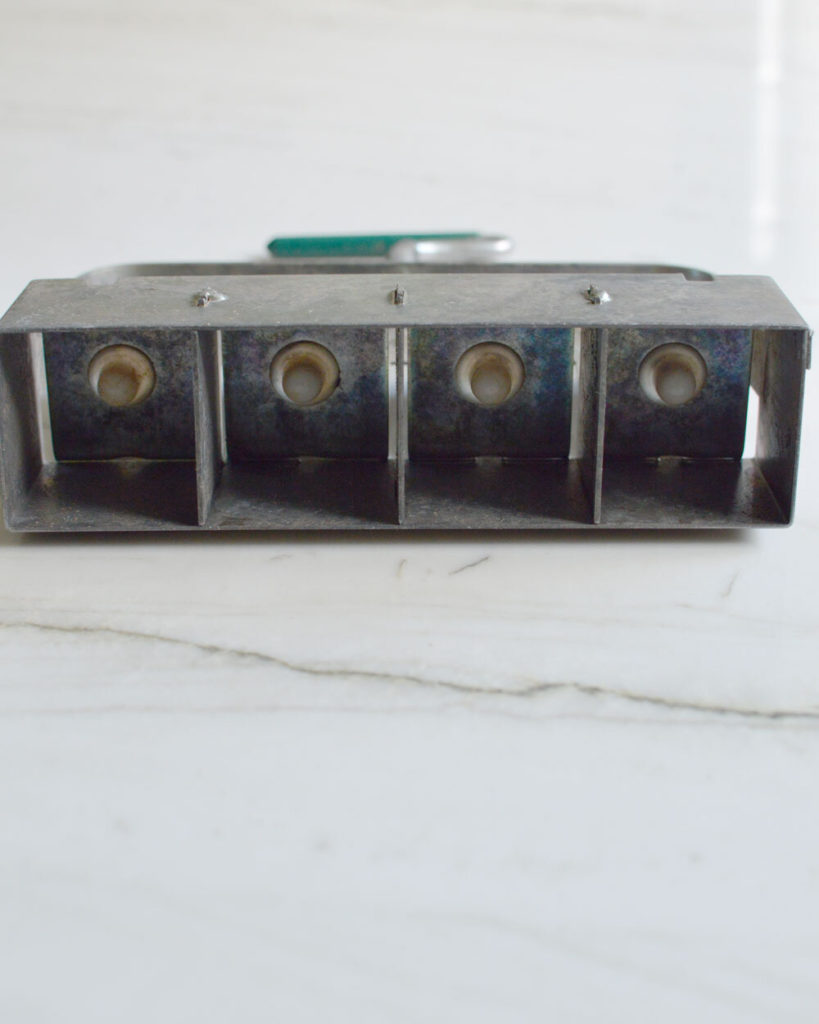
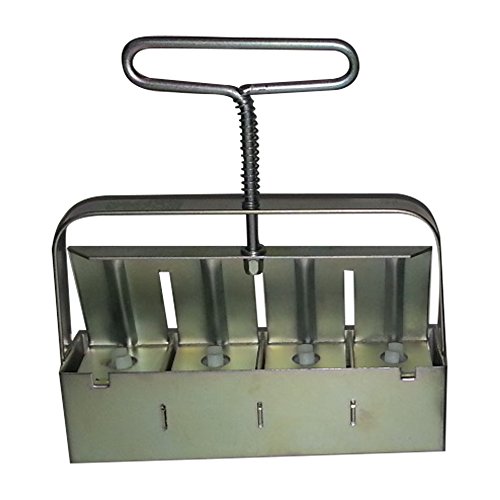
2 inch Soil Block Maker
The 2-inch soil blocker is a great one to start with as a beginner. I bought this one first and slowly added to my collection once I realized how much soil blocking benefited my seedlings.
On it’s own, the 2 inch soil blocker and 1/4 inch pin will meet most of your soil starting needs. As you continue, you may want to purchase some additional pins that to get the appropriate size hole for your seed or potting up.
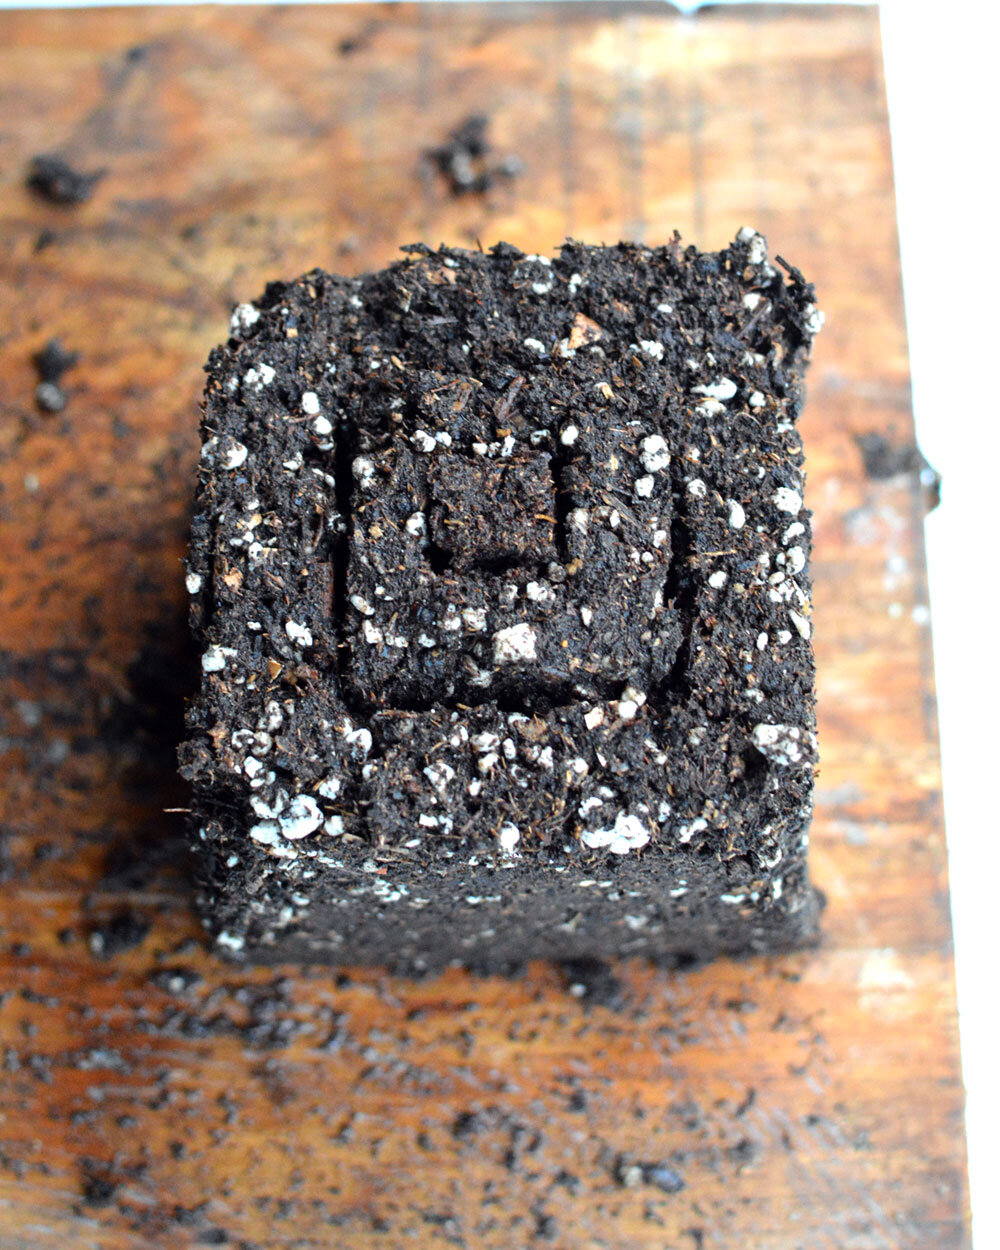
4 inch Soil Block Maker
This is a tool I purchased just a few years ago. I thought I would use it for just peppers but I ended up using it for potting up tomatoes, watermelon, and cabbages. A two inch block nests inside the four inch.

How to Make Soil Blocks
Making soil blocks is easier than it looks. It is a small learning curve and then you get it. It is simple enough that my 7 year old and my 9 year old help me make soil blocks.
Step 1
Add soil mix to a shallow container. You want to make sure you have enough depth to the soil that it is easy to compress. If you have two inches of soil for two inch blocks that isn’t enough. It’s best to start with double the depth of the block you are using.
Next, wet down the soil mix. You’ll want to add water and mix until it starts to look like brownie batter. The peat should soak up the water and every bit of the soil should be moist. When in doubt, add more water. The blocks are much easier to make when the soil is too moist, as opposed to too dry. After adding water, wait five minutes for everything to soak in.
Step 2
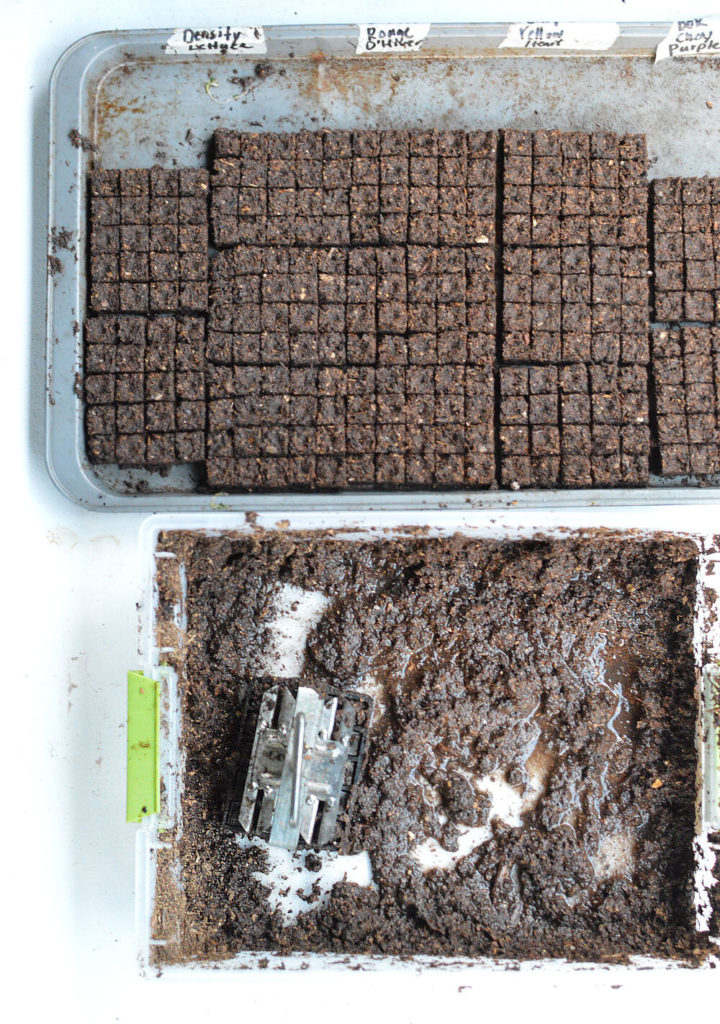
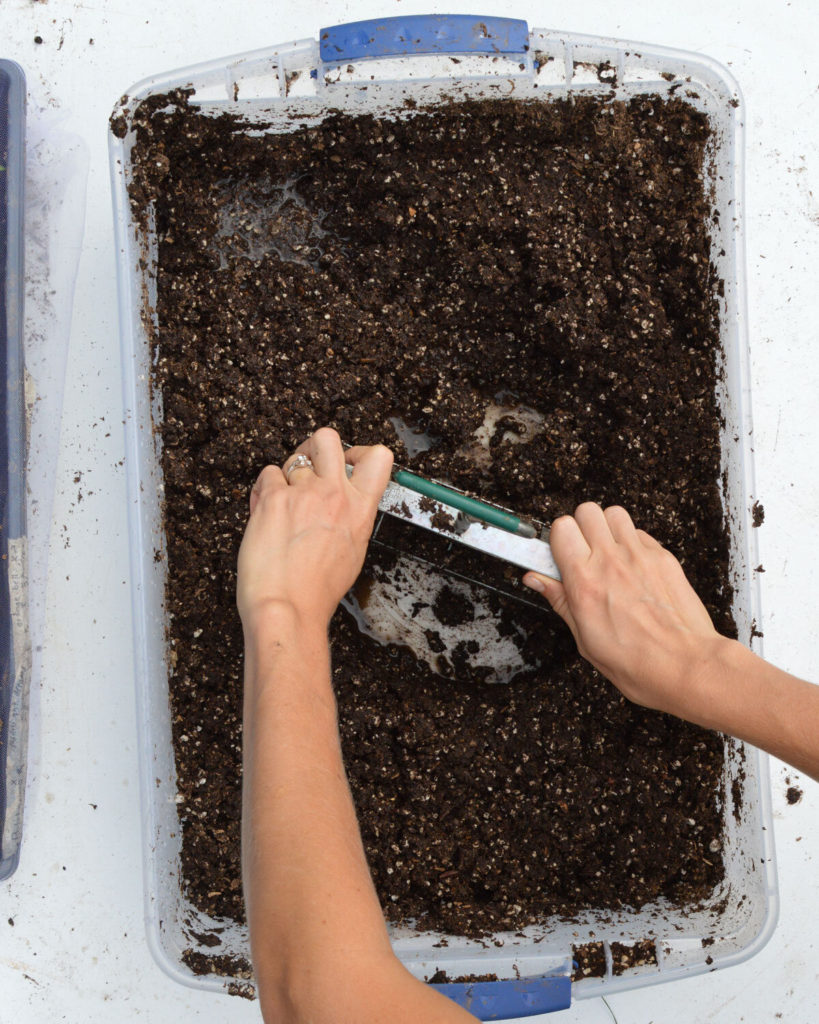
Take your soil block maker and compress the soil in one area. Once you hit the bottom of the container, I move the soil block maker in a side to side motion to flatten and press in the soil. Then lift the soil block maker and put it down again over another spot of fresh soil, using the same technique.
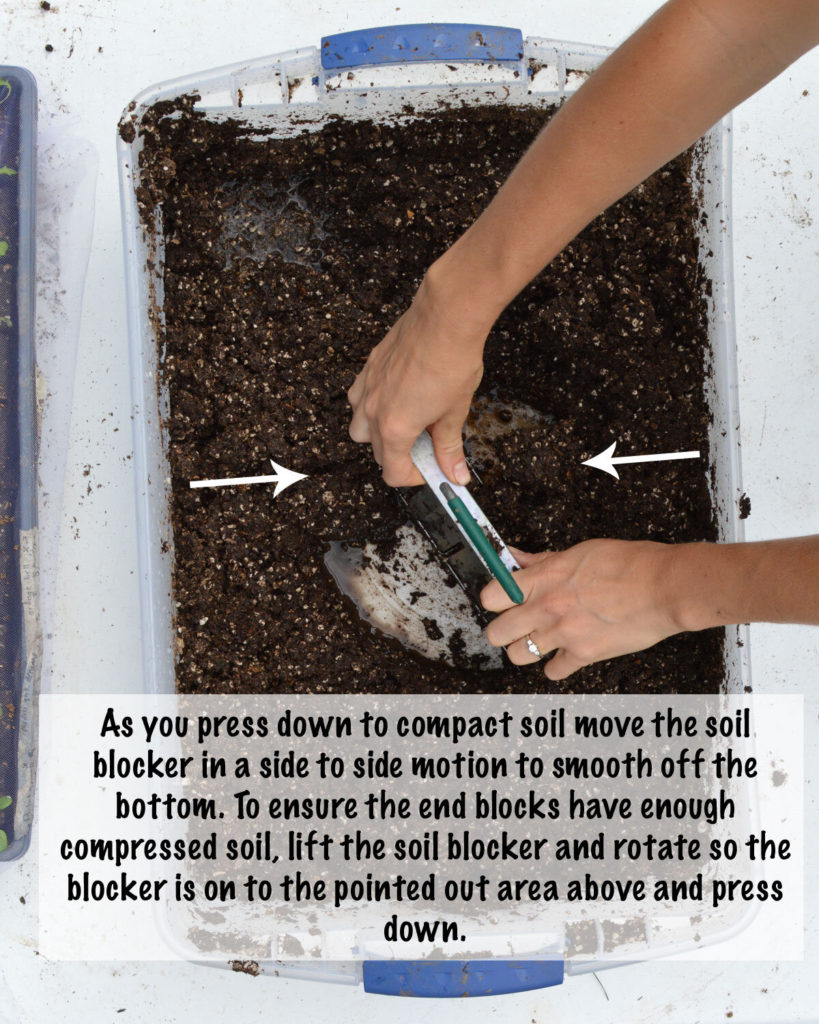
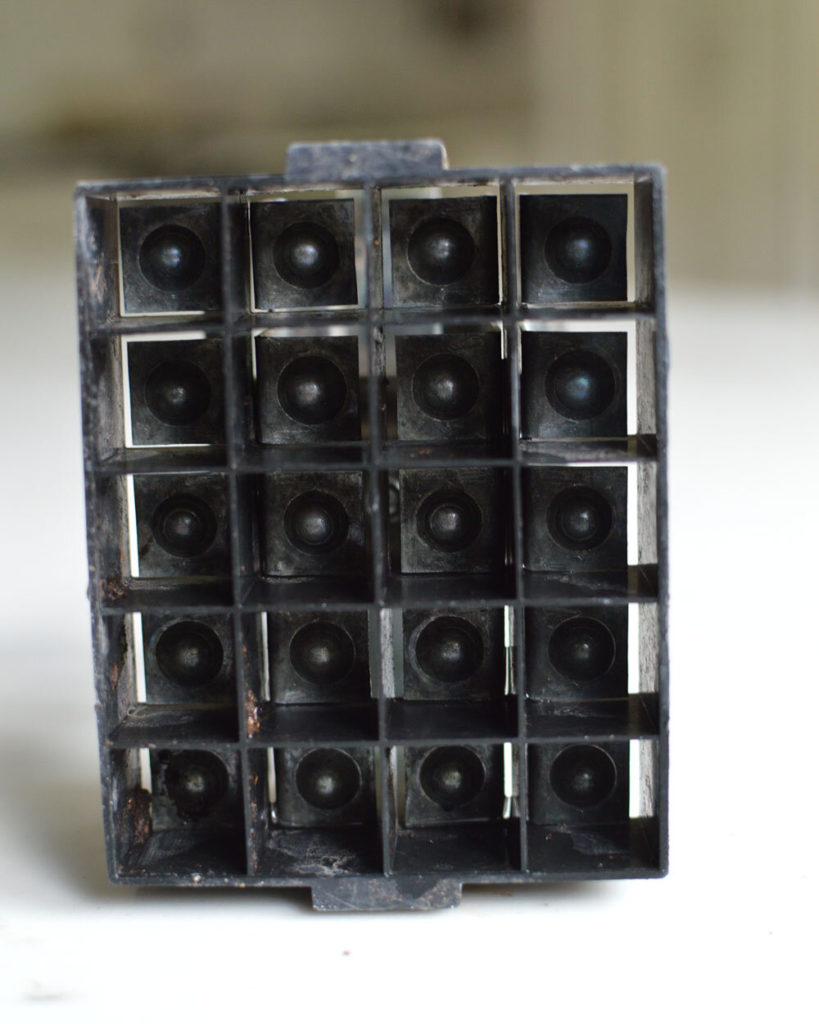
For the two inch soil blocker, it has a tendency to fill in the middle and not on the edge blocks. To easily remedy this, after lifting the soil blocker from an area where you just pressed down, rotate the soil block maker 90 degrees. This should leave the middle two blocks with little to no soil underneath, and all the pressure on the end blocks.
 After filling give the soil a firm push on the base to see if it is loose or firm. If it doesn’t move much your ready to press out the blocks from the mold.
Step 3
Place the soil blocker on your choice of seed flat (in the photo above a plywood board is used) grab the handle with the palm of your hand and the spring mechanism with your finger tips.
Step 4
Press firmly with the palm of your hand and squeeze with your finger tips at the same time. It will begin to pull the mold away from the blocks.
Step 5
Start to release the spring by letting go with your fingertips. At the same time, pull up and away from the blocks.
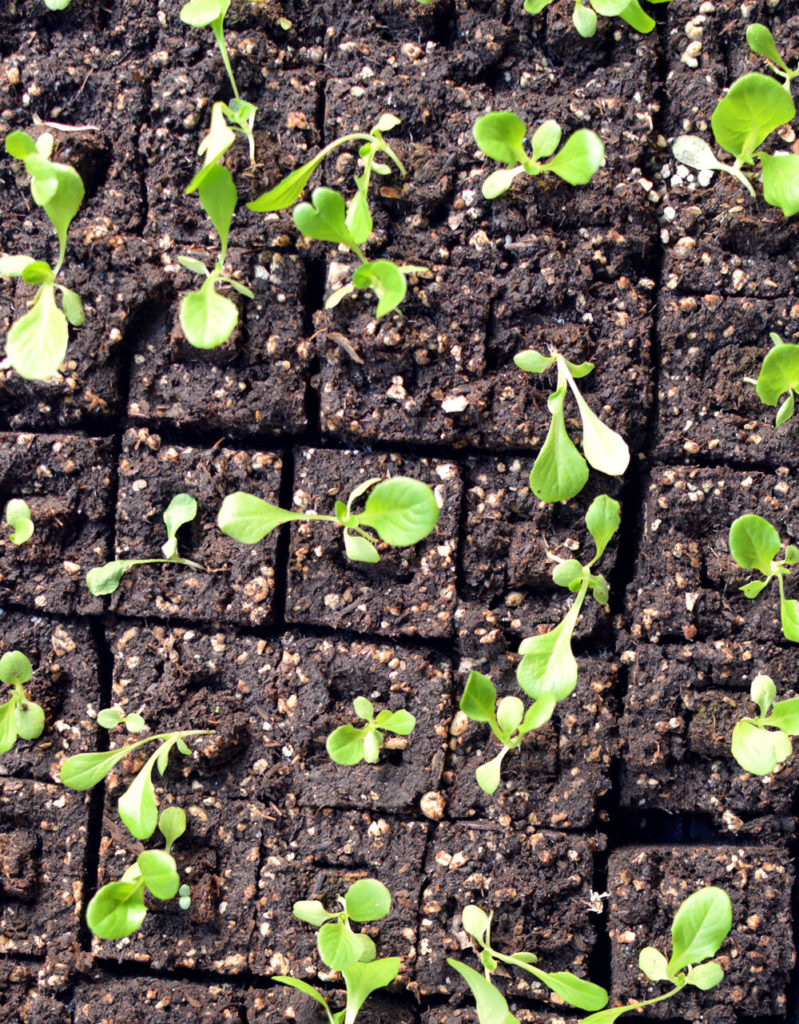
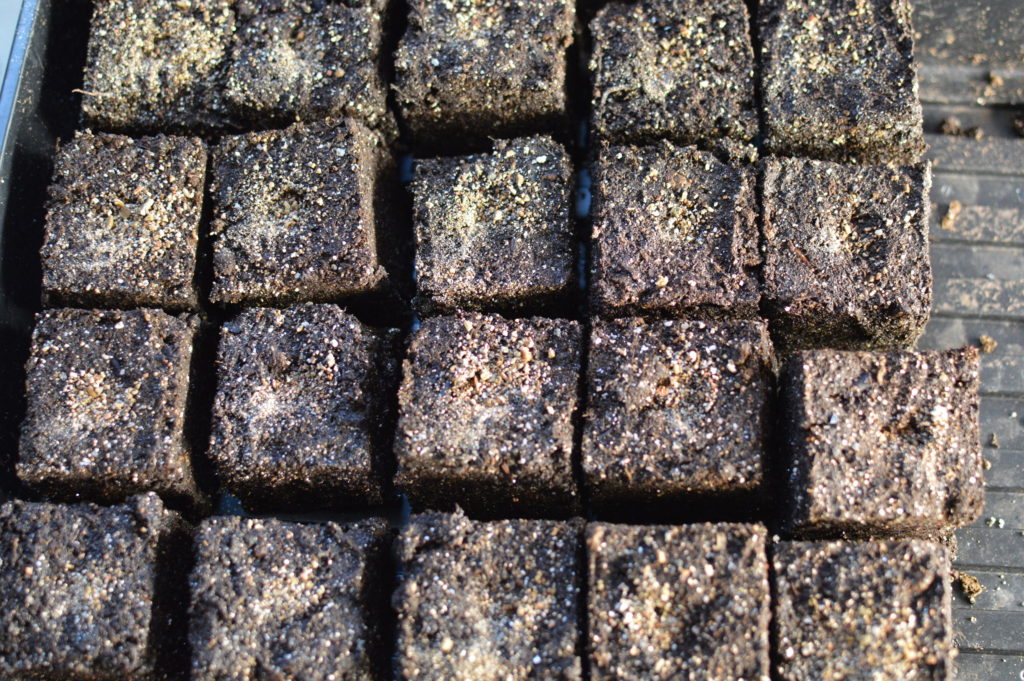
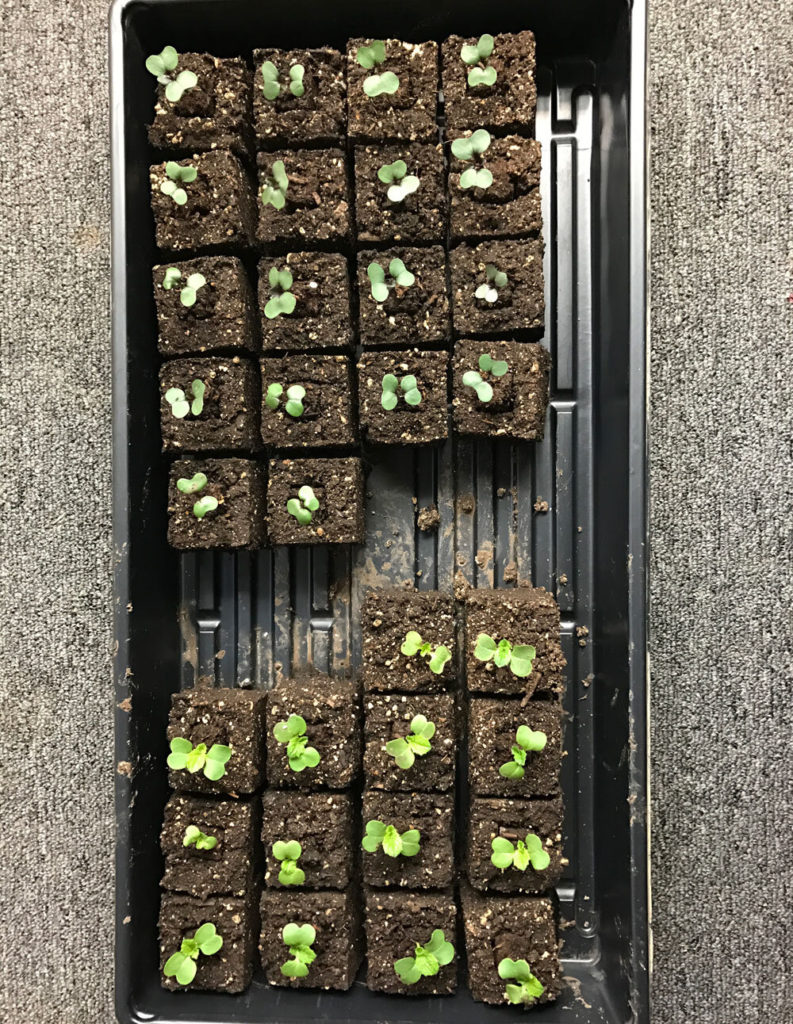
Your beautiful soil blocks should be left on the tray ready for seeding.
 How to Plant Seeds in Soil Blocks
 How to Plant Seeds in Soil Blocks
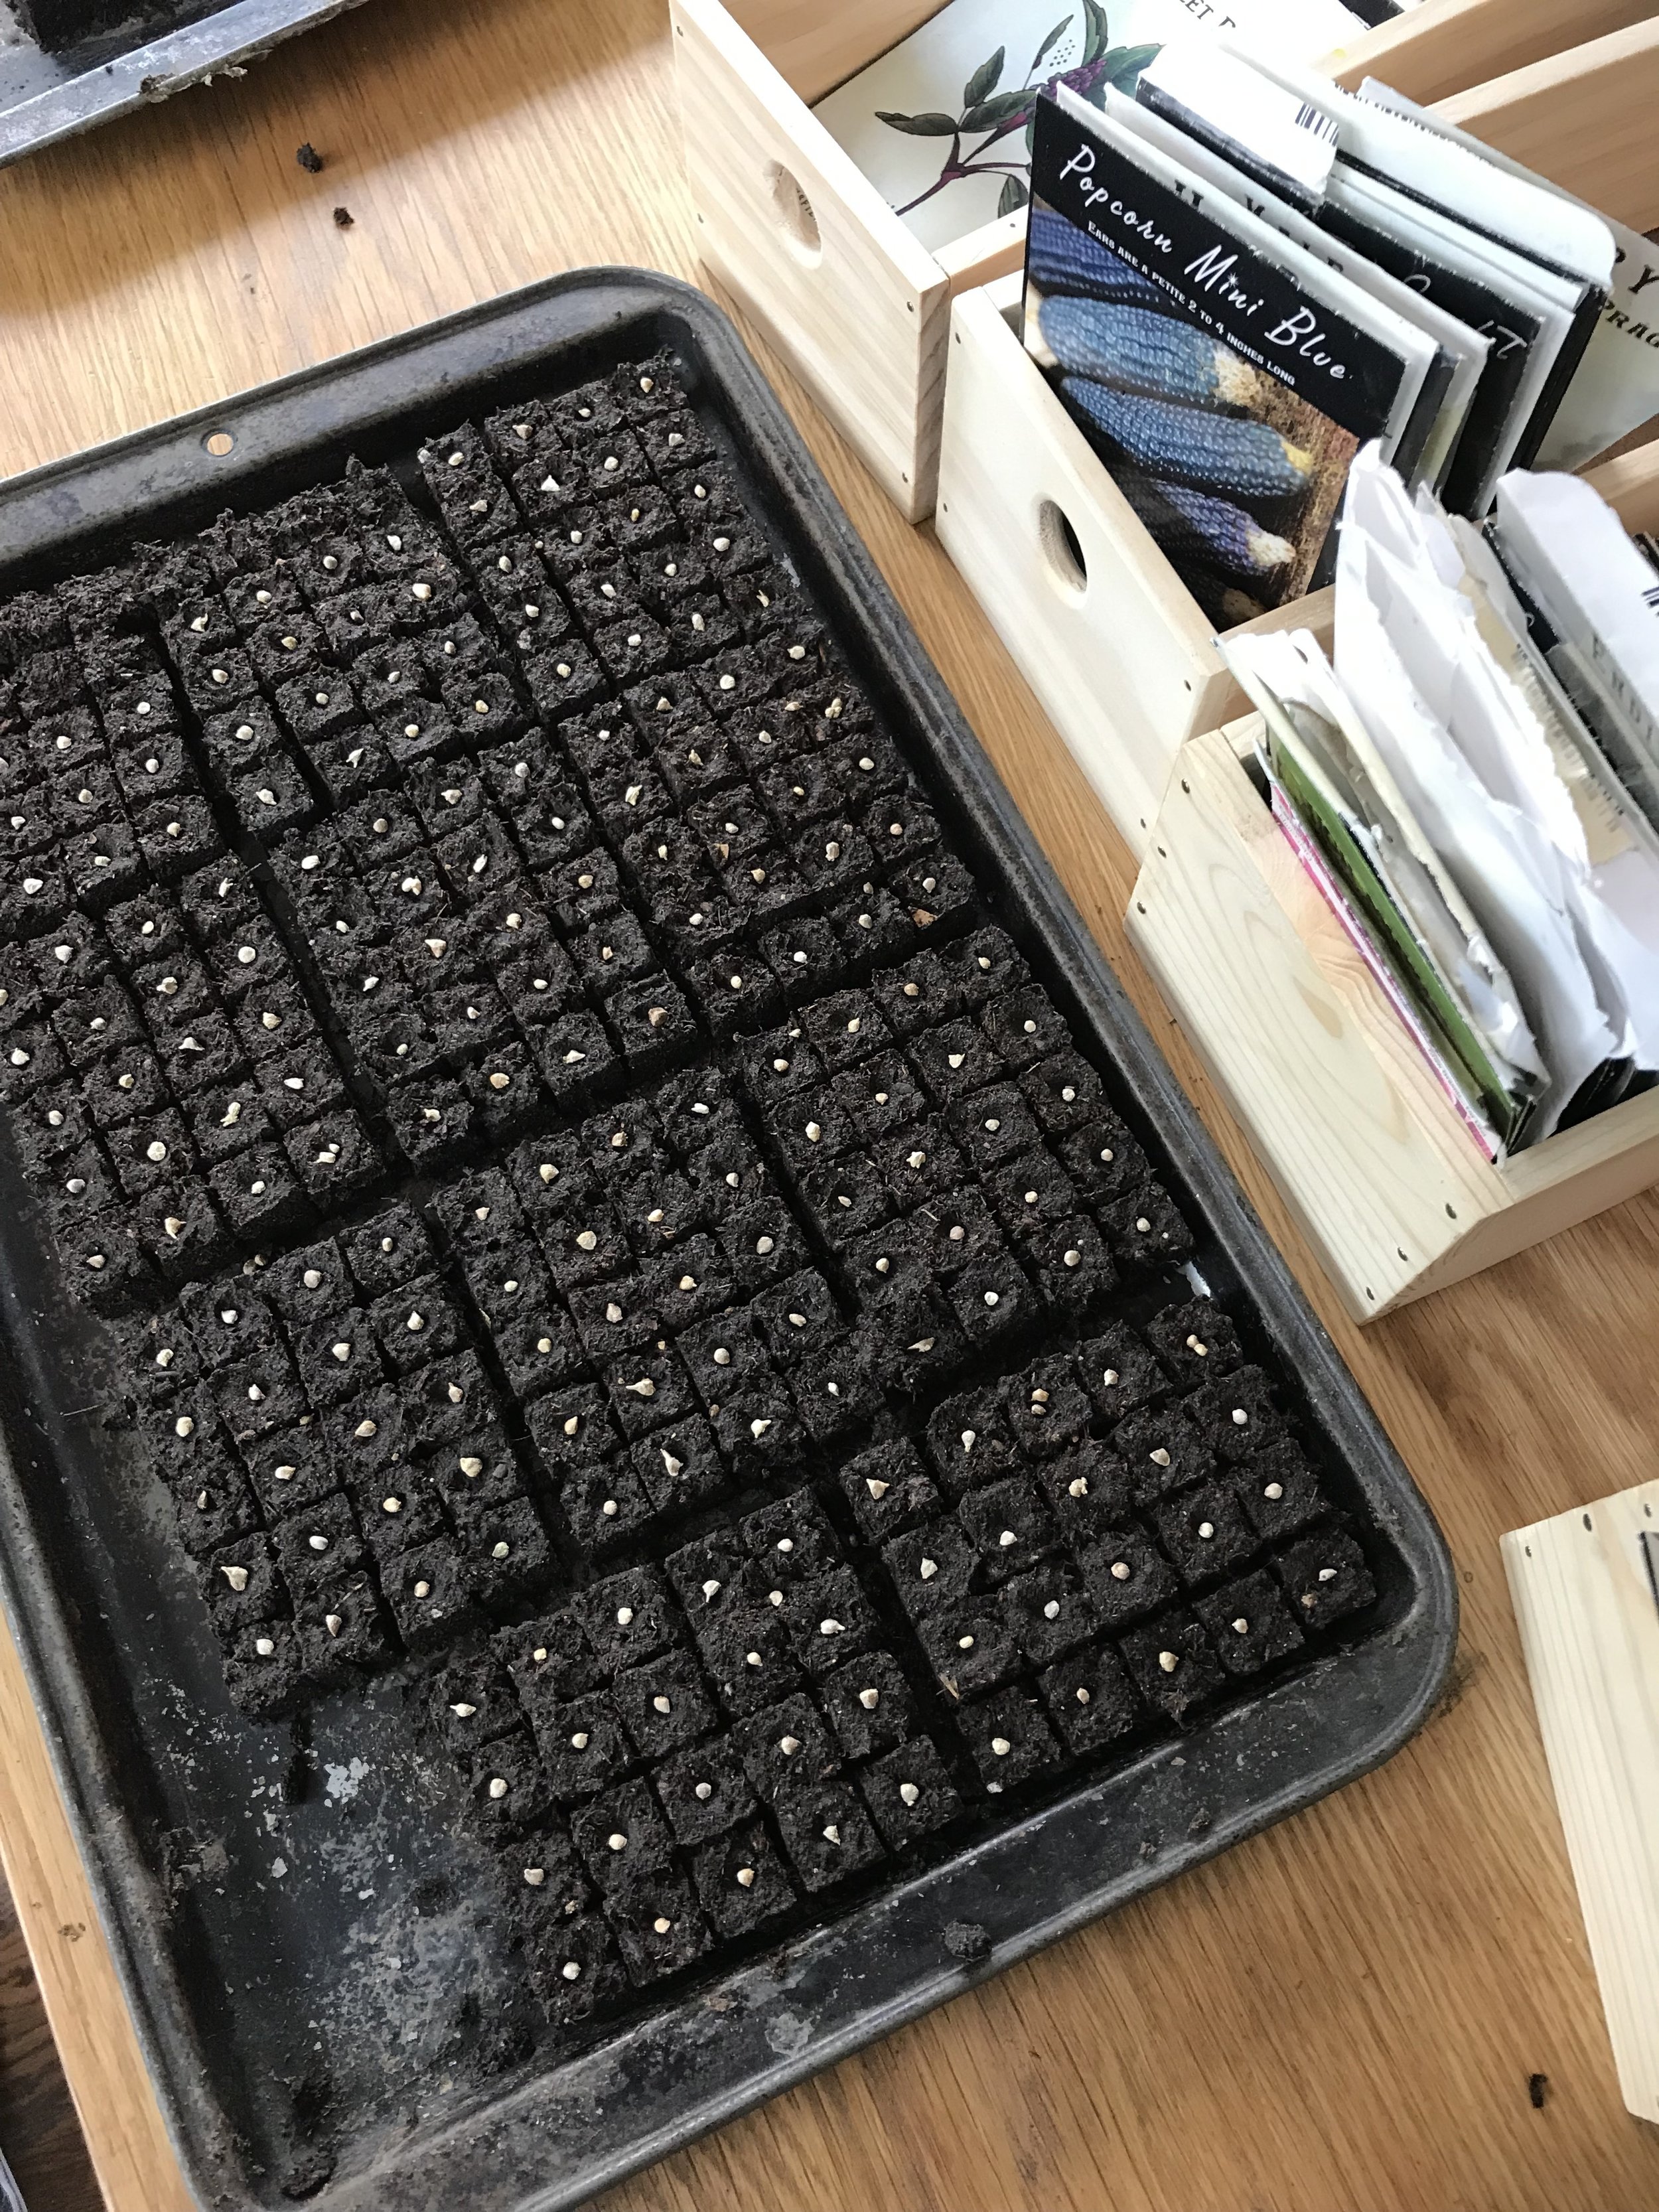
Planting Seeds in Mini Soil Blocks
When planting small seeds in the mini blocks, place one seed on each block. Don’t cover the ¾ inch blocks with soil, it is not necessary. Place a piece of plastic wrap on the top or a plastic lid to keep in moisture. As soon as the seeds start to germinate, remove the lid or plastic wrap. The plastic wrap can be a bit tricky since sometimes seeds like to stick to it. If you feel this will be an issue, don’t use it.
Again, you must keep the soil blocks moist. The ¾ inch blocks are so small they dry out very quickly. Most times, I need to water them twice a day.
Planting Seeds in 2 inch Blocks
When seeding directly in the larger size blocks, Pick the size dowel or pin you would like to use based on what kind of seed you are starting.
¼ inch dowel pin- Use for anything that says it needs to be planted a quarter inch deep to a half inch deep
1 inch dowel pin- Use for large seeds needing a 1 inch planting depth. I use this size for anything in the squash family like watermelon or cucumbers.
For the 2 inch size soil block, I like to add a little bit of vermiculite or peat moss over top of the hole after seeding. When using peat moss to cover the holes, it’s easier to put it on dry and then come back and water it a bit after.
 Troubleshooting
 Troubleshooting
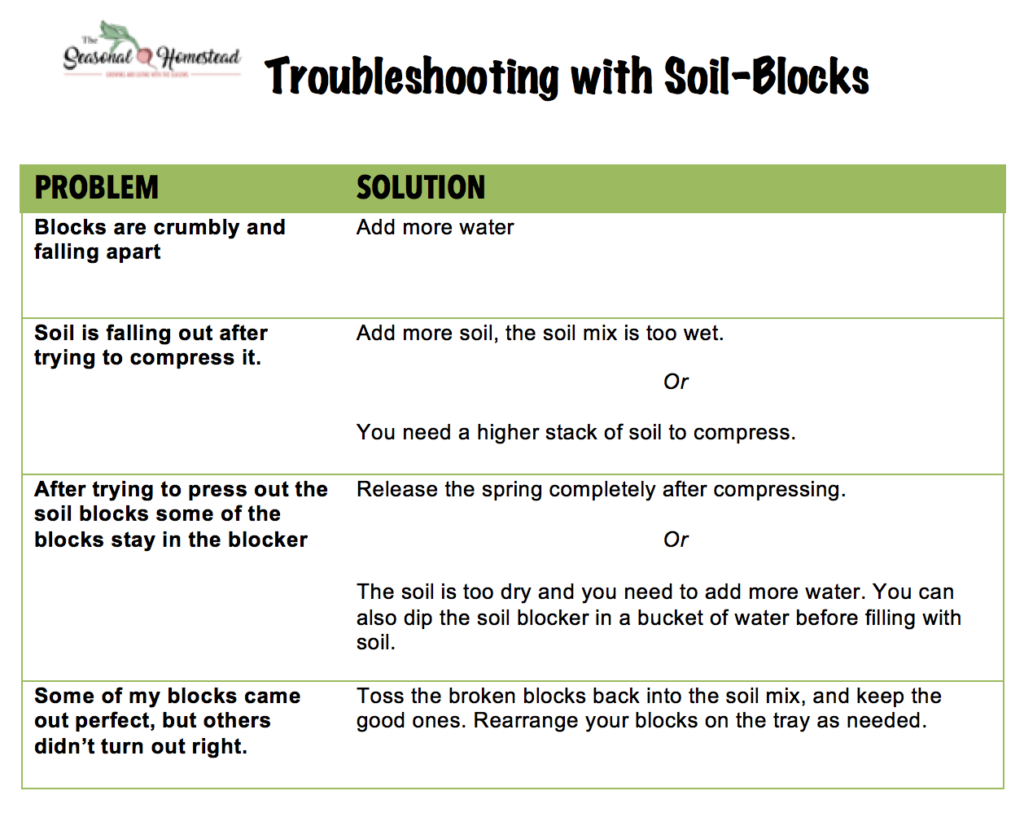
Watering Soil Blocks
The moist growing conditions of soil blocks make it ideal for seed starting. Because of the nature of peat moss, you need to make sure the blocks stay moist and not allow them to dry out.
Once peat moss gets dry, it can be very difficult to moisten again.
When watering mini soil blocks, especially at the beginning a fine mist of water is ideal.
Watering from above.
When I water from above the soil blocks, I am cognizant that my soil has no container. You don’t want to drench them, especially when you first sow your seeds. Watering too much can make the blocks melt into a puddle of mushy soil.
After you have more roots in the block, they retain their shape easier and you don’t have to worry about the blocks being ruined as much.
Watering from above works well for seedlings that aren’t disease prone.
Watering from the base.
This is an ideal watering method for disease prone plants like tomatoes and peppers. In order to water from the base, you need to have a four sided tray to retain the water so the blocks can slowly soak it up.
The other method is to use a capillary mat.
This mat is placed under soil blocks touching them directly. A part of the mat is then placed in water and allowed to soak up the water.
Here is LINK to make your own DIY capillary wicking mat.
Other water considerations:
I love soil blocks. But the major problem with them for me is when it’s time to harden them off for transplanting. The blocks stay outdoors for a certain number of hours of the day. If it starts to rain, you must bring them indoors or under a covered area.
With enough rain and overwatering the blocks will disappear or become a pile of soft soil. It isn’t pretty. Soil blocks are ideal for greenhouse starting for this reason. Since they are protected from rain, overwatering from the elements isn’t a concern.
Once they are planted in the soil, this is no longer an issue.
All that being said, I still use soil blocks for the majority of my seed starting. The extra hassle to consider the rain is worth it to me.
Potting up Soil Blocks
Once you seed the roots start to poke out from the block, it’s time to pot up to a larger size block. If you use a plastic greenhouse tray with four sides you’ll have to lift the blocks up to monitor the root growth. With the three sided flat or the sheet of plywood or polycarbonate, the roots will be visible.
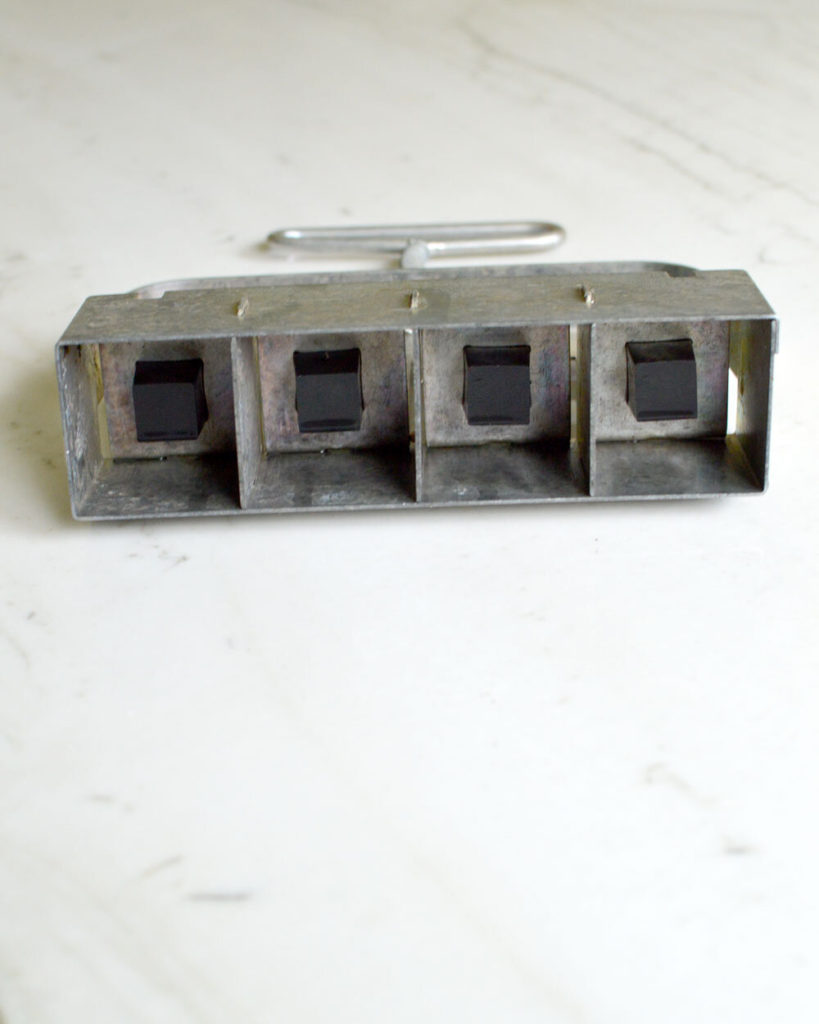
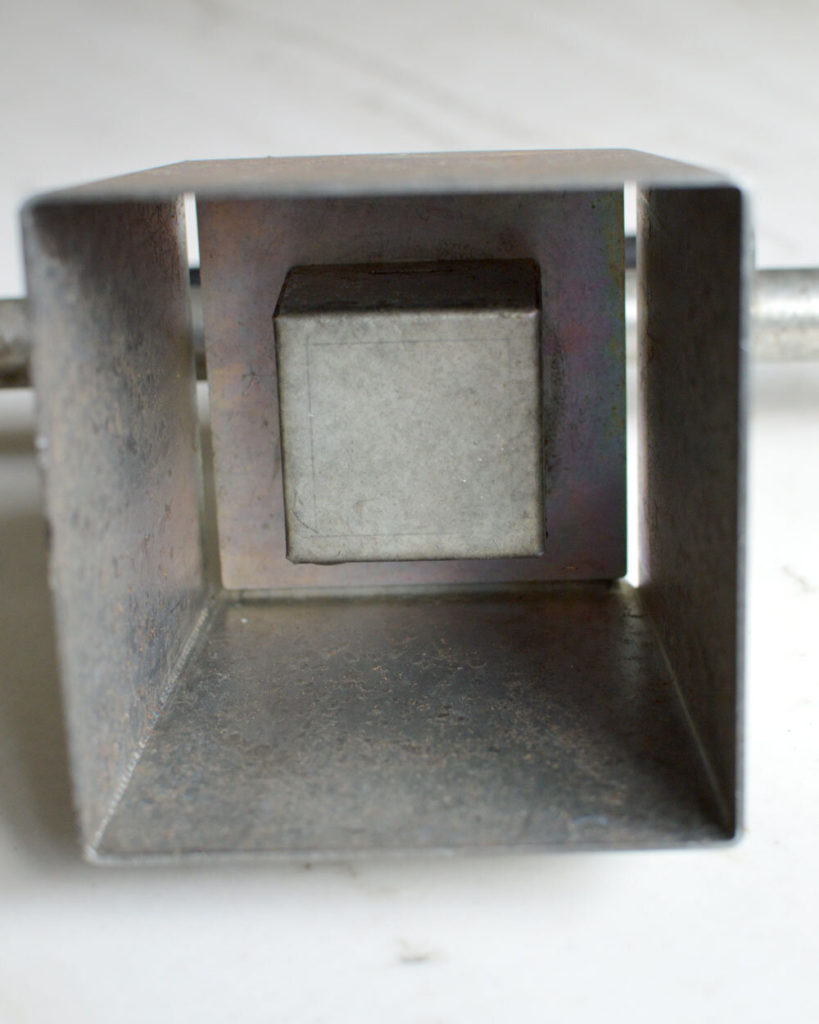
The ¾ inch block will be potted up into the 2 inch block. Use the cube insert pins when creating the 2 inch blocks. Place the ¾ inch block into the 2 inch block.
The 2 inch block can be potted up to the four inch block.
 Transplanting Soil Blocks
 Transplanting Soil Blocks
Just like any other seedlings started indoors, when it’s getting close to time to plant them, you’ll need to harden them off. This means you need to acclimate them to the outdoors slowly. One hour in the sun the first day, two hours the next day, three hours in the sun the third day and so on. Until they are staying out all day, and then the final step, staying outdoors overnight.
After they are properly hardened off, it’s time to transplant them into your garden bed. Prepare the bed and dig a hole to fit the block. Take a block from the tray, place it in the hole and fill in the hole. It is very simple. Ease of transplanting and no transplant shock for seedlings is where soil blocks really shine!
How to Make Soil Blocks Video Tutorial

Where to Buy Essential Tools for Soil Blocking
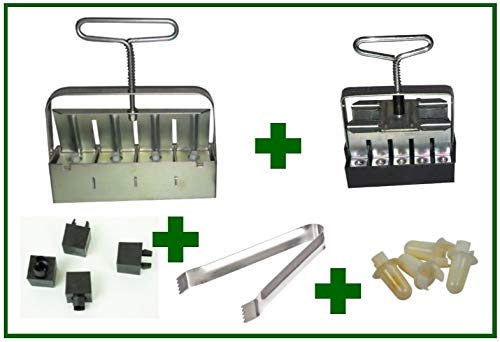
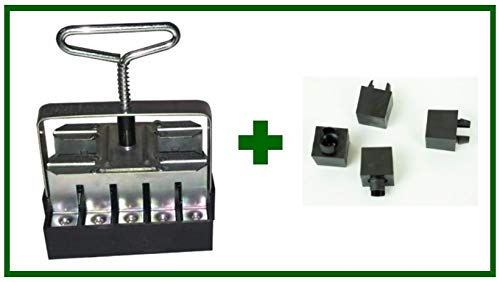
This is the kit I would most highly recommend it you’re just getting started. These are the tools I use the most… well except for the tongs, they aren’t necessary. I did buy this kit but I have an older model that uses cubes with washers and screws. The clip in cubes on this newer model will really make it easy to switch pins!
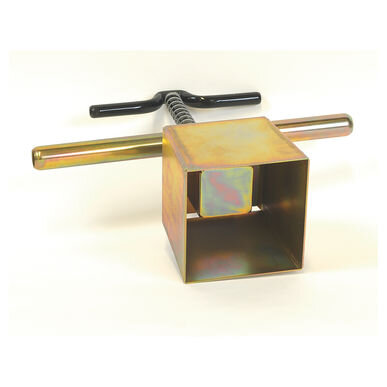
This is the 4 inch soil blocker I bought. It has worked very well. Find it HERE. I recommend waiting to get the larger four-inch soil blockers until you see if you like using soil blocking as a method of seed starting. The four inch blocker is definitely an investment.
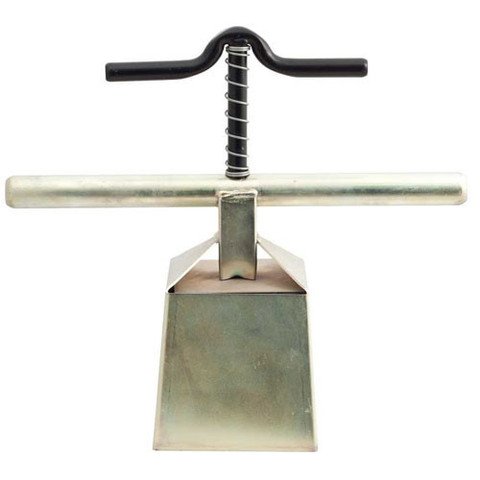
Another option for the 4 inch blocker is above. This one is slightly cheaper (at the time of writing this) but made by a different company.

A must-have book for learning about soil blocks
If you buy just one soil blocker to get started, this is the best one and will get the most use.
The 3/4 inch micro blocker and cube clips. You don’t want this one by itself. This is a kit to buy if you already have the 2 inch soil blocker and want to use the small blocks for germination.
When I’m not using wood flats, I use these trays to hold soil blocks. Find them HERE.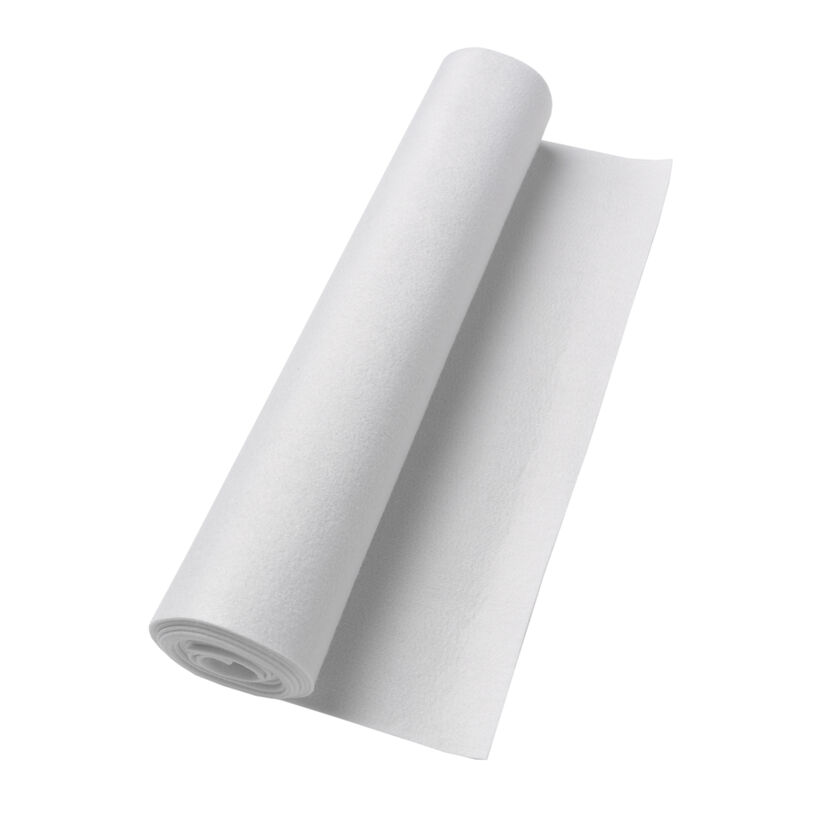
This is the capillary (also called wicking) mat I use under my wooden flat trays. I really like it! Link to it HERE
I have a similar hand held water sprayer that I use to mist my 3/4 inch mini blocks with water. The brand of sprayer I used wasn’t very good (I’ve gone through 2 already), so I’m linking to this one with better reviews.

And here is the man himself, Eliot Coleman showing how to make soil blocks.