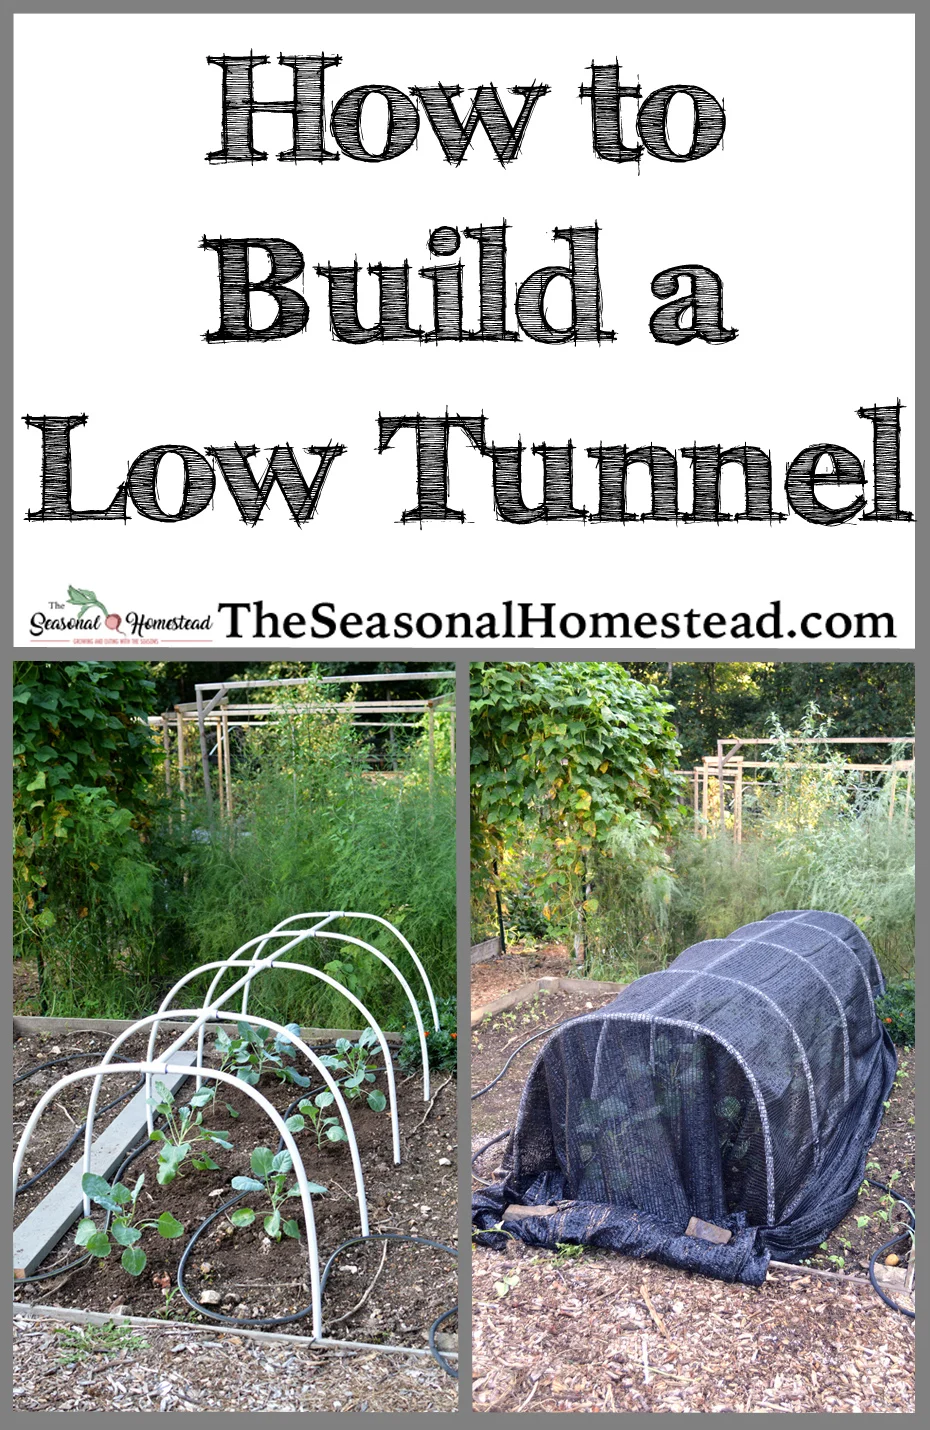
How to Build A Low Tunnel
This guide shows how to build a low tunnel that can be used for many years. Low tunnels provide the framing to support row covers and insect netting. A low tunnel offers extra protection for your crops.
Video Tutorial for building a low tunnel
In our first youtube video ever, we show visually how a low tunnel is built! This low tunnel one is tall but the height can be adjusted as needed.

Supplies you’ll need
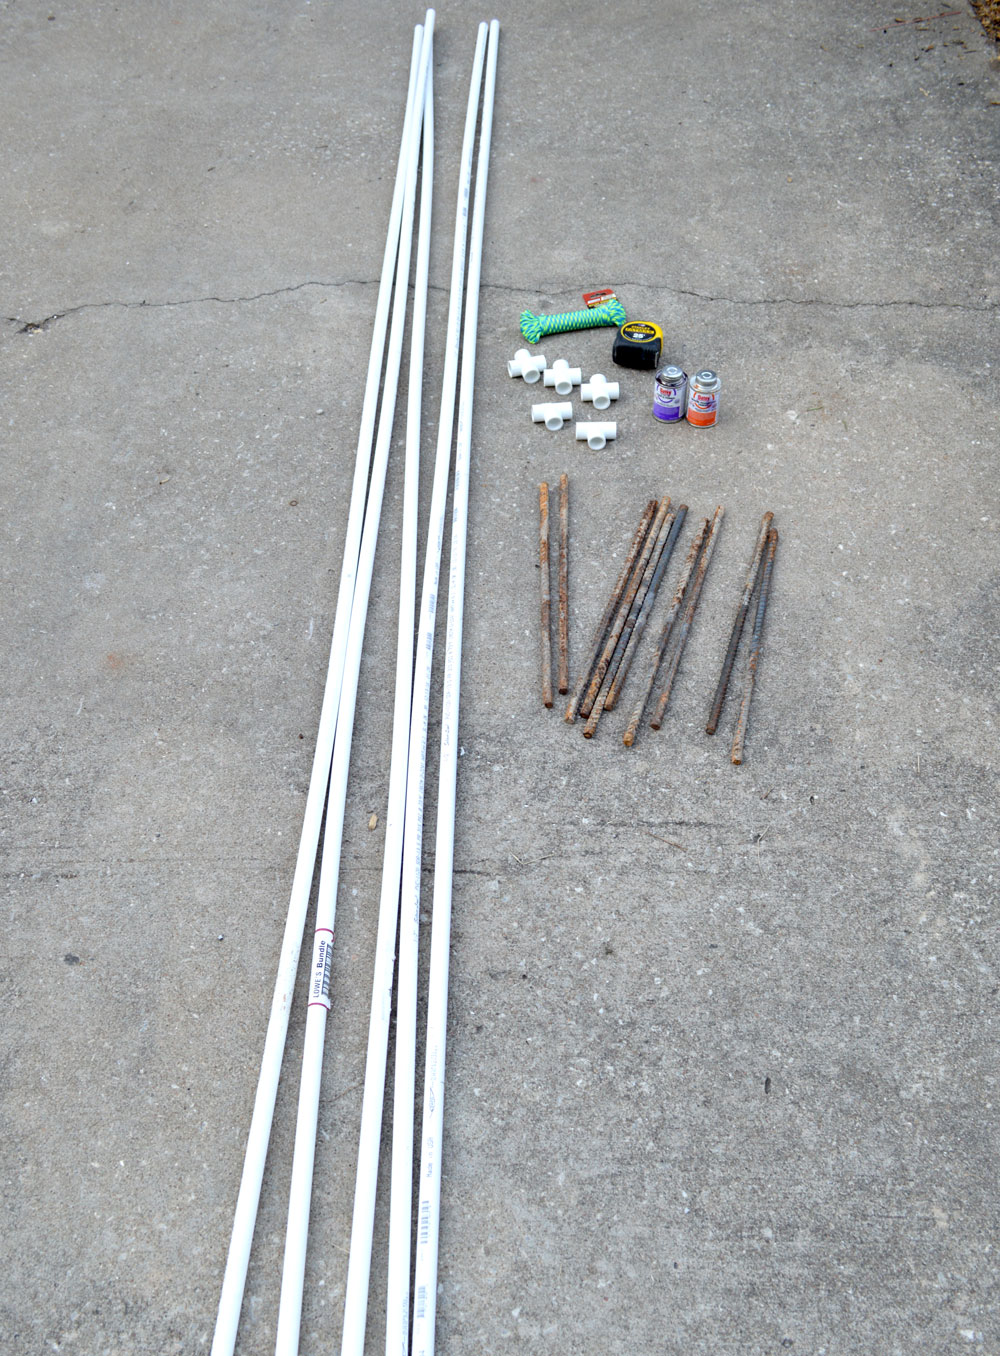
With the supplies pictured here, you will make a low tunnel that will cover up to a 9ft by 4ft section of garden. Each tunnel should take between 30 minutes to an hour to complete. Your first one will take the longest, then once you have the process down, it will become much quicker. Supplies needed for this project:
(5) – 10ft lengths of 1/2” PVC pipe (thinner diameter is preferred, more on that below)
(10) – 24inch pieces of rebar. Your hardware store should have them in 2ft length
- 5 or more “plus” shaped pipe fittings for 1/2’“ pipe
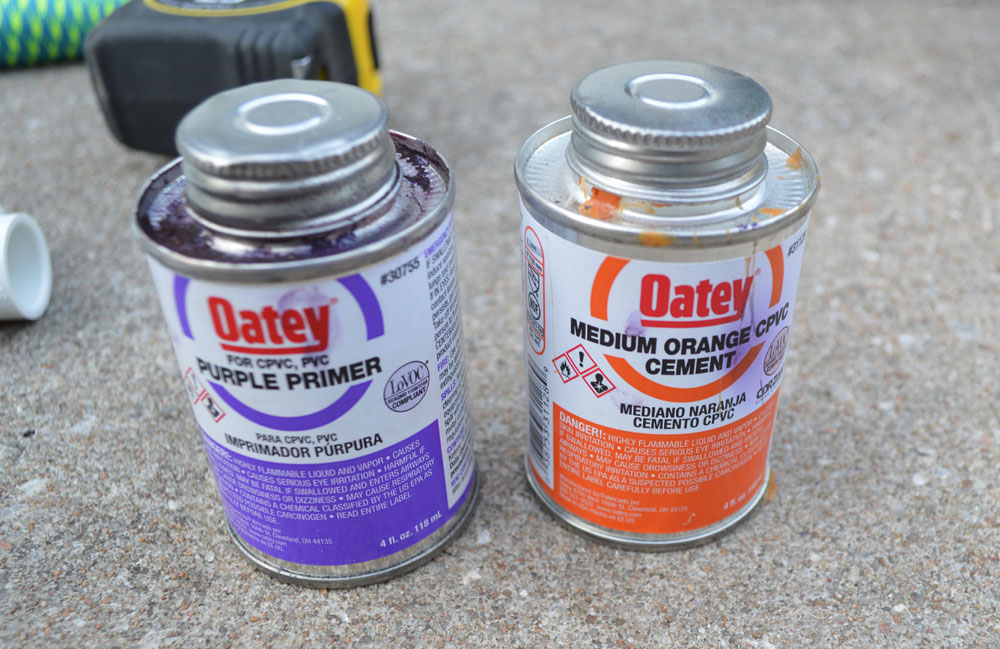
- PVC pipe primer & cement
- Measuring tape
- Saw for cutting the pipe; handheld or power miter saw
- 20ft of thin rope/paracord
- A large pot of boiling water
- A funnel, and a way to pour the boiling water into the funnel without burning yourself. I use a tempered glass 1qt pyrex with a handle.
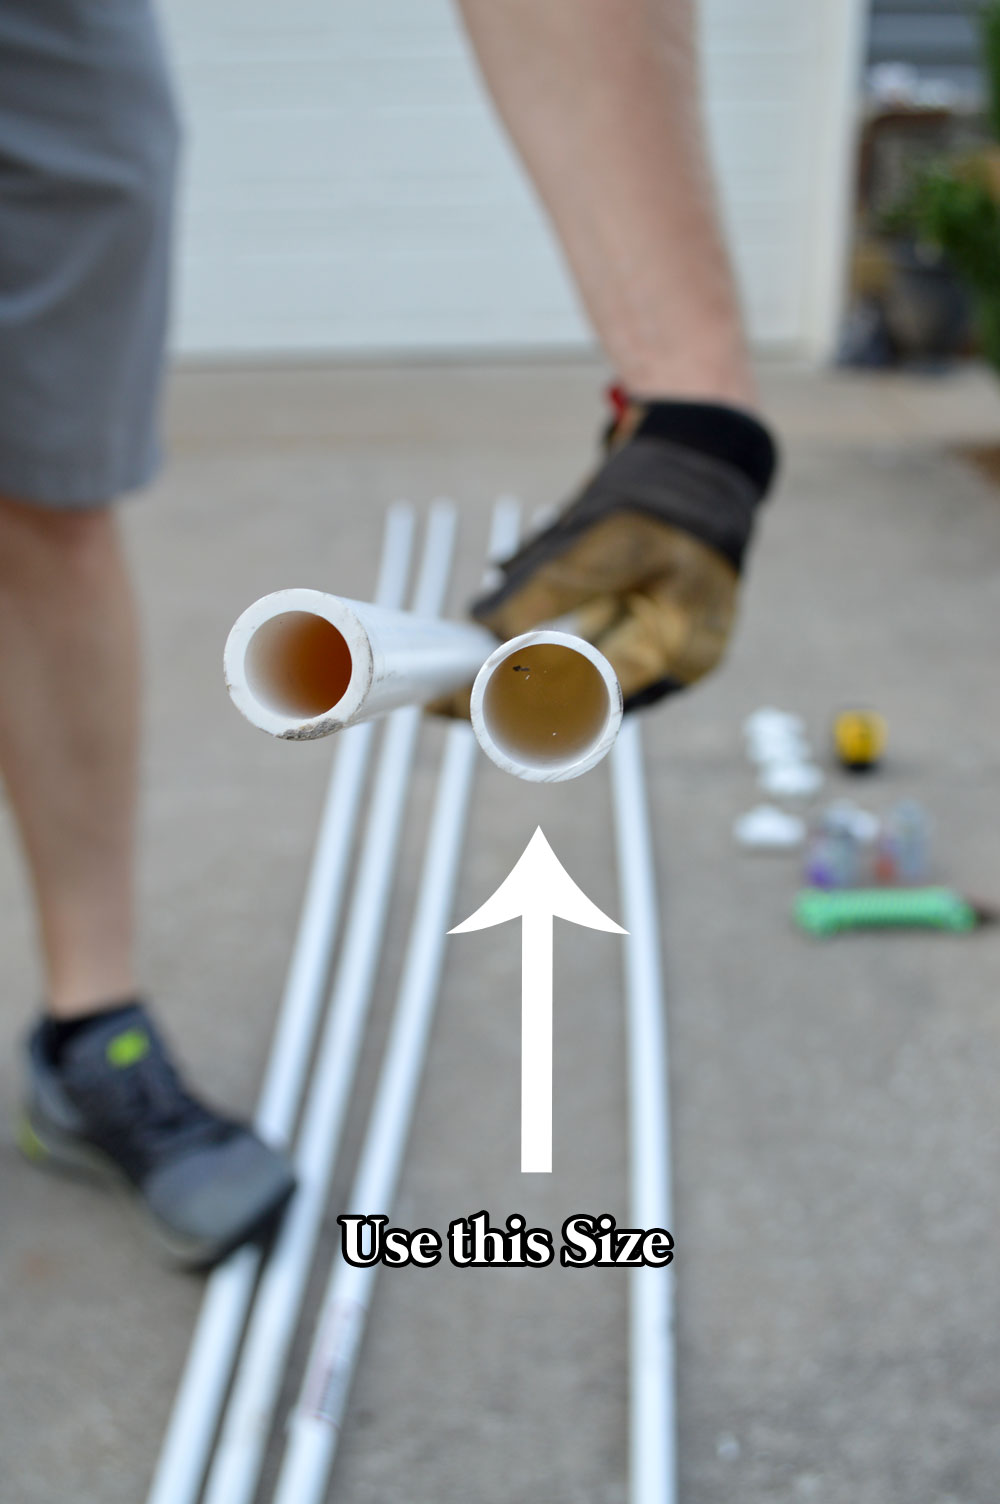
Until recently, I wasn’t aware of varying thicknesses of the white PVC pipe. In plumber language, the thicknesses correspond to their PSI rating. The thicker pipe is rated at 600PSI, the thinner pipe rated 315 PSI. You can still use the thicker pipe for this project, it will just be slightly harder to bend to shape. I prefer the thinner pipe.
Step by Step Guide
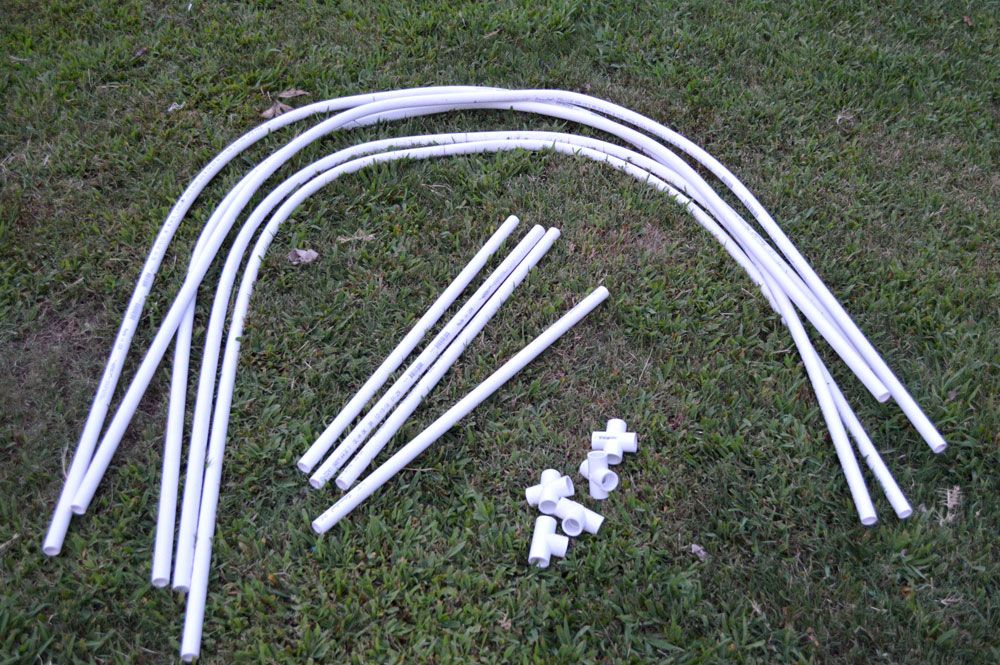
STEP 1 First cut will be 2 ft off the ends of each pipe. This leaves you with five 8ft sections that will become the “ribs”, and five 2ft sections that will create the “backbone” of the low tunnel. Set the 2ft pieces aside for now…
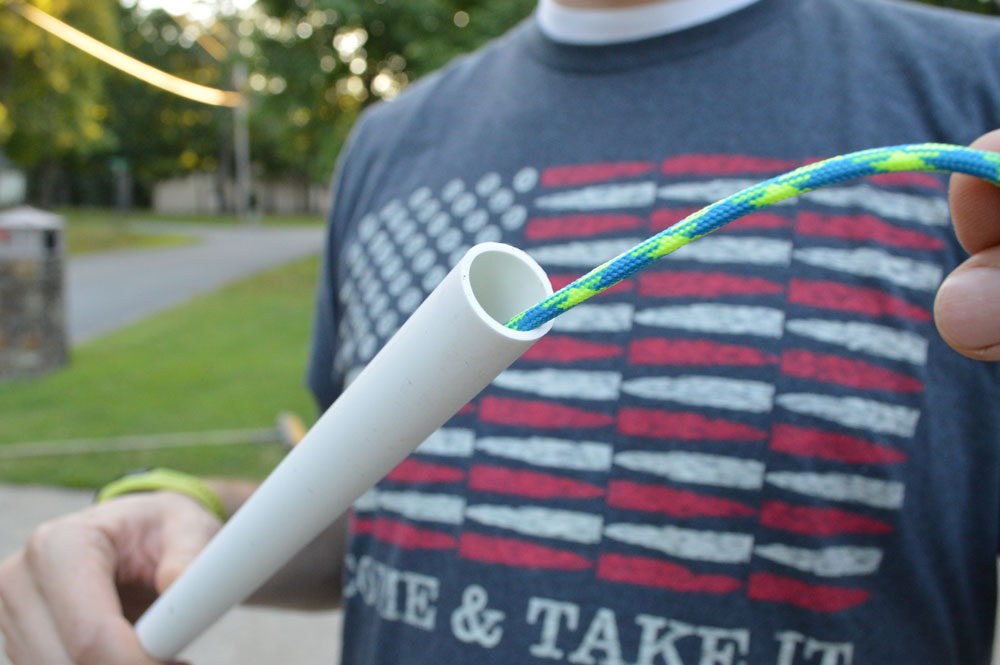
STEP 2 Get some water boiling. As your water heats to a boil, thread the 8ft pipes one by one with the rope. I tie a loop on the end that I am NOT pushing through the pipe. You’ll see why soon.
STEP 3 Feed the rope until it comes out the other end.
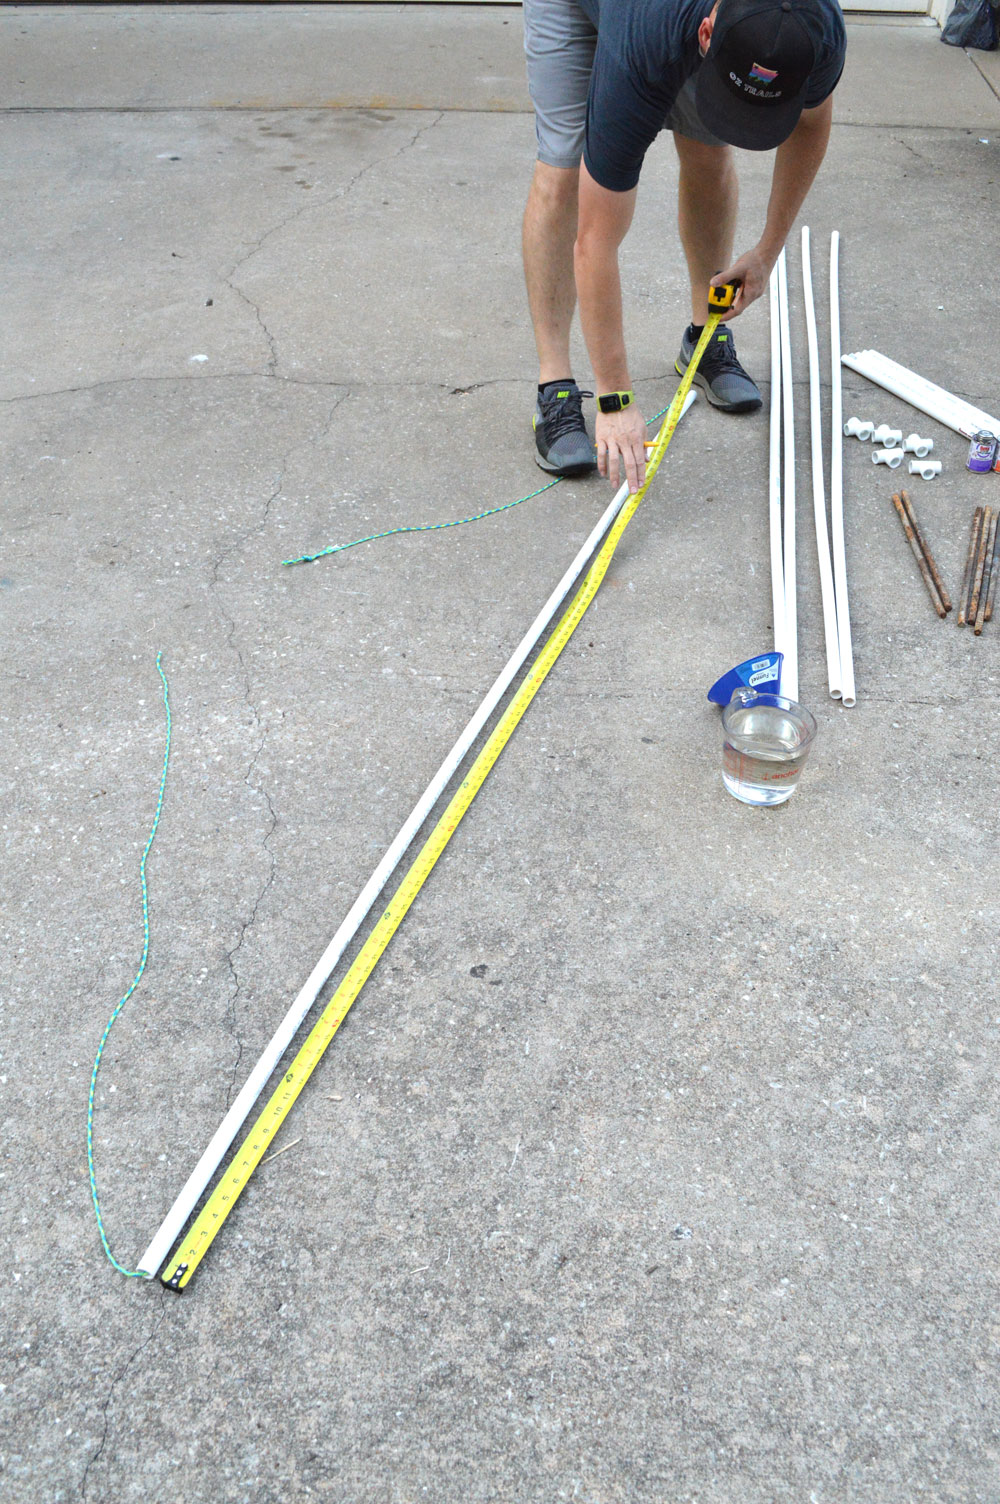
STEP 4 Measure the midpoint of the pipe, and scratch a pencil line there for reference.
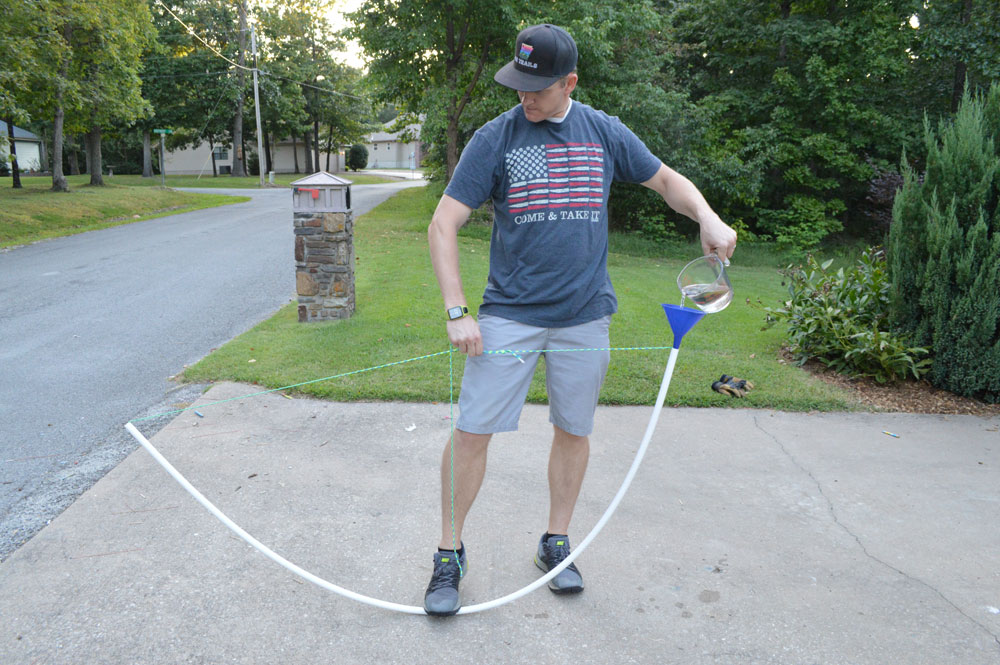
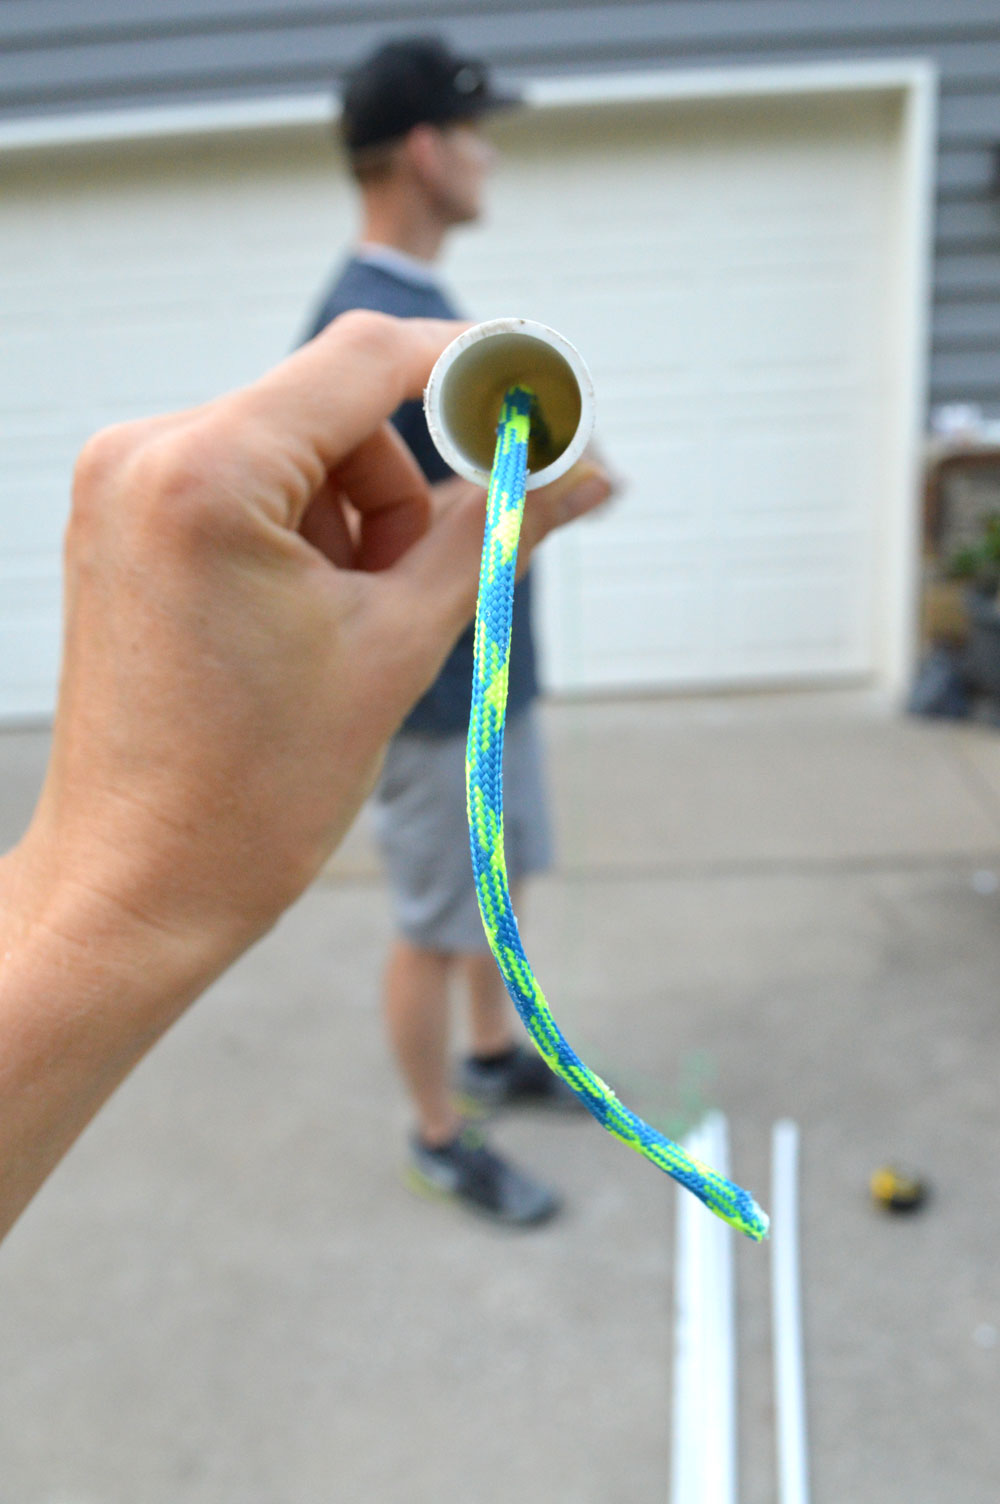
STEP 5 Slowly bend the pipe up, feeding the loose end of the rope into the loop I had you make earlier. Pull the rope together until the pipe resembles a bow and arrow shape. *Warning* – do not pull it completely into the finished “U” shape yet, else you will risk kinking your pipe when the water is poured in. I learned this the hard way.
Tie a sliding knot (I use a double half hitch) so you can easily tighten and loosen the rope. Now, slowly pour the boiling water in the pipe. For reference, an 8ft pipe takes about 3-4 cups of water to fill.
STEP 6 Once filled with hot water, you will immediately feel the pipe loosen and bend. You have about 20-30 seconds to make your adjustments, tighten the rope, and then hold the pipe in place as it “cures”. Use that midpoint mark you made on the pipe for reference to help make a symmetrical bend.
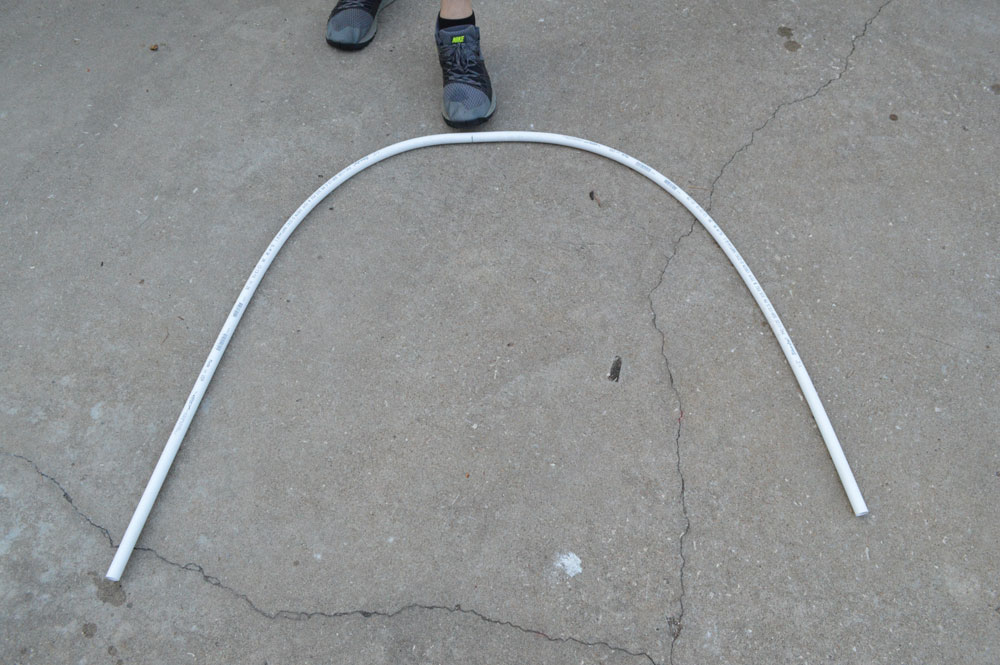
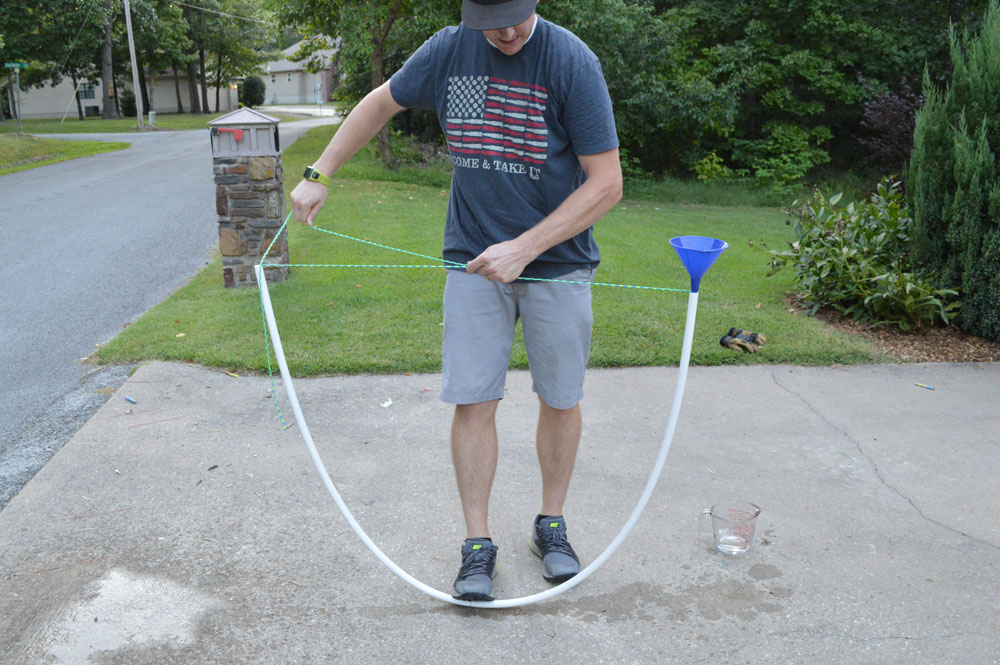
STEP 7 After the water has cooled and the shape is set, remove the rope. Here is the first “rib” finished! With the rope removed, the pipe may widen a bit in shape, but not to worry. As long as you have the basic “U” shape, you are all set.
After bending all the pipes, we are ready for one final cut, then the glue up!
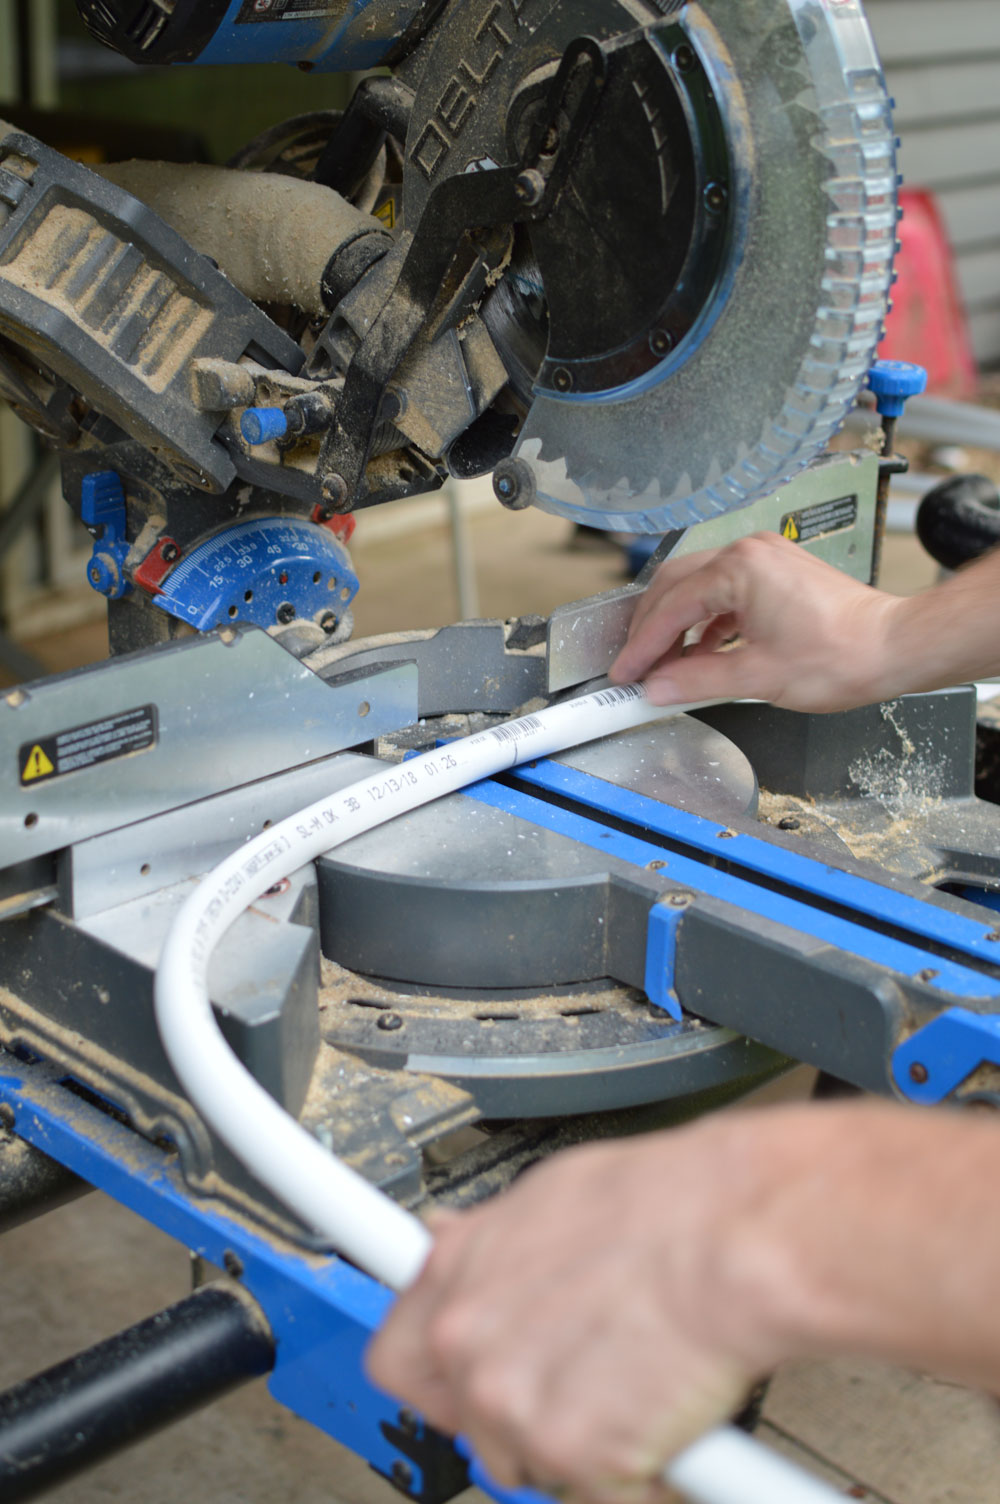
STEP 8 Cut each rib in half
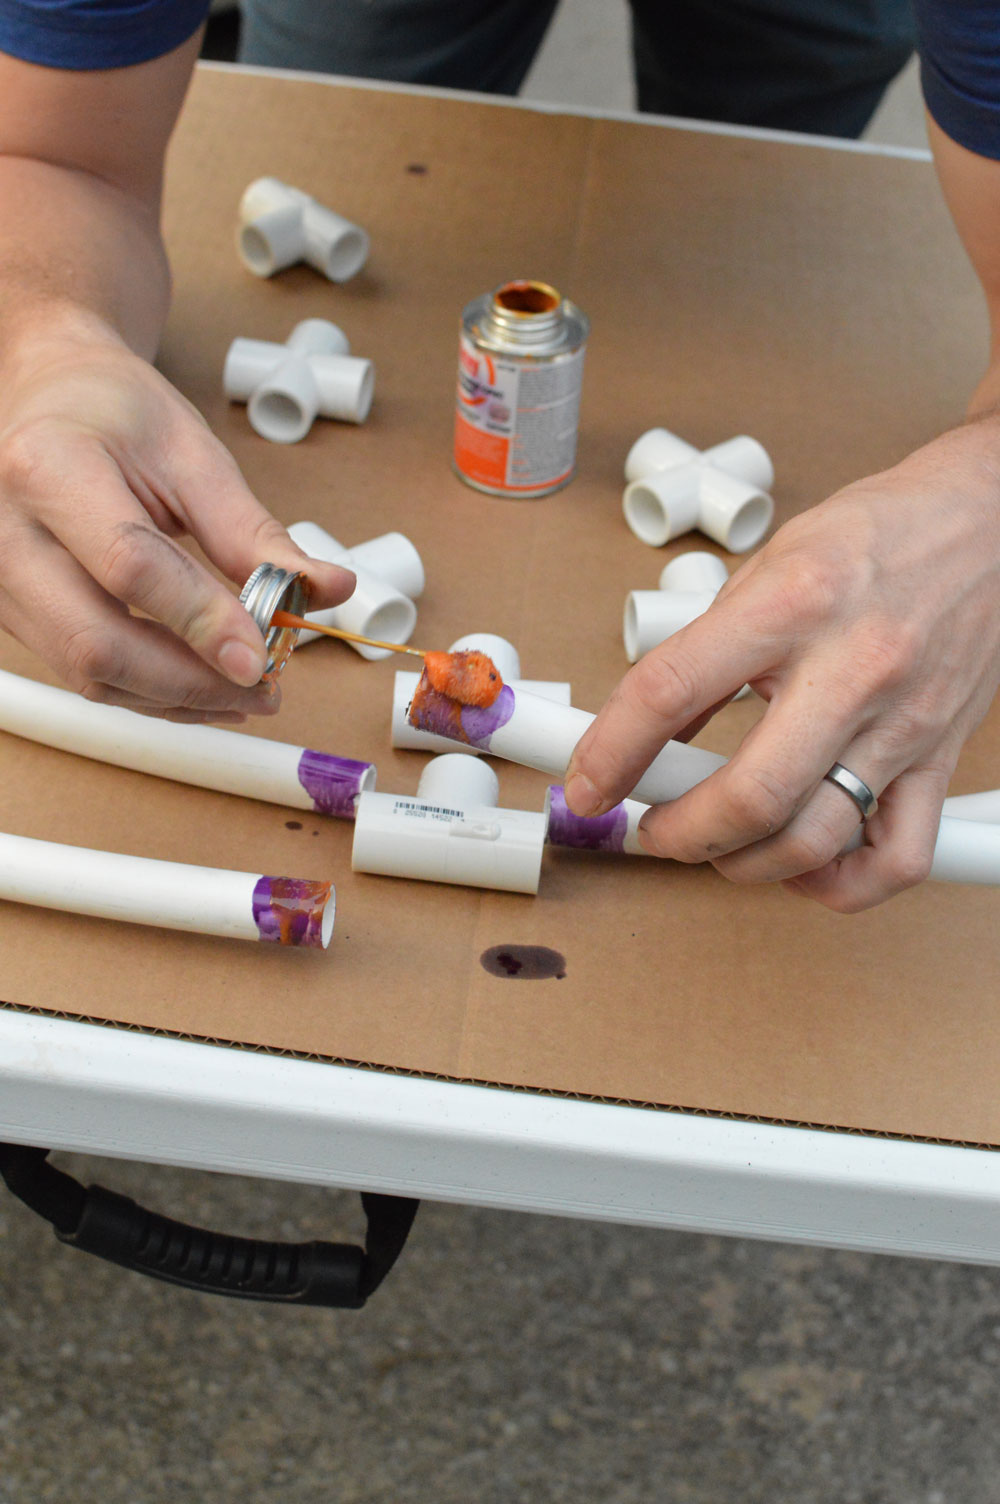
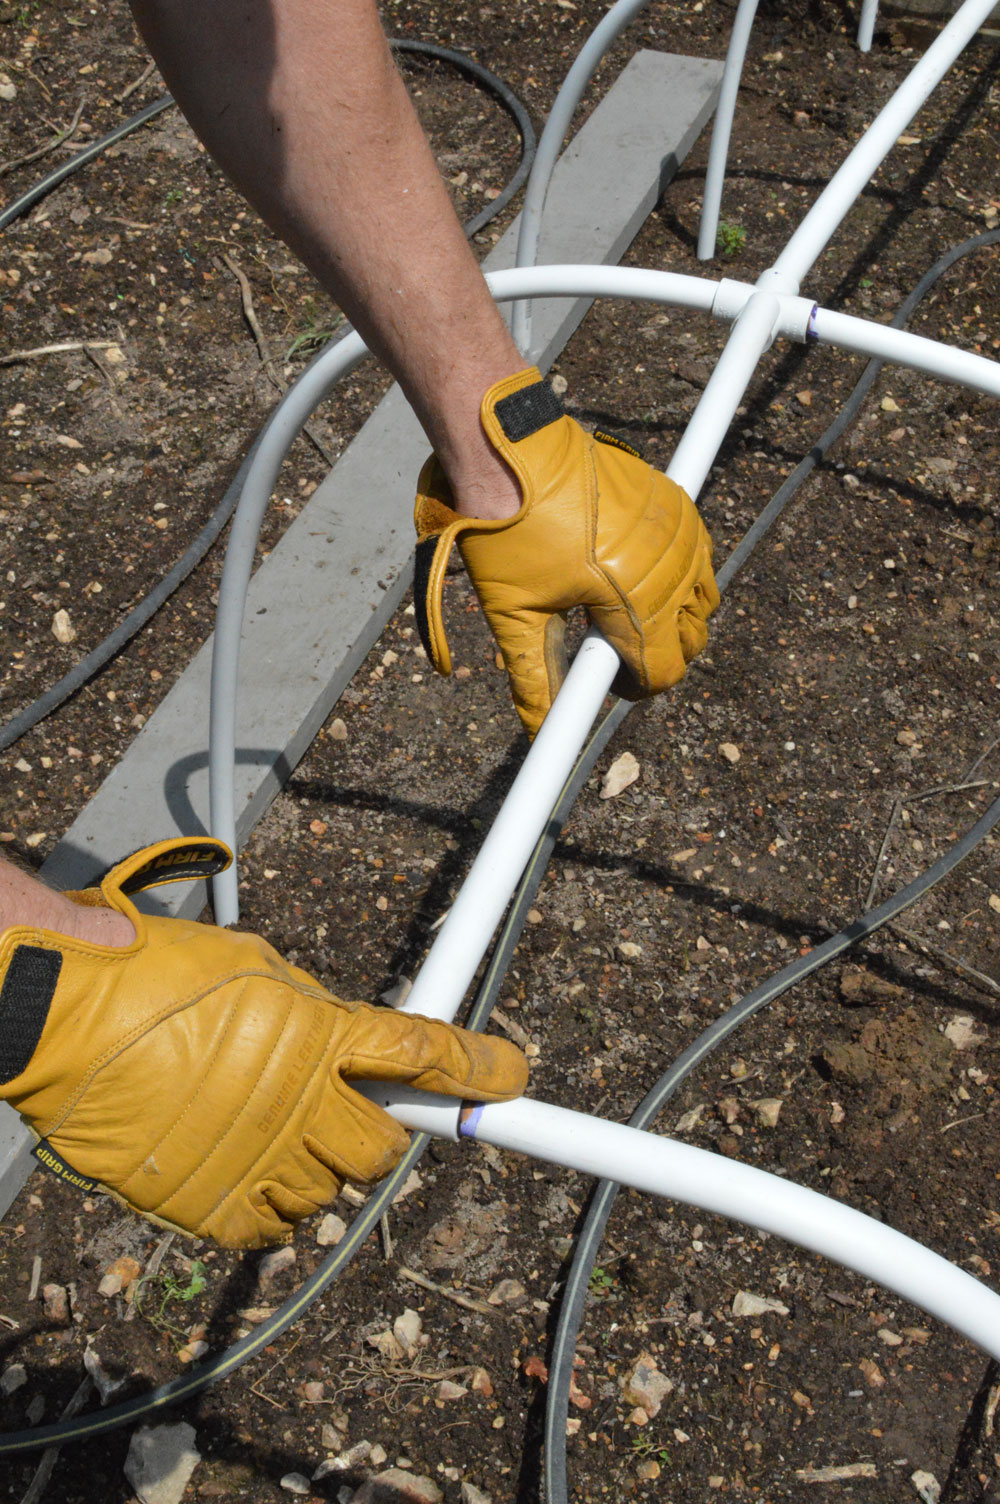
STEP 9 Prime BOTH the pipes, and the fittings. Then immediately apply the liquid cement to both as well.
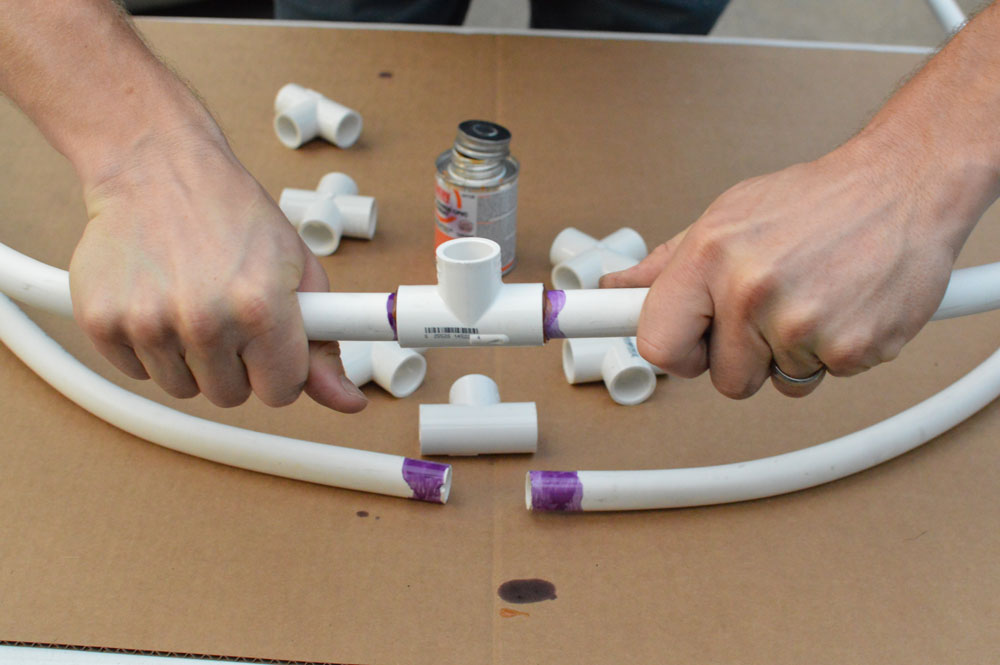
STEP 10 Add glue where hoops will go. Don’t add glue where the “backbone” pieces will connect. Fit pipes to the fitting.
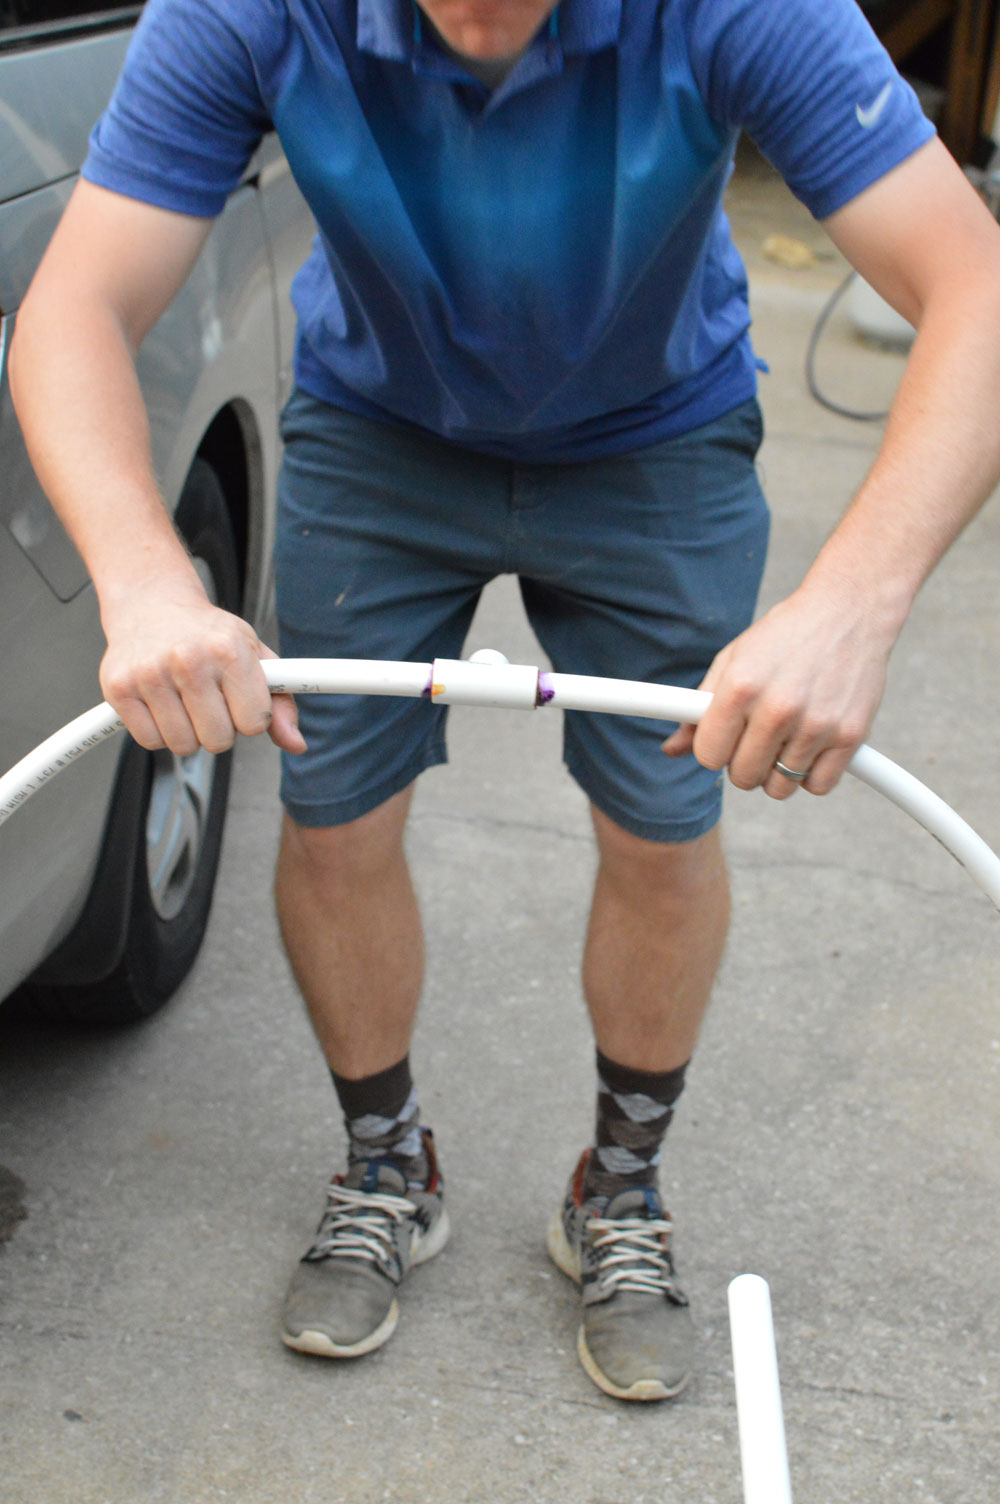
STEP 11 Make sure the fitting is parallel to the ground, so that the connecting pieces will easily slide in.
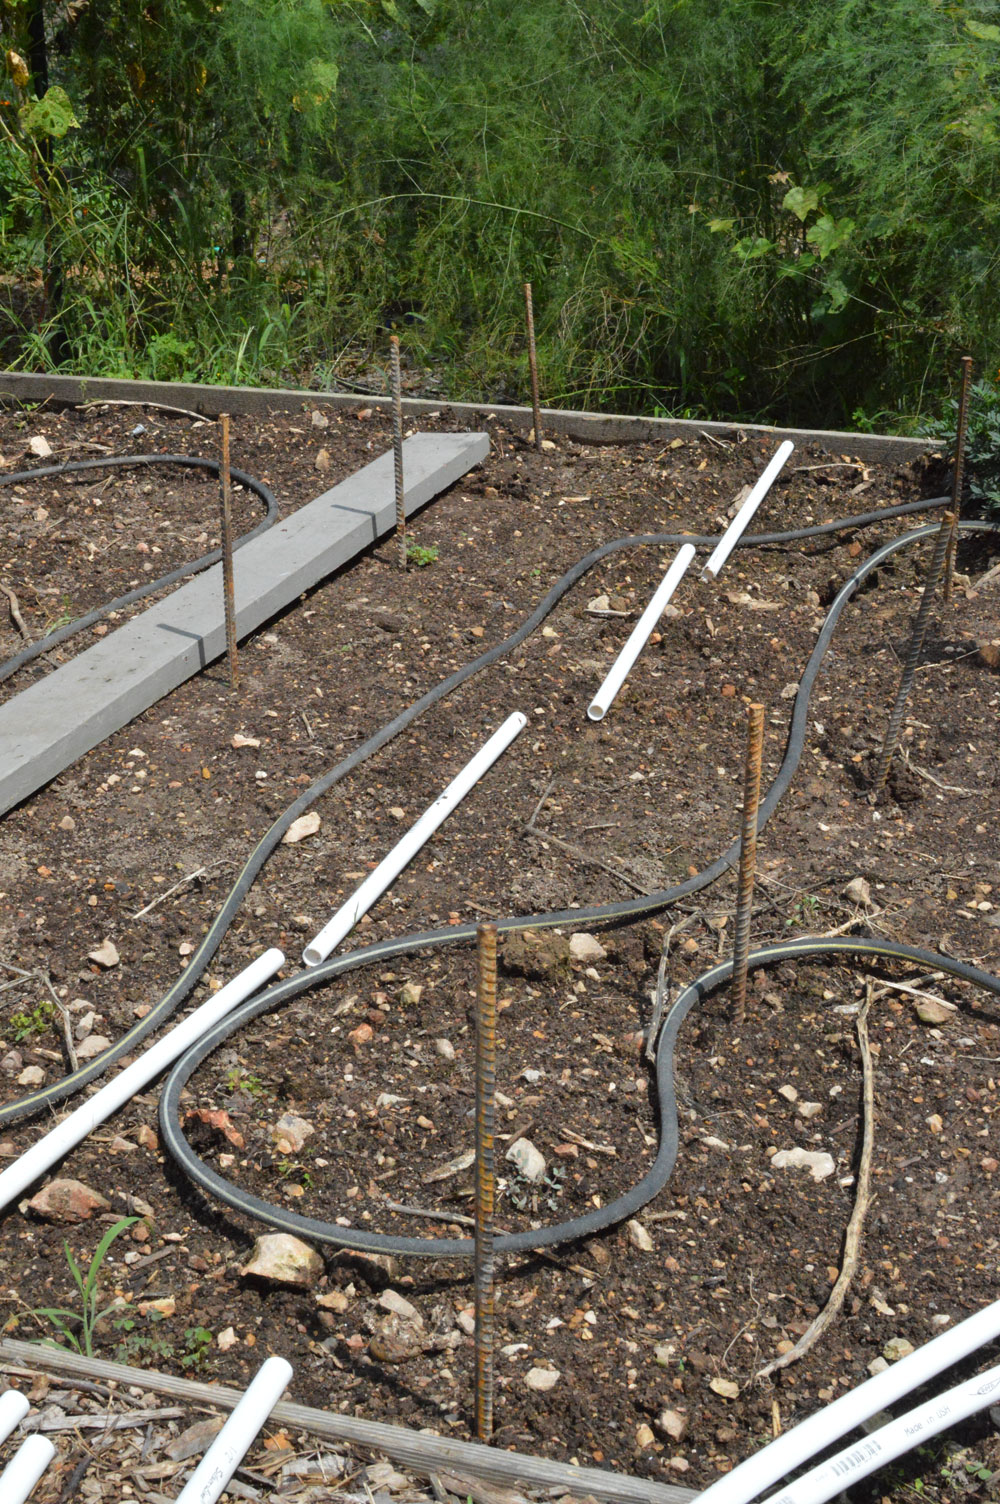
STEP 12 Now in the garden, I laid out the “backbone” pieces, to give me reference for where I needed to pound the rebar for the ribs, roughly 2 feet apart
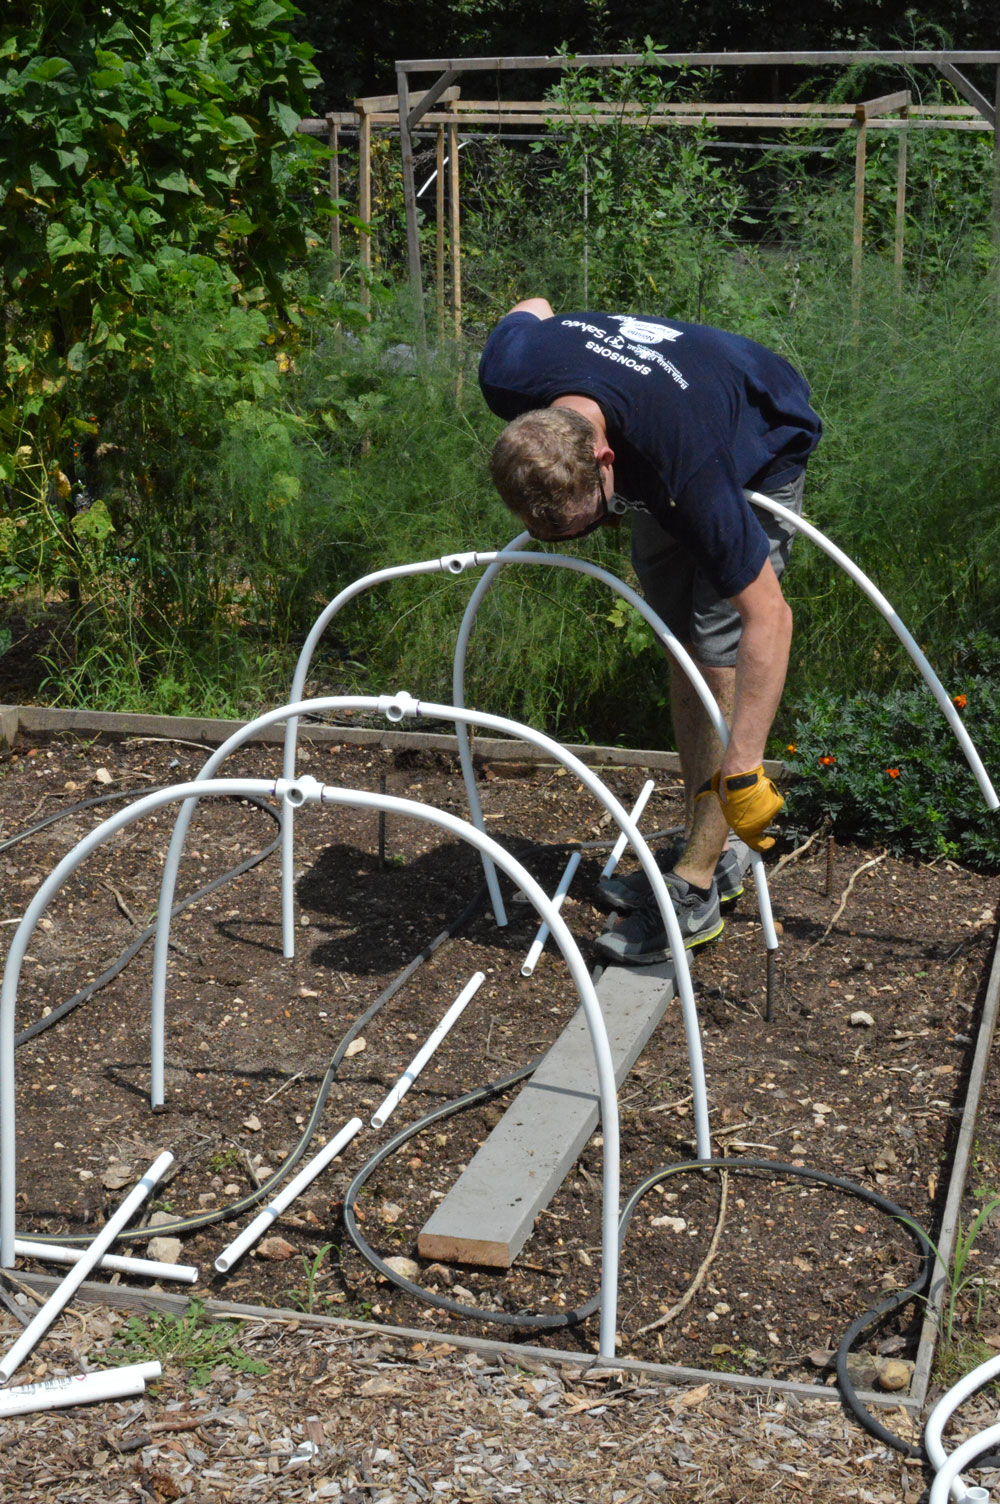
STEP 13 Slide the ribs over the rebar. Adjust if needed. *Note* depending on how wide your tunnels are, or what you are planting, you tunnels may be too tall. If they are, cut small increments off the bottom ends of each rib until you are at the size/height you need.
STEP 14 Connect the backbone to the ribs. Again, don’t glue the connector pieces. This will allow you to move the low tunnel around the garden or put in storage if needed.
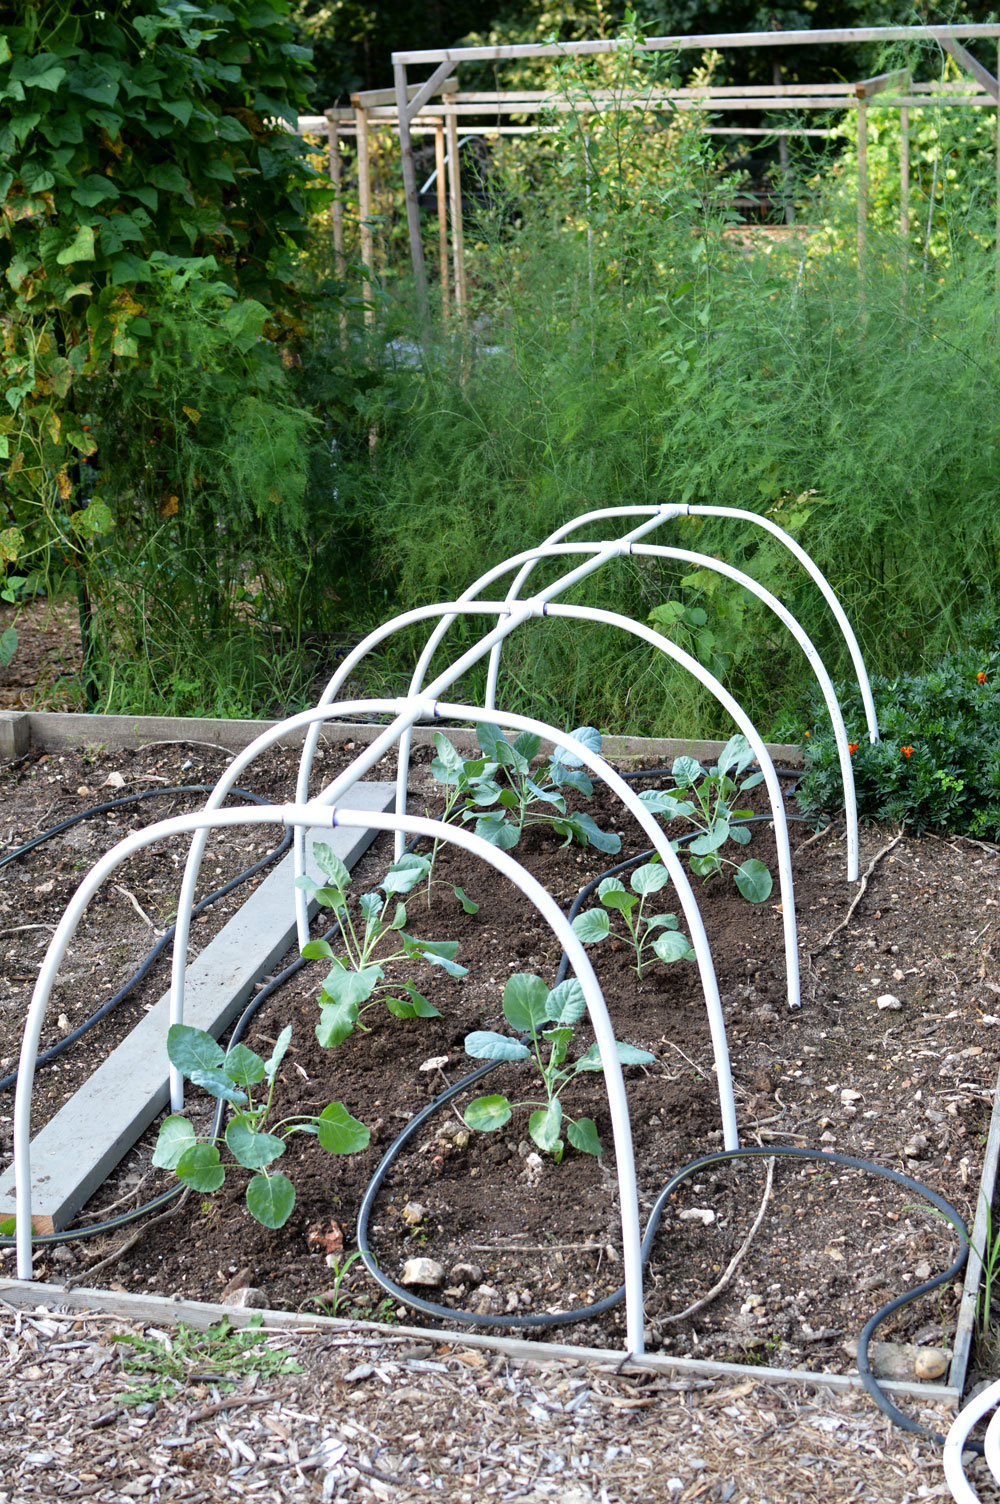
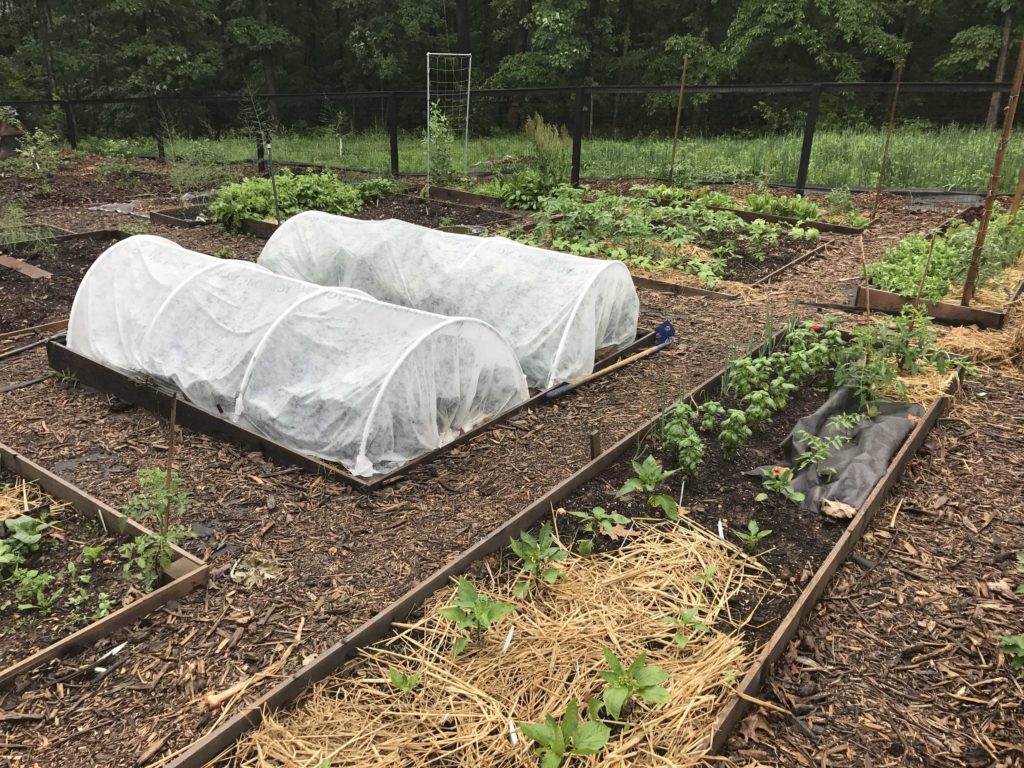
STEP 15 Plant, then cover with row cover, insect netting, or shade cloth.
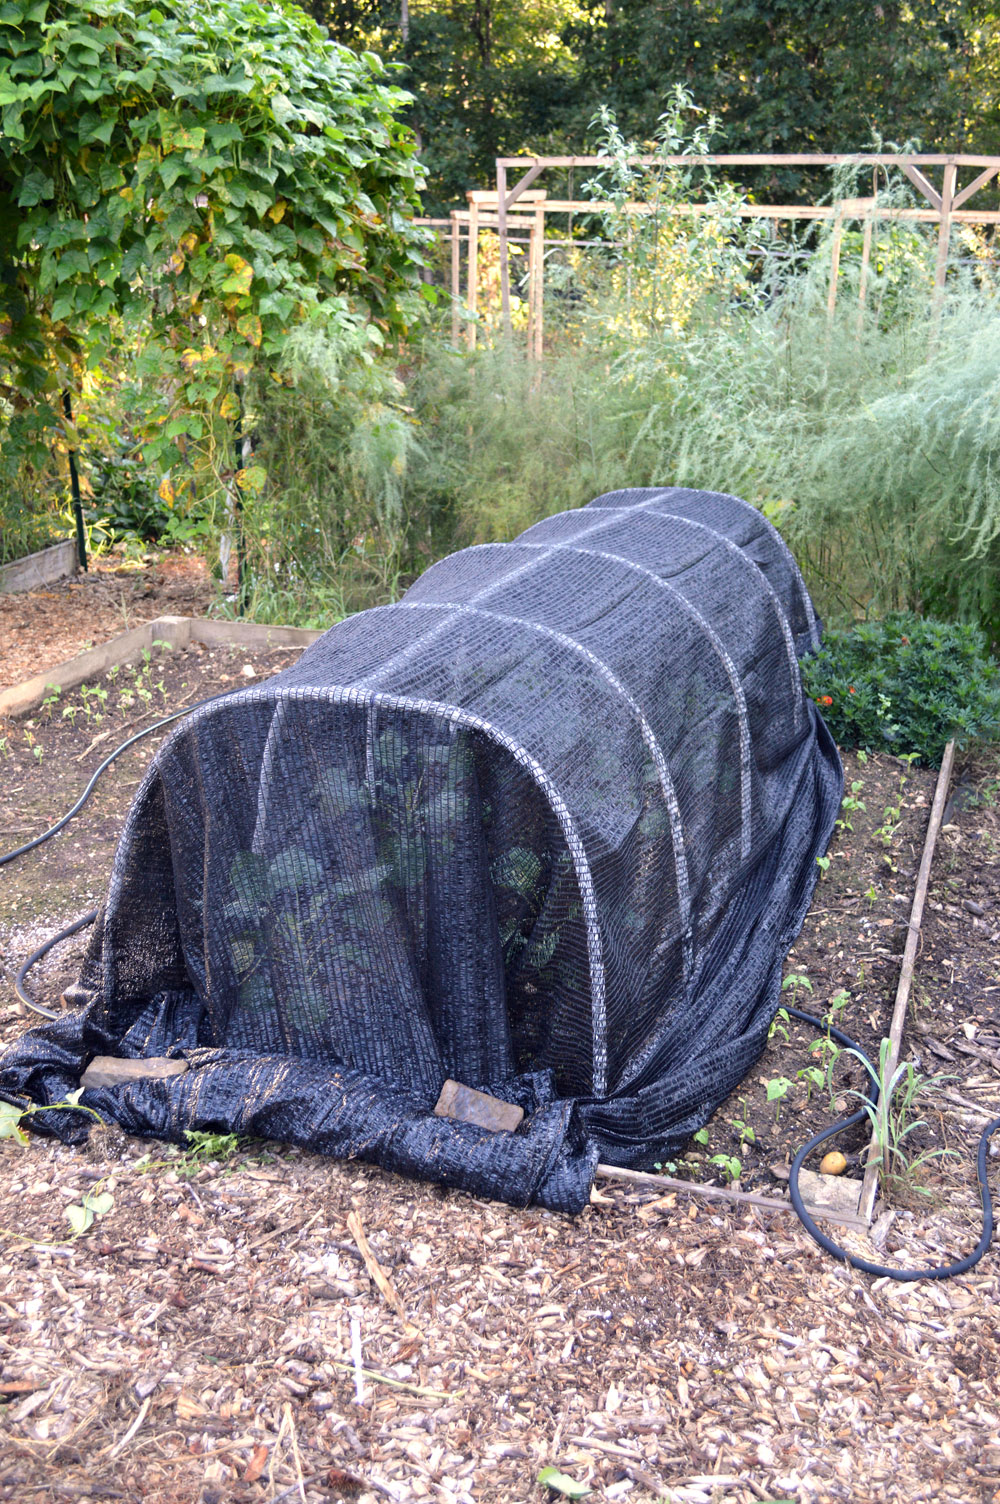 Shade Cloth on Low tunnel
Other Options for a Covered Space
Low tunnels are a low cost version of a greenhouse that are very adaptable. If you’re looking to level up to a tunnel that is easier to manage and work in, I recommend using a high tunnel or greenhouse. I have a cost comparison of greenhouse types in my post, is a greenhouse worth it?
We used low tunnels for years but moved to an area that had no Property Owners Association rules (yay!) so finally could build a high tunnel. It’s amazing. We still use low tunnels inside the high tunnel for extra cold protection.