How to Grow Peppers | A Beginners Guide
Peppers make a fun and rewarding plant to grow because they come in so many varieties! They come in all kinds of colors and often change colors as they mature. Some are sweet, others are spicy, and their walls can be thick or thin. In this beginner’s guide, I’ll show you how to grow peppers from start to finish, based on my personal experience from nearly 20 years of successfully growing them.

Choose the Right Variety
I remember the first year I grew peppers. It was going well until all the leaves fell off and I didn’t harvest a single pepper. After a little research, I found it was likely due to bacterial leaf spot, a fungal disease.
Later, I saw a local farmer growing them and knew it was possible in my area. Turns out some types of peppers are easier to grow than others. I tried a few other varieties and was eventually able to find some winners!

The moral of the story is it’s critical to pick a variety that works for your area. This is your first step to success!
Here are some other considerations when choosing a variety:
- How long is your growing season? If you don’t know you can find out using this calendar. Peppers are heat loving crops and will die in a frost.
- What is your climate like? Is it humid, rainy, and the plants are prone to disease? Or do your plants rarely get disease because it’s dry?
- What type of pepper do you want to grow? There are sweet bell peppers, sweet snacking peppers, thin walled spicy peppers, and thick walled spicy peppers like jalapenos!
I’ve compiled a list of the best peppers to grow as a beginner. Obviously there will be some opinion and bias in this list. But I hope it helps you get an idea of where to begin. Start here, then feel free to venture out and try more based on trial and error.
Sweet Bell Peppers: Iko Iko Sweet, Emerald Giant
Short Seasonal Sweet Bell Peppers: Yankee, King of the North
Other Sweet Varieties: Carmen,
Mildly Hot Peppers: Tam Jalapeno, Early Jalapeno, and Banana
Medium Heat to Very Hot Peppers: Cayenne, Habanero
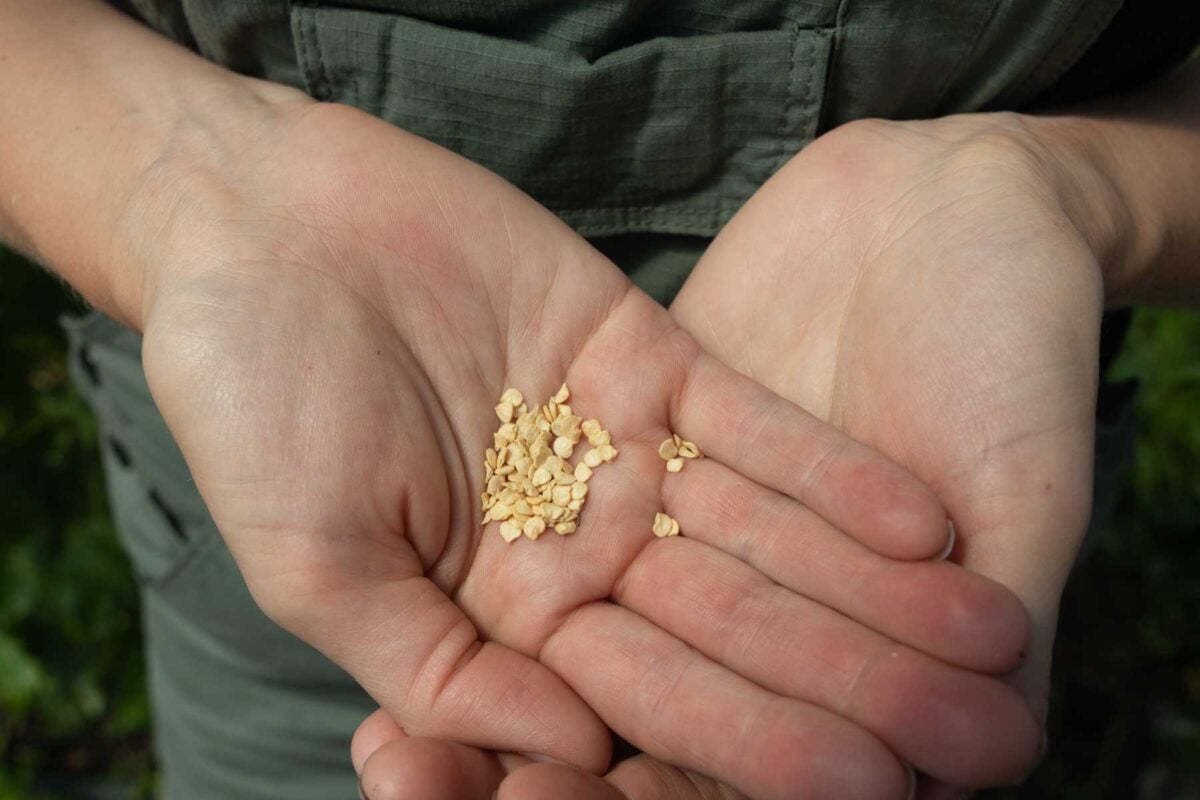
How to Start Pepper Plants from Seeds
Peppers are easy to grow from seed if you remember one thing. They love heat. Putting them in seed starting soil and then expecting them to germinate in a 68ºF home is a recipe for possible failure.
I don’t mean that to be discouraging. Instead, I want to help you be successful so let’s avoid it! The reason for avoiding it is the pepper seeds will either be very slow to pop up (2-3 weeks) or will rot in the soil.
Before I go through the steps, if you need help on the basics I have resources for you. You can check out my indoor seed starting guide or my guide to start seeds outdoors in a greenhouse or unheated hoop house.
Start seeds 8 weeks prior to transplanting outdoors.

STEP 1: Wet down a seed starting medium and put it into trays or make soil blocks. Create a depression a quarter inch deep in each cell or if using blocks, use the standard ¼ inch deep dibbler when making blocks.

STEP 2: Add 1-2 pepper seeds in each cell or block. Cover seeds with moist soil medium. Then place trays on a heat mat. A heat mat for underneath the tray or another heat source like setting near a wood stove is essential. If possible, maintain soil temperatures at 80-90°F (27-32°C).
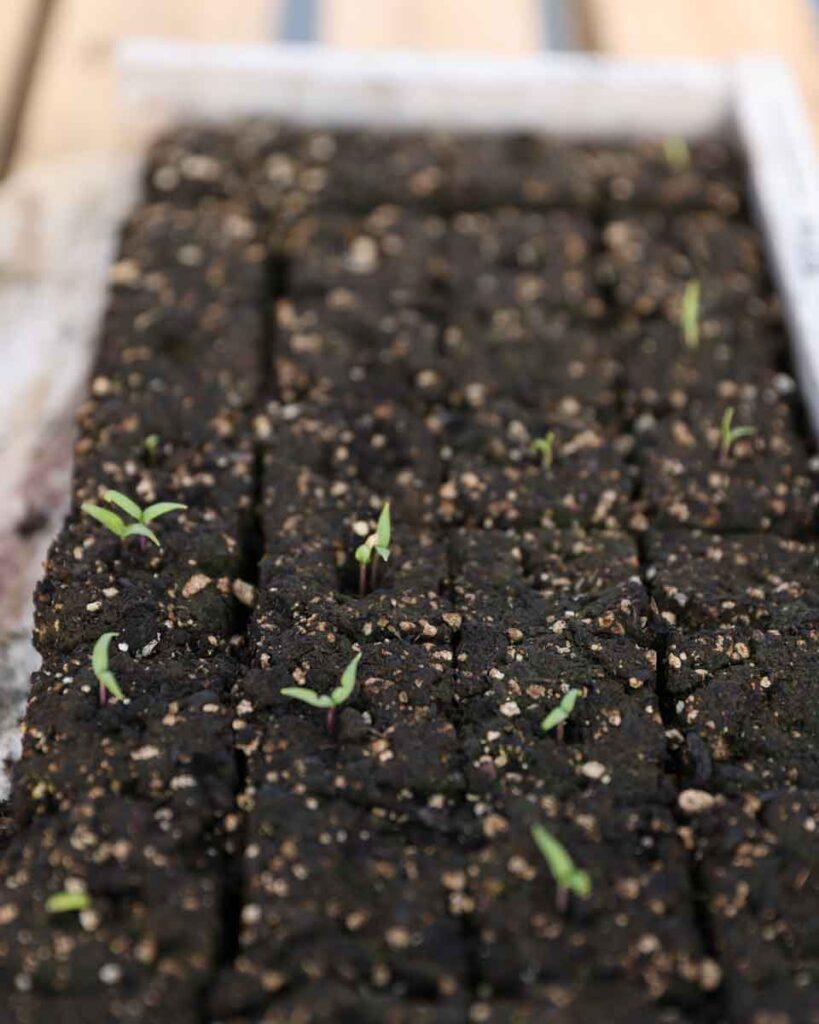
STEP 3: After all the plants have sprouted, take away the heat mat. Seedlings should be grown at 70ºF if growing in a temperature controlled area.

STEP 4: When the first true leaves appear, transplant seedlings into 4 inch pots or soil blocks.
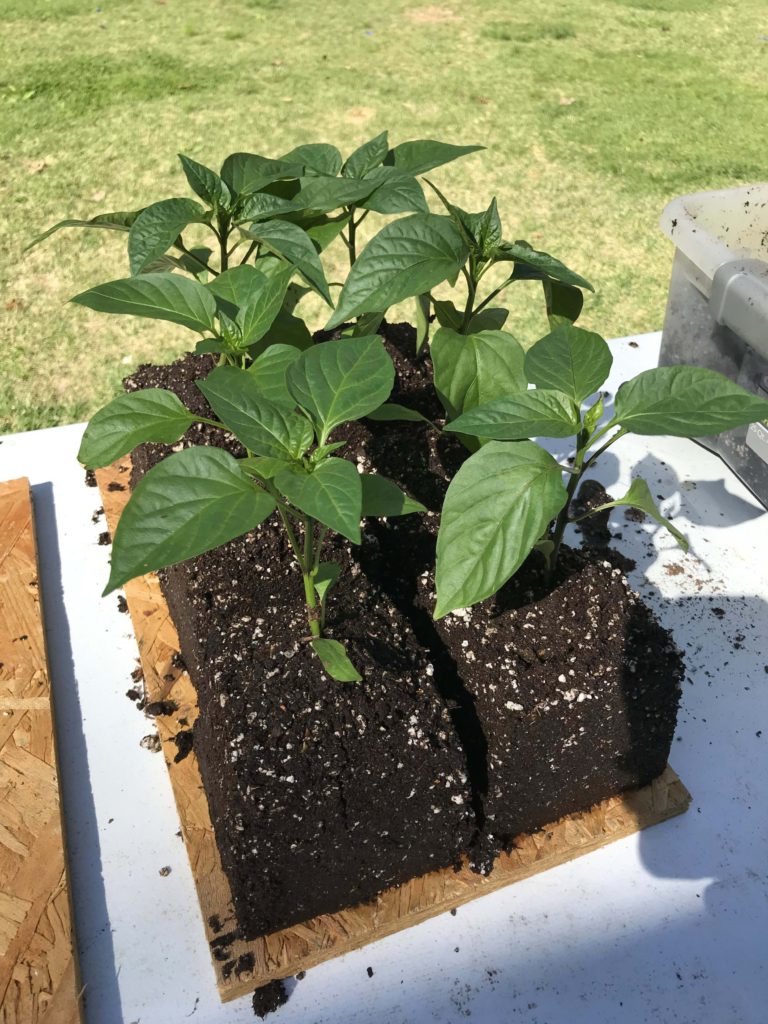
How to Transplant Pepper Seedlings & Best Timing
Whether you’ve started your own pepper plants from seed or bought some from the store, the instructions are the same.

If growing indoors, harden off plants prior to transplanting. Transplant outdoors after all danger of frost is past. If chilly temperatures are expected even after your last frost, wait to plant. Peppers can be stunted by the cold. Plant when daytime temperatures are around 70ºF while night time temperatures stay above 50ºF. The soil should be warm, at least 75ºF if possible.
Space pepper plants 12 to 18 inches apart depending on the variety. In a 30 inch wide bed plant 2 rows, staggering plants down the garden bed. If planting in a raised bed space plants 12- 18 inches apart in all directions.
I highly recommend using an organic mulch to keep in soil moisture and to prevent weeds.

Fertilize your pepper plants. Fertilizer can go in the planting hole (if mixed well with the soil) or side-dressed by placing it over where the roots are located. Another option is to use a liquid fertilizer that is diluted in water.
See below for fertilizer recommendations.
The Best Fertilizer for Pepper Plants
The best fertilizer for pepper plants should be customized to your soil. Therefore, I highly recommend taking a soil test first if you haven’t yet.
I personally add a 2 tablespoons of blood meal and 2 tablespoons of kelp meal at planting.

Peppers also like high phosphorus but my soil already has phosphorus levels off the charts so I don’t add any. If you need phosphorus, I recommend adding some bone meal or rock phosphate.
I also add minerals to the soil once a year. If I haven’t added to that garden bed yet I’ll add some Mineralyte Build, it is a fantastic mineral addition.
Tips & Tricks
- Hot pepper plants are generally smaller than sweet ones and can be spaced closer together.
- Collars are good insurance against cutworms.

When to Harvest Peppers
Did you know a red pepper is a green pepper that has matured on the plant for longer?

Harvest first peppers promptly to stimulate further fruit production. Peppers can be harvested and eaten at either unripe (green) or ripe (colored) stage. Colored peppers generally require 2 – 4 weeks longer on the plant before harvesting.
Common Diseases
Bacterial Spot
The most common disease seen on peppers is bacterial spot. This can appear both on the fruit, and on the leaves. It shows itself as leaf lesions that turn dark brown to black with a central tan area.
Leaves with spots eventually drop off the plant. If the fruit is affected it will have spots that are brown to black with a warty appearance.
The disease persists on both plant residue and seed so make sure to purchase only disease-free seed.
Anthracnose
Another common disease I personally deal with often in the fall is anthracnose. It can be identified as lesions (spots) that are sunken and round on the fruit.
In moist conditions those lesions will develop peach colored spots in the center and sometimes have concentric circles surrounding the lesions.
You’ll see anthracnose most often in mature, colored fruit. It develops when temperatures are above 80ºF and conditions are wet.
FAQ
If you haven’t heard of it before, there is a common recommendation among older gardeners to “add a pack of matches to each planting hole when planting peppers”.
This is because matches contain both sulfur and phosphorus which is good for peppers.
However, matches also contain a whole bunch of other chemicals that I would definitely avoid if possible.
An easy alternative to matches is to add minerals to your soil and another source of phosphorus like bone meal in a small amount. (See my recommendations about fertilizers above if you haven’t yet.)