How to Freeze Green Beans from the Garden
Last week the bulk of my green bean harvest came in and it was more than we could eat, a great problem to have! To preserve green beans for winter, we prefer to freeze them.
I mentioned this on my Instagram and I was surprised at how many people wanted to know how it was done. Or at least my own personal technique of freezing green beans.
As a result of that question, I am going to go through some of these basic preserving techniques in a new series of blog posts throughout this summer.

For many people preservation has not been taught to them from parents or grandparents. I am one of those people and this wasn’t taught to me from my family. I did a ton of research and put in a lot of time to learn.
Now that I have the years of knowledge and experience under my belt, I am excited to teach you all how I do my preserving. I hope this gives you a short-cut to success.
To start out this week I am sharing how I freeze green beans from the garden.
Green beans are harvested quickly by pulling up on the bean. When pulling up it detaches from the plant easily. However, it does maintain the little stem on the top and it needs to be cut off in the kitchen in preparation for freezing.
Sometimes to save myself time in the kitchen, I will cut the bean below the stem connection with scissors while I am outside. Or pinch that part with my fingers and it comes off that way. Any of these methods work great, it’s just a personal preference of whether you want to do the work now or later 🙂
Step 1:
After harvesting the beans, I fill the bowl with water, swish them around in the bowl and then drain. This method is what I use with almost all my washing of veggies. Simply rinsing them over the top with water doesn’t get everything off.
Step 2:
Next I fill a saucepan with water and turn the burner on high to get it boiling. At the same time, I fill a seperate bowl half full of ice and water and set it aside.

Step 3:
While the water in the pot heats up, I drain the rinse water off the beans and chop off the stem part of the bean if it is still on there.

Step #4:
Once the water on the stovetop is simmering, add in your beans and set the timer for 3-4 minutes depending on the size of the bean. You want them to cook long enough that the enzymes in the bean are gone. This process is called blanching. These natural enzymes are what will continue to break down the bean in the freezer if you do not blanch.

I usually wait until the bean is bright green. It should lose a little of it’s crispness but not be so cooked that it becomes soft or mushy. Remember that the blanch is only enough to keep the bean in good condition in the freezer.
Step 5:
After simmering for 3-4 minutes, remove the green beans from the water using a slotted spoon or tongs. Plunge them immediately into the ice water. This prevents the green beans from continuing to cook after taking them out. It also prepares them for the freezer.


Step #6:
Once the green beans are cooled, you can drain the water if you are doing one batch or if you are doing multiple batches remove them with a slotted spoon again so you can reuse the water.

Step 6½:
You can cut the beans to bite size at this point or leave them whole and skip to step #7. I choose to do this after blanching because the beans lose less nutrients and cook more evenly.

#7 Place the green beans on a baking tray spread out evenly (no overlapping if you can avoid it) and flash freeze them. The purpose of the flash freeze is to freeze them just long enough that the moisture becomes solid and the beans won’t stick together as I package them.

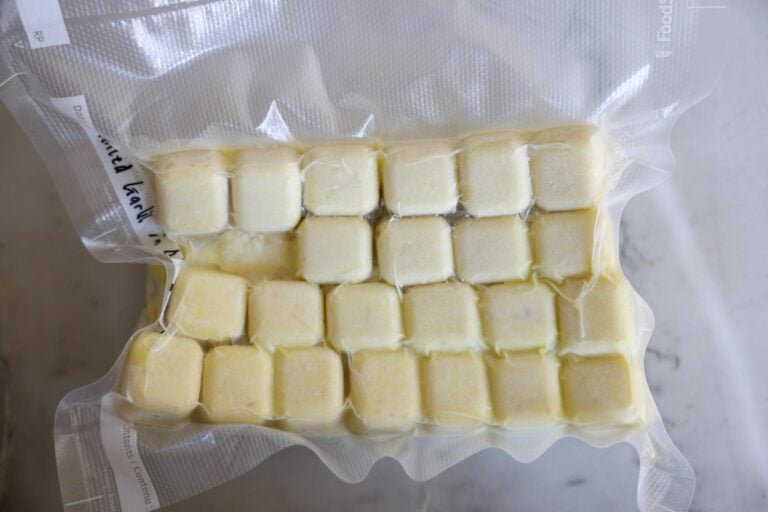
#8 Next I portion the beans into bags and vacuum seal them. You can also use regular freezer zip lock bags. I would attempt to suck out some of the air so they don’t freeze burn as easily though if you use that method.

#9 Label and Freeze!
It’s that simple! When it’s time to use them and cook them in winter, take the frozen beans and you can steam them or cook them in simmering water until hot. This is usually 2-3 minutes if they are already bite size pieces. I’ve also roasted them in the oven with good results. They are good in soups and stews as well.