How to Harvest, Cure, and Store Garlic- Long Term
How to Harvest
Garlic is wonderfully easy to grow in most areas. But when it comes time to harvest, knowing when the garlic is ready and at its peak can be tricky!
For me, I was looking for an exact formula of knowing when it was ready. From my research opinions varied across the board as to exact harvest time. However, the common thread I did find was to look at the leaves above ground.
This post contains affiliate links. Here is the full disclosure.

The best results come from waiting for a portion of the bottom leaves to yellow or start to yellow. Some sources say wait until two-thirds of the leaves are yellow, others say to wait until about 40% are yellow. I usually aim for somewhere in the middle of this at about 50% the leaves turning yellow at the bottom. Obviously with so many different opinions on the matter it isn’t an exact science.
Sometimes it can be difficult to tell how much of the plant is has yellowing leaves because after the leaves yellow, they get crispy and fall off, leaving little evidence they were there. And yet if you look closely, you can see where they once were and count upwards leaf loss.
Another thing that threw me off my first year harvesting was I was waiting for the entire leaf to turn yellow. When really sometimes they just get streaks of yellow. I usually count that as a yellowing leaf.
Another sign of readiness I have noticed is that the entire plant starts to get pale in color. In Spring they are bright and vibrant green but as the leaves start yellowing at the bottom the rest of the plant turns a softer green.
If you’re still unsure, you can harvest a few garlic and see if they are big enough. If they still seem small, wait a little longer.
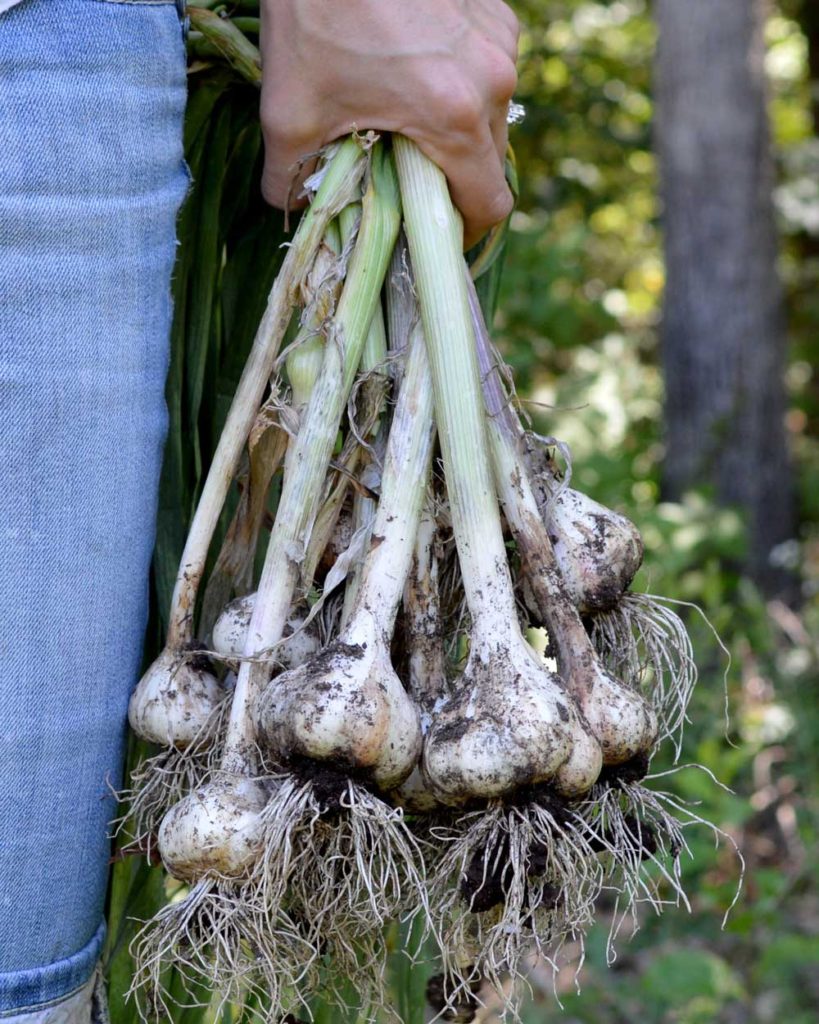
Below is a photo of my own garlic that is very near readiness. I will wait another week or so to harvest.

What Happens if I Wait too Long to Harvest My Garlic?
Let’s say you waited until the majority of the leaves or all the leaves turned yellow. Here is what would happen:
Each leaf represents a wrapper around the garlic bulb all these layers keep in individual garlic cloves into one tidy bulb. If you wait too long the wrappers will be gone and you will be left with individual garlic cloves and nothing to hold them together.
Waiting too long and losing the protective cover on the garlic shortens the shelf life significantly. The garlic would still be edible at that point but it would not last long in storage.
The Proper Harvesting Technique
There are a couple ways to go about actually removing the bulbs from the ground. I will tell you my own experience.
One year I harvested with a pitch fork. My thought was that it would be similar to potatoes and really make it a cinch to pull out of the ground. It was very easy but you need to be incredibly careful not to poke your garlic bulbs.
I was being careful but still managed to poke a few. It’s not too big a deal, I used them up quickly in my canned preserves I made in the summer so they didn’t go bad. But it wasn’t the best method of harvesting.
Another year I was just pulling a bulb or two to test readiness. I was already in the garden and my curiosity got the better of me. I yanked one up by the stem without a tool. The whole stem broke off leaving my bulb in the ground. My lesson was well learned. Do NOT harvest garlic by pulling!
The best method of harvesting garlic is to take a little hand garden shovel or something similar dig down beneath the roots and use the lever action of the shovel to loosen it out of the soil. I hope I’m not making that sound more complicated than it is. Use the hand held shovel and dig it up without damaging the bulb.

How to Cure Garlic
In this modern time, we have the information of years of research as to the exact conditions needed to cure garlic and store it properly.
Here is the commercial recommendation for curing and storage:
“Curing in the field runs the risk of sunscald, while poorly ventilated barns can result in loss from disease. Avoid high temperatures (over 90 F) and bright sunlight. Rapid curing can be achieved by placing bulbs roots up on 1” wire mesh in a hoophouse covered with a shade cloth, and with the sides and ends open.
A well-ventilated barn will also work, but be sure that bulbs are hung with adequate air circulation or on open racks up off the floor. Curing takes 10-14 days…
For long-term storage, garlic is best maintained at temperatures of 30 to 32 °F with low RH (60 to 70%). Good airflow throughout storage containers is necessary to prevent any moisture accumulation. Under these conditions, well-cured garlic can be stored for 6-7 months.” -University of Massachusetts Extension
While that is quite useful for commercial growers, applying it to a home setting takes some tweaking. Here is what I do:

After garlic is harvested, the first thing you want to do is remove it from the garden to an area that is dry and covered. I take mine and put it on a screen that Cameron made for me that allows air to circulate around the bulbs. It is a 3×3 foot screen that is sandwiched between a frame of wood around the edges (photo of the screen is earlier in this post). I put the screen with the garlic laying on it under our covered porch.
I do NOT cut off the tops at this point because I hang my garlic for storage.
If you are in a dry and not humid area, leaving it in a covered area with lots of air circulation would be a great place to finish curing it. Garlic takes around 2-3 weeks to fully cure. You want the entire garlic stem and neck to be dry and papery.
In my humid area, I often find my garlic doesn’t like to dry all the way outdoors. The past few years I have been bringing it to my bedroom placing it on our laundry drying rack and putting a fan directly on it for the last week of the cure.
If you choose to braid or tie your garlic, it’s a little easier to do that before the garlic stem is completely dry. The stalk should be limp and very near dryness but not so dry it shatters in your hands when braiding or tying.
Softneck varieties can be braided and Hardneck will need to be tied.

How to Store Garlic
While sources say to keep garlic cold (see the reference above), I personally have had excellent results storing my garlic in less than ideal conditions.
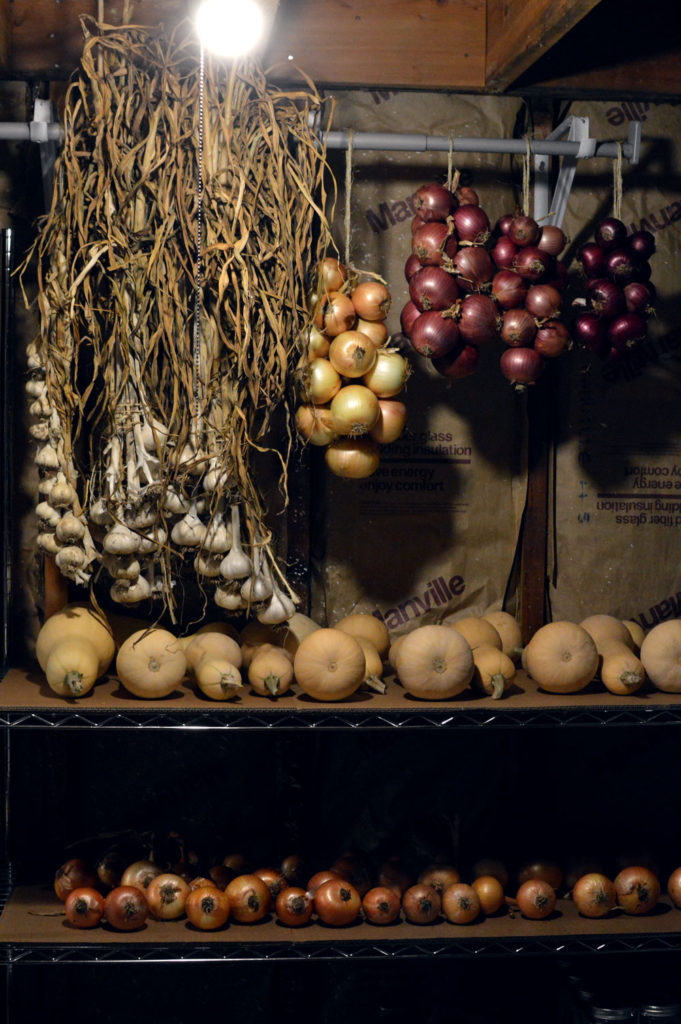
One thing that I feel really helps is braiding and tying the garlic and hanging it. Even though by the books it’s not technically required, it allows a good amount of air flow around each bulb. And it also looks cool. I always feel like a legit homesteader when I braid garlic!
My storage room is about 55º F all winter long. My hardneck varieties easily last 6+ months and my softneck stores for 9+ months. I’ve had some last over 1 year. The humidity of that room is 60% in winter.
If you don’t have a basement or root cellar, another option to store food in winter is the garage, as long as you can keep it above freezing in there. A cold closet or area of your home that isn’t insulated well would work too. Just remember that the warmer the area is that you are storing in, the shorter the shelf-life.

.


