How to Prepare Soil for Blueberry Plants
After growing blueberries for 15+ years in two different locations, I’ve learned a lot about how to successfully prepare soil for blueberry plants.
My Story of blueberries
As a little girl, I lived in a suburban neighborhood. My house and the house next door had no fence in between our yards. The dividing line was our neighbors blueberry bushes which were just feet from our own little garden beds.
I remember walking by and seeing the blueberries ready. My siblings had told me not to pick them but they were ripe and it was so tempting. I tried one and then two, they were delicious! I didn’t eat more than that but I wanted more.
The blueberries felt like forbidden fruit. The blueberries at the store never were quite like my childhood neighbors blueberries. After years of waiting, I planted 12 blueberry bushes at our home.
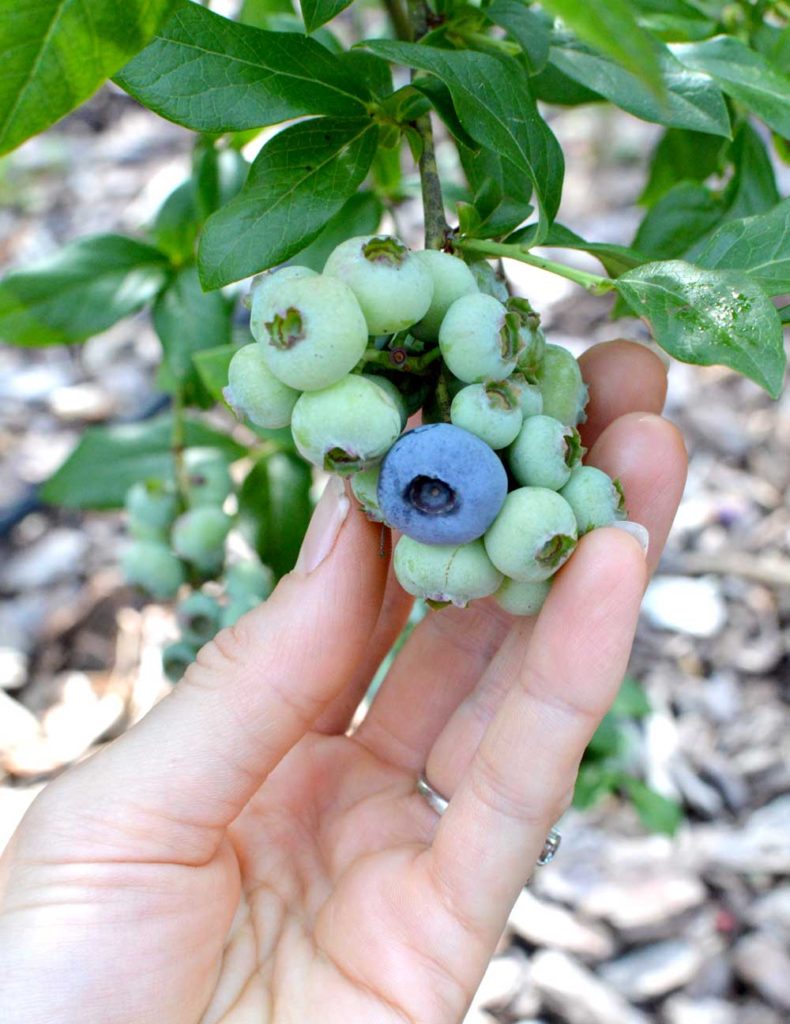
After the second year, the blueberries produced a little bit of fruit. It was an amazing feeling to be able to be free to eat the berries. And as they produced more fruit every year thereafter, I felt like I won the lottery or something! The kids and I would race out each day to get the biggest and best fruit.
As you can tell from my story, I feel that blueberries are delicious and worth a little extra effort to grow. They have different soil requirements than most fruits but a little bit of knowledge will help you be successful.
Low Soil pH for Blueberries is Required
The biggest and most important thing to know about blueberries is that they love acidic soil. To be more specific, blueberries grow best with a soil pH of 4.8-5.2. *Note, different sources vary on this range.
The pH scale helps to measure how acid or basic a substance is. In this case we are measuring the soil to be sure it’s compatible with a blueberry plants natural requirements.
Because they need a high acid soil, blueberry plants are well suited for soils that are naturally a little on the acid side. This includes the eastern and southeastern US and the pacific northwest.
If you have naturally alkaline soil (most of the western US), it can be amended but needs much more effort. You must dig deeply and very wide then add sulfur to get to the recommended ph. Yearly monitoring would be need to ensure proper PH.
How to Find out Your Soil pH
No matter where you live, the first step would be to determine your soil pH if you don’t already know it. Here is some information on soil testing with what I personally think is the best professional soil test kit.
Below you’ll see an image of my soil test the first time I tested the soil for the blueberries. The soil test kit I use has an option to categorize what is being tested. In this case “small fruits” was the best fit. Normally small fruits require a 6.2-6.8 optimal range as noted in the image below.

However, since low pH of blueberries needs to be low and is unique, I sent and an email after the results came back. I told them this was specifically for blueberries and they told me exactly what to do! I’m adding a screenshot of the email because it was so helpful!

The alternative is using your local cooperative extension. I used to do this but it is a slow process and they don’t give organic recommendations.
I Do NOT recommend using the $10 pH tests sold at hardware stores. They are cheap for a reason. You can’t get a precise reading when you are trying to determine soil pH with water colors or litmus strips.
If you’re going to spend the time and money to invest in blueberries, you may as well do it right!
Preparing the Soil by Removing Weeds, Grasses, and More
While you are waiting for your soil pH test results to come back, its a good time to prepare the planting area for blueberries. This is done by removing weeds, perennial grasses, rocks, tree stumps, tree roots, and anything else in the soil that could possibly hinder blueberry growth.
Blueberries have very shallow roots which do not like competition from other plants. Be diligent about removing any and all weeds before planting. Prevention goes a long way and is worth the time.
As I am writing this, I am also preparing my blueberries for planting at our new farm! We have a lot of bermuda grass.
If you aren’t familiar with bermuda grass, it’s a noxious weed that spreads by rhizomes under and over the soil (and pretty much anything else). To give an example of how aggressive it is, it can grow under one side of a concrete sidewalk and pop up on the other side!
We plowed our pasture and it left little bits of bermuda rhizomes everywhere. They will regrow if left there. At the advice of a friend, I decided to sift out the bermuda grass from each row. It takes a long time but it will be worth the effort.
Soil Texture
Blueberries like a soil that is high in organic matter. They also tend to prefer a light soil. For these reasons, I add 40% peat moss and 10% compost, then the remaining native soil should make up the last 50%.
IMPORTANT NOTE! Do not use mushroom compost or composted manure in soil used for blueberries. It will likely kill your plants due to the high nitrogen content. If you are unsure as to whether or not your compost is suitable for blueberries, leave it out.
Peat moss is not required but it helps with a heavy clay soil, lower the soil acidity (peat moss on average has a pH of 4.0), and it also helps get the proper soil texture. If you have a loamy soil, close to equal parts sand, silt, and clay, it’s not necessary.

Lowering Soil pH
Now that you have determined soil pH from testing, and have the area free of grasses and amended, you can adjust the soil pH if necessary.
Pine needles, aged compost, sawdust, and old leaves have a small effect on soil pH but the effect generally isn’t enough for the low soil acidity required for blueberries. Therefore, the best and most long lasting way to lower the soil pH is by adding sulfur.
Types of Sulfur
There are a few types of sulfur available for lowering the soil pH. The most widely available are elemental sulfur (organic) and Ammonium Sulfate (synthetic). Both can be used for lowering soil acidity but each has pros and cons.
Ammonium Sulfate is an extremely soluble fertilizer, making the sulfate quickly available to plants but very prone to leaching. Because of its strength, care must be taken when applying Ammonium Sulfate so as to not burn any existing plants.
Elemental sulfur requires a longer time to lower the soil pH because it works with natural soil bacteria. The soil bacteria convert sulfur to sulfuric acid thus resulting in a lower soil pH. Michigan State University states this well:
“It is important to note that this [adding elemental sulfur] is a biological process (slow) and not a chemical reaction (rapid). The bacteria are active, when the soil is moist and warm. The soil temperature needs to be above 55F. The bacteria are not active in the winter so fall applications of sulfur have little effect on the soil pH next spring.”
Time Required for Sulfur Applications to Acidify Soil
As I mentioned above, allowing enough time for sulfur to acidify soil is necessary. I always want to plant blueberries right away! We are a culture that doesn’t like to wait. But you really need to give time to let the sulfur work.
Six months would be a very minimum amount of time, especially if you are using elemental sulfur. One to two years is more ideal.
Have your soil tested again several weeks before planting to ensure it is in the proper pH range for blueberries.
Sulfur Application Rates for Blueberries
Application rates can get a bit tricky and confusing. In researching this article I have seen application rates vary widely, even from reputable sources.
Because of the widely varying application rates, and because I want you to be successful, I recommend checking the packaging of the product you are using for a guideline.
I normally use Epsoma Soil Acidifier. I’ve linked it but sometimes you can get it locally for a better price.
Epsoma recommends 12lbs per 100 square feet to lower one pH point. It is specific to that product and I haven’t seen that high of an amount anywhere else.
I was not able to pin down exact application amounts for elemental sulfur vs. Ammonium Sulfate and therefore if your sulfur packaging does not have an application amount on it, call your local cooperative extension office and find out. They are very helpful!
The Waiting Game
While you’re waiting natural biological process of lowering the acidity of the soil to happen from elemental sulfur, you need to cover the soil. You will want to add mulch after planting the blueberries but you can also do that now to cover the soil.
When planting time comes, rake away the mulch to plant and then put it back into place. Pine needles, wood chips, and finely shredded leaves are good candidates for mulching prior or after planting. It is recommended that you not use anything that can mat down and suffocate the plant roots, like whole leaves or grass clippings.
If you would rather not have to worry about accidentally mixing in mulch with your soil at planting time, a tarp or planting a cover crop are good alternatives.
Cover crops are planted to build or retain soil health and not for harvest. Examples include winter rye, sorghum sudangrass, millet and buckwheat. Cornell university has some excellent information on cover crops suitable for blueberries if you want to try going that route.
The Boiled Down Summary
Even though some blueberry soil preparation may sound complicated, it’s really not. Here is the concise version of steps.
- Take a soil sample from the location where blueberries will be planted and get soil tested.
- Remove Grasses, Weeds, Tree Stumps, and Roots from Soil prior to planting.
- Improve the soil texture by adding peat moss and a small amount of compost.
- Add sulfur if needed using recommendation from packaging and current soil pH to get to 4.5-5.2
- Give the sulfur time to work. 6 months+ (Don’t leave the soil uncovered while you wait. Use mulch, a tarp, or a cover crop to cover soil).
- Remove or push aside whatever you used to cover the soil and then plant.
Here is additional information on the best blueberry plant spacing.


