DIY Farmhouse Pantry Makeover
I’m excited to share all the details of our recent DIY pantry makeover with you! The pantry started with basic builder grade shelving that was sagging after only three years of use. We transformed it into a very functional pantry with lots of storage and a farmhouse design to fit our home and style.

Our Pantry Before
Our home was custom built so you may be wondering why after building a custom brand new home we would be doing a pantry makeover.
The truth is that we needed to stay on budget for our home build. So that meant we got the shell of the home finished but didn’t add any character to our home.
So we needed to wait, save up, and pay cash for what we actually wanted. Until that time came, we did have the trim guys do some cheap shelving in the pantry but we always knew it would be temporary.
Pantry Shelves and Cabinets for Organization
It took 3.5 years before we were ready! But waiting ended up being a blessing because after living in a space for a while, we got a better idea of what we needed to store and how.

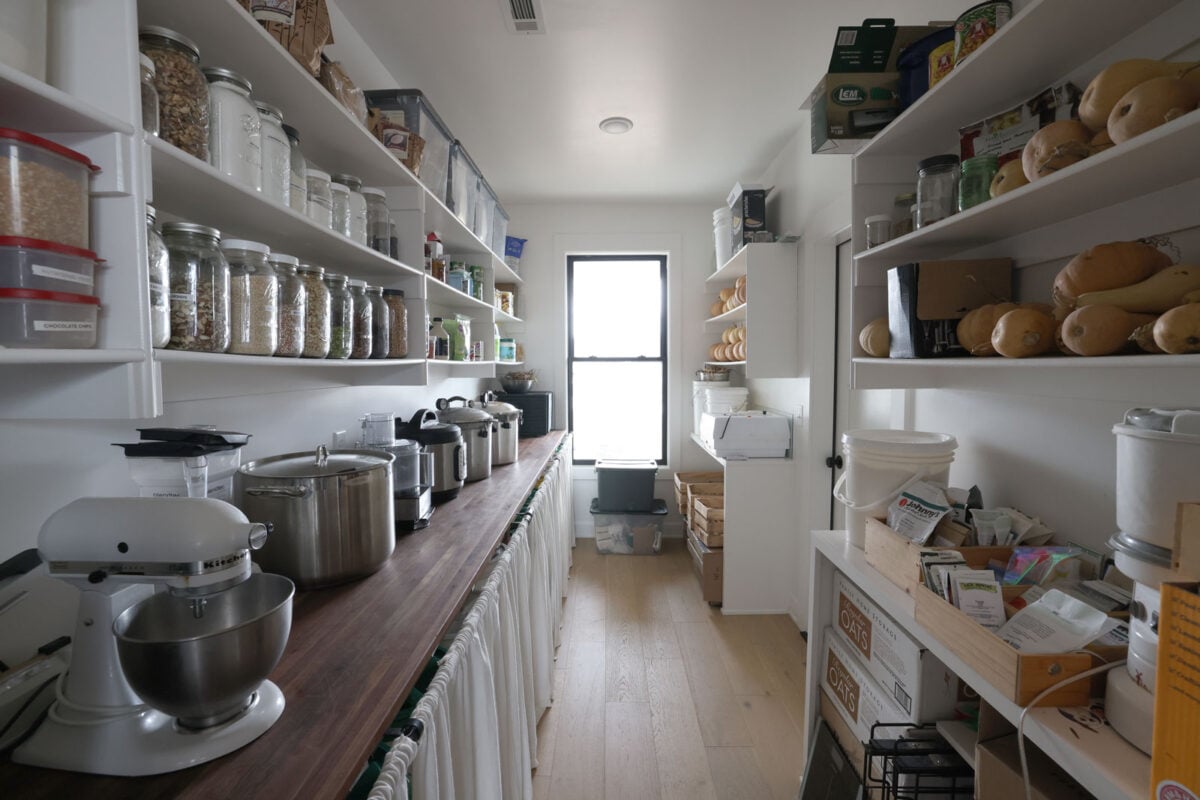
In a pantry, it’s great to have open shelving so everything can be easily seen. However, some things are just plain ugly and having them visible everyday made our pantry feel cluttered.
I realized that the best solution was a hybrid of open shelves, closed door cabinets, and storage hidden behind curtains.
So I’ll explain how each space is organized and what we store there.
Pantry Cabinet Storage
Behind our new cabinets we store items that are best left in their original containers. These are items like vinegar, mustard, oils, ziplock bags, parchment paper, and more. They are never going to “look pretty” or be something we want to stare at so they are behind closed doors now.
We also wanted an area to put all the smaller kitchen appliances that we use often. Originally they were stored out on the countertop but it was messy looking. We designed the cabinets to be large enough to hold our most used appliances.
Our entire kitchen has drawers for the lower cabinets but we actually chose doors in the pantry because we wanted the space to be more flexible and hold more. In those bottom doors we store 2 gallon buckets of flour, freeze dried food, and bigger appliances like the pressure cooker.
Pantry Shelf Organization
The open pantry shelves are a way to easily see all the dry storage foods we use. If you’re new here, you’ll notice we don’t have a lot of packaged snacks and colorful packages. This is not just for show or a picture!
Favorite Storage Containers
We cook just about everything from scratch so we have lots of bulk ingredients that need storage. My favorite way to store smaller portions of dry storage foods is in half gallon size mason jars.
Mason jars are uniform, the design never changes, and they are almost always available for purchase when we need more.

Aside from looks, they also serve a very practical purpose. When combined with the correct lid, they are airtight, rodent-proof, waterproof, and keep bugs out. Here’s where you can find my favorite jar lids. Another option is to use a two piece lid and vacuum seal jars that aren’t used often.
Speaking from experience, it’s completely devastating to have so much food destroyed by pantry moths, weevils, and mice. The jars may be more expensive than a plastic container but they are worth it.
At first I worried about using them with kids around but my kids quickly got used to them and are careful so they don’t break. The only person who has ever accidentally dropped and broke a mason jar was Cam! 🙂
I use a label maker to label the jars that have contents that aren’t easily distinguished.
Baskets
We also utilize baskets on the top shelf to store things we don’t use often. This is mostly seasonal items like Christmas and other holiday kitchen items, towels, and decor. I also like to stock up on non-food items and store them up high. We will add some labels eventually, but don’t have them yet.
The baskets we used aren’t sold anymore but here’s where you can find similar baskets.

Under Counter Storage
Several years ago, Cam made a custom walnut countertop. Underneath that space is where we store all our buckets of bulk food. This food storage includes wheat, cornmeal, split peas, rye, spelt, rice, and popcorn kernels.
For the bulk food storage, we use 5 gallon buckets with gamma seal lids. These are my favorite for storing larger amounts of food because they are easy to access but still rodent proof and bug proof (as long as the rubber seal is still in place and in good condition).
Pantry Design Decisions
Custom Cafe Curtains and Curtain Rods
As part of the remodel, I made custom curtains to go under the countertop and cover the buckets. Previously I bought some pre-made curtains but they just never fit right and since they were white, they showed every speck of dirt and food spills.
As a result, custom cafe curtains were a must. To make them I hemmed the edges of the fabric to size, then sewed on pleat tape to the top and attached hooks.
Regular curtain rods stick way out from a wall and in our case, further than the countertop. This left a big ugly gap where you could see the buckets underneath.

Instead of a curtain rod, we opted for a custom curtain rod made of ¾” walnut dowels and then conduit straps to attach it underneath the countertop.
Finally, we placed rings on the rod and hooked the pleat hooks onto that. The only negative of using wood as a curtain rod is that it does sag a little. However, I LOVE the look of them and how they blend into the countertop. So I solve the sagging by rotating the rod every once and a while. It’s a little extra work but worth it and an easy fix.
By the way, the curtain fabric was found at Hobby Lobby on clearance. Since I purchased it as a clearance item, I don’t believe they sell it anymore.
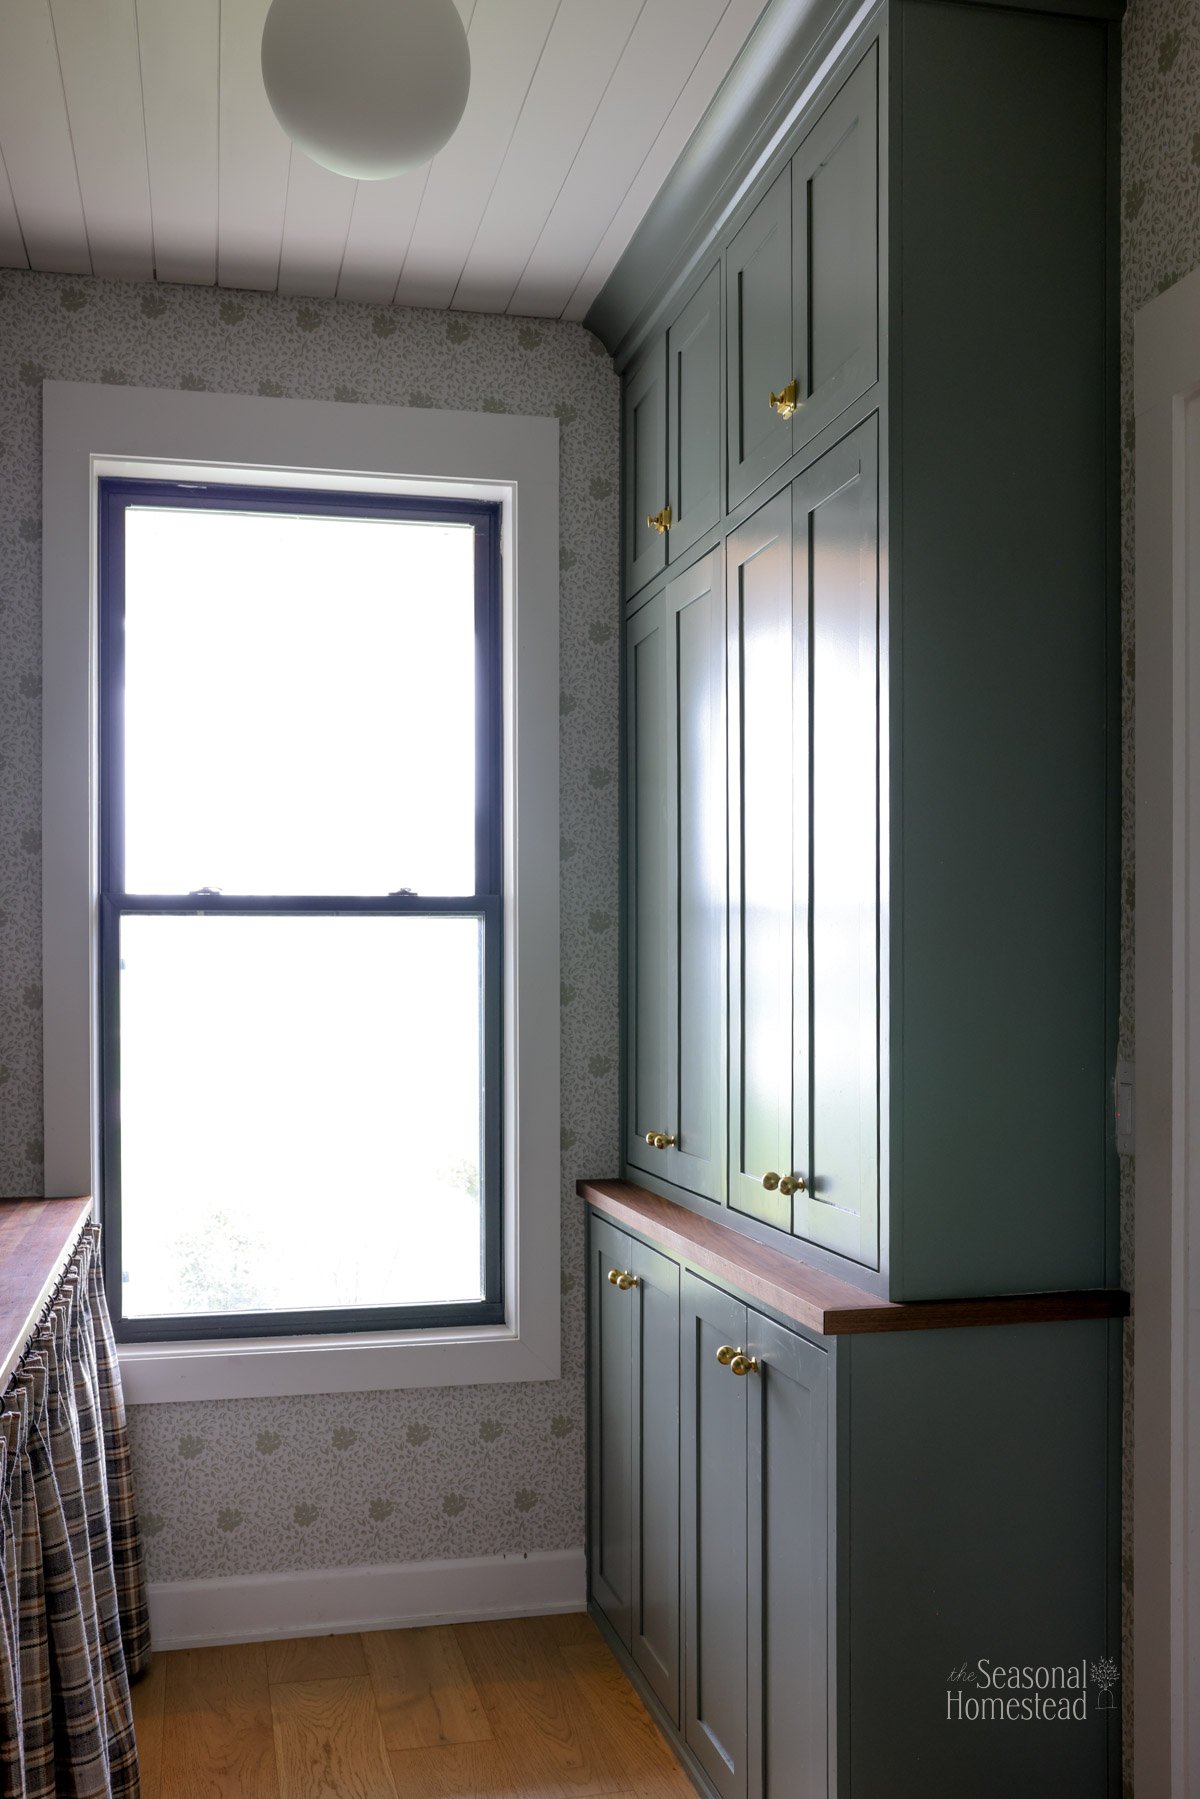
Floor to Ceiling Cabinets
Originally, Cam was going to build our new cabinets but I convinced him not to do so due to our time crunch. The cabinets were by far the most expensive part of the project because we hired them out. They are inset cabinets that match the rest of the cabinets in our home.
At first the cabinets were going to be one floor to ceiling cabinet box. But our cabinet builder informed us that in order to make that happen there would be a seam down the center. This was needed so they could fit it inside our small space.

I really hated the idea of a visible seam. Even though you can definitely add caulk or wood filler, wood always moves and the seam will eventually become visible again.
So I went back to the drawing board (literally) and drew up a cabinet design that didn’t require a vertical center seam. This was a big blessing actually because I like what I came up with so much better!

The cabinets came in two pieces still but instead of vertical they had a horizontal separation. The bottom cabinet is deeper than the top and has a walnut shelf to mimic the opposite counter top. They have the feel of a piece of furniture rather than a flat cabinet.
DIY Open Shelving
The open shelving was custom built by Cam. Before he installed it, the first step was to install vertical shiplap. Then he used maple plywood to create the shelves and then created a face frame made of maple to make it look finished.

The whole DIY build of the pantry is all documented on Youtube! I will link all four videos at the end of this post.
Wallpaper, Lighting, and Paint Sources
The final touches were painting, wallpaper, and adding lights. We ended up painting all the cabinets with the color Benjamin Moore Intrigue. Cam saved $2000 by painting it himself! He hates painting but for how much money is saved, it’s worth it to DIY.
Next was the wallpaper. We choose a peel and stick wallpaper because they are easy to remove if we ever get tired of it. A peel and stick wallpaper is also easy to install and doesn’t have the mess of glue. Here is where I got the wallpaper in the color sage (use code SEASONALHOMESTEAD for 15% off). It’s close to the paint color but not too matchy-matchy.
Finally, I was on the fence as to whether or not to get new lighting instead of can lights but I’m glad I went for it. I ended up with these globe lights in the 10” size.
Watch our Pantry Makeover

Part 1 is demolishing the existing shelving, the cabinet install, and installing shiplap on the ceiling.

Part 2 is demolishing the existing shelving on the opposite wall, installing shiplap behind the new shelving, sewing custom curtains, and installing the shelving boxes.

Part 3 is installing a face frame to the open shelving and creating custom corbels.

Part 4 is painting, installing lights, putting up wallpaper, putting up the curtains, and adding trim. This shows the final before and after!
Final Thoughts
The pantry is now my favorite room in our home. I love how it has a finished feel and character and yet functions so well.
We waited 17 years to build our home and this is the first time I’ve ever had a pantry! I spent a lot of time creating our homestead house plans to fit our needs.
For how much we cook from scratch, I’m glad we dedicated space for a pantry and a cold storage room for food storage.
We are able to create a grocery store in our home. This gives us huge peace of mind because we can hedge against any food supply shortages and increase our own personal food security.
Now the space is not only functional but with the pantry makeover, it’s also beautiful!


