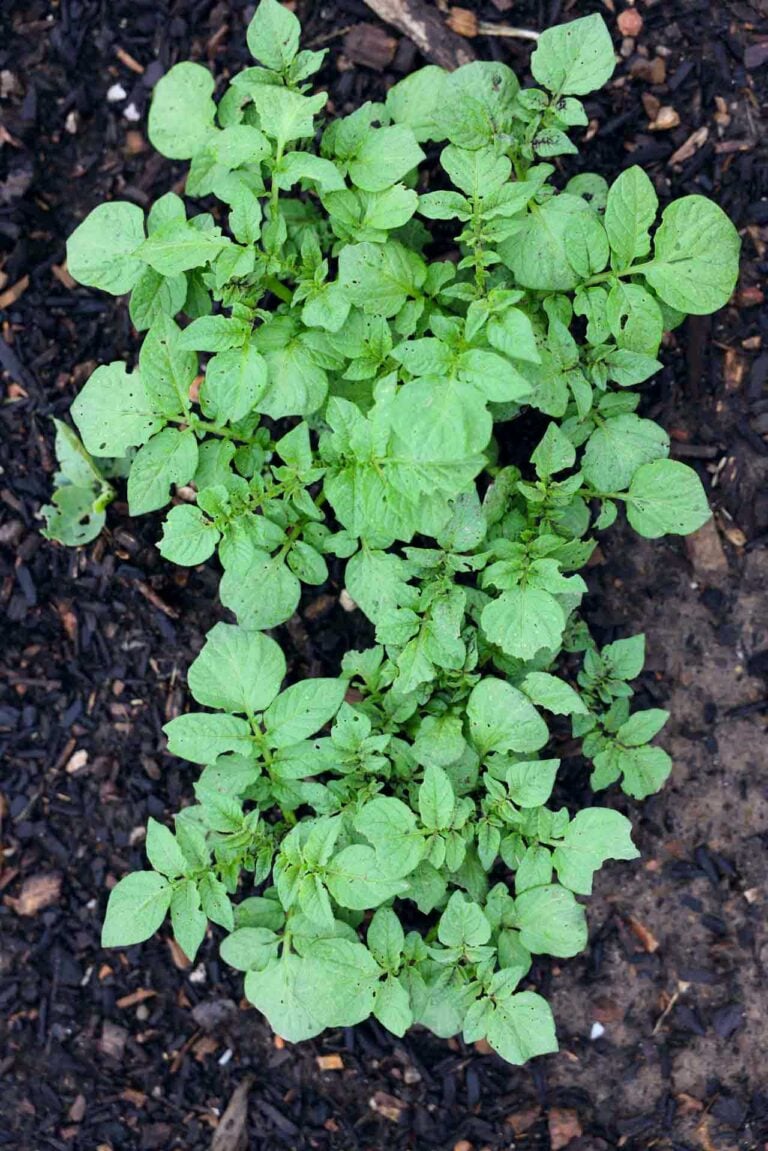
Growing Potatoes for Beginners
Potatoes are one of the best crops to grow for beginners. They are filled with nutrients, fun to harvest, store for a long time, don’t take much space, and are versatile for cooking all kinds of things.
Starting with Seed Potatoes
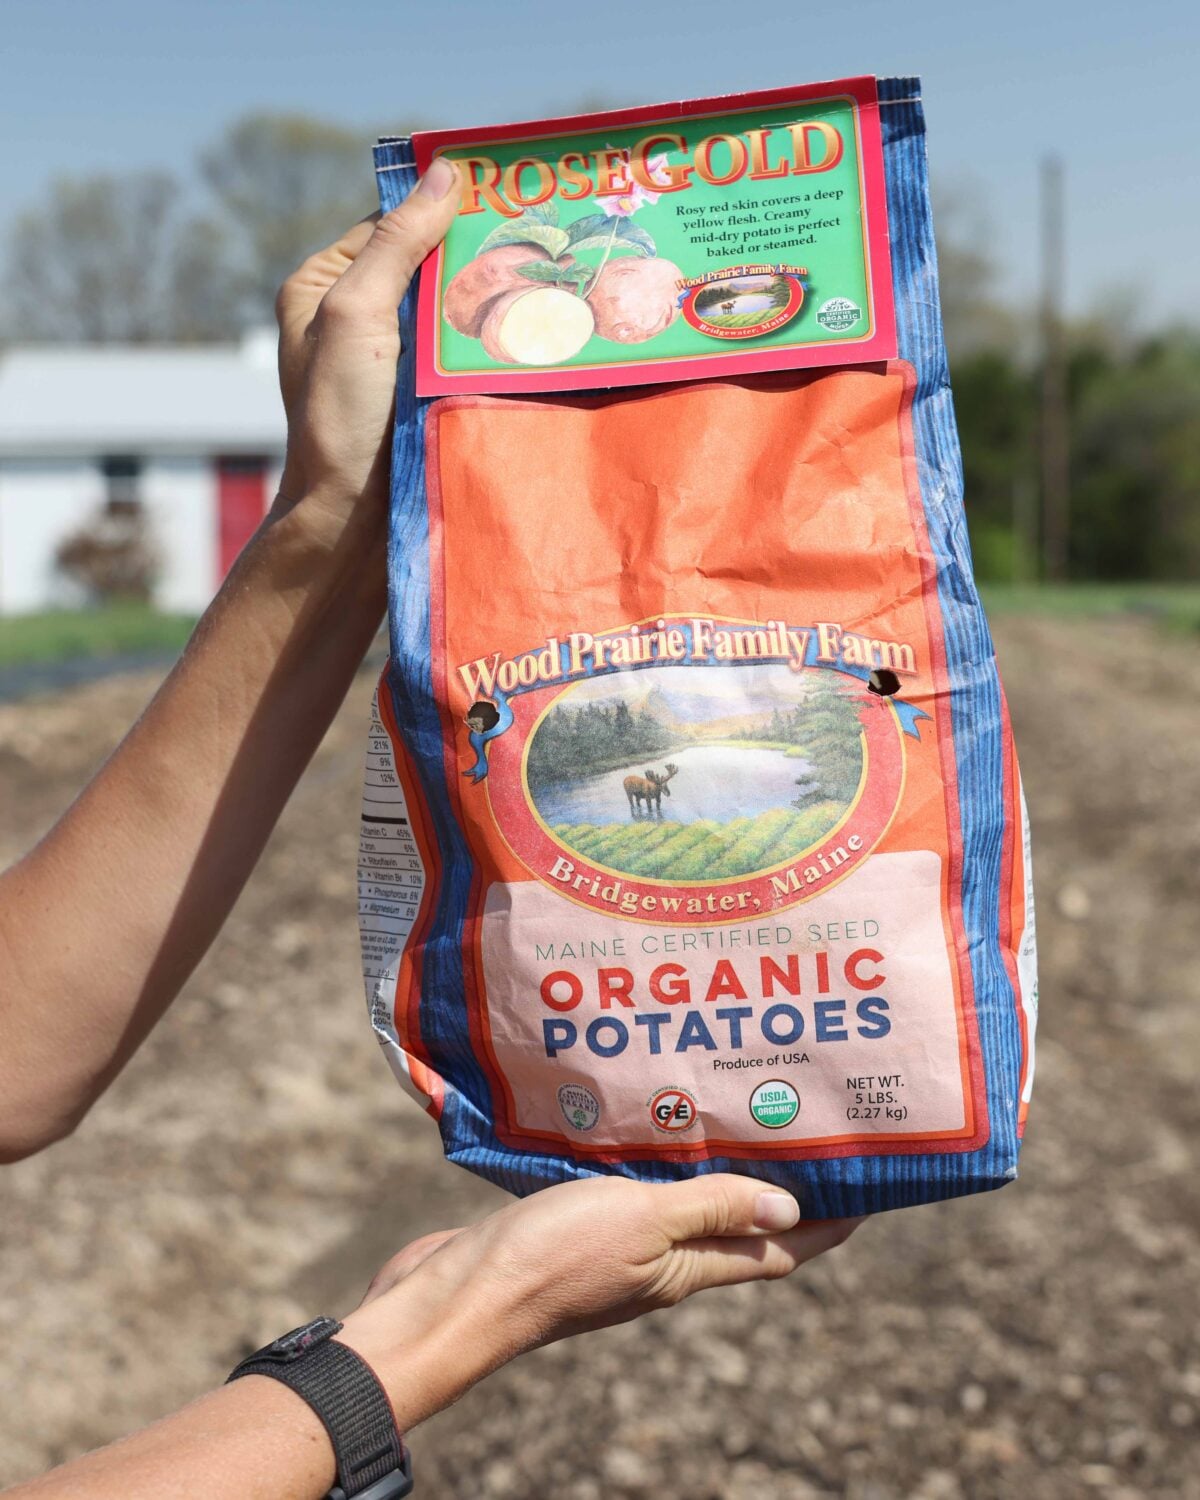
One of the most critical parts of growing potatoes is starting with good “Seed Potatoes”. Seed potatoes are potatoes that are grown for the purpose of planting again as “seeds”. They aren’t actual seeds, you just plant the potato or a piece of the potato in the soil.
After growing for a season, a seed potato often yields seven to ten times the amount planted. So if you plant 10 pounds of potatoes you can harvest around 100lbs. Pretty cool, right?
Why Planting Potatoes from the Grocery Store Isn’t a Good Idea
So you may be wondering if you can buy potatoes at the store and plant them since they are so cheap. After mid winter, nearly all commercially grown potatoes available in grocery stores have been sprayed with a chemical sprout inhibitor.
Potatoes need to sprout to be able to grow in a garden, therefore a potato that is chemically treated to NOT sprout puts you at a disadvantage before you even get started. An organic potato is a better bet because it may not have a chemical inhibitor but it’s still not the best choice. Here’s why:
Buying potatoes specifically sold as “seed potatoes” have three main advantages over the grocery store offerings.
- You can be sure they haven’t been sprayed with a sprout inhibitor.
- Seed potatoes are tested to make sure they aren’t passing along diseases.
- Seed potatoes have their leafy green tops purposefully killed before they are fully mature in order to maintain vigor. That vigor and energy translates to a larger harvest for you.
I heard a seed potato farmer describe it like this: Seed potatoes are at the teenager stage of growth where they are strong and have lots of energy. Potatoes that are fully mature and sold in a grocery store are at the adult stage and have LESS energy.
That means planting a grocery store potato gives you a lower harvest amount. So to sum it up, it’s possible to grow potatoes that were purchased at a grocery store but you may have trouble getting them to sprout and lower yields.
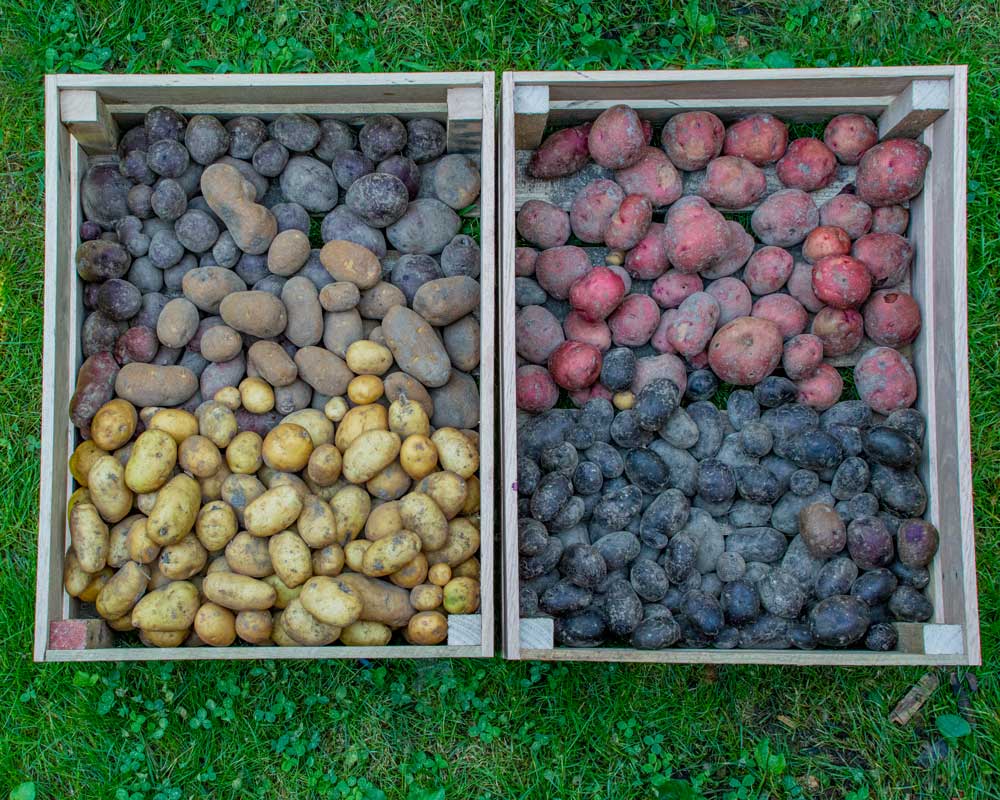
Choosing The Best Varieties of Potatoes to Plant
There are a lot of options of types of potatoes to grow. There are early, mid, and late season varieties. Additionally, you can choose potatoes based on texture like waxy, dry, mealy, and firm.
In the southern US, the best choice is early varieties because they mature before it gets too hot or can be planted in the fall. In the northern US you can grow any type.
My favorite varieties for organic growing are:
- Sarpo Mira (Late Season)
- Kennebec or Elba (Late Season)
- Sarpo Una or Red Norland (Early Season)
You can’t go wrong with any of the Sarpo varieties; they are fantastic for growing in a home garden, especially organically, and under any kind of stress. We had a terrible wet spring one year and the Sarpo Mira grew through our hot summer to produce hundreds of pounds of potatoes.
The Best Time to Plant Potatoes
Potatoes will rot in cold wet soils. Therefore, the best way to check if the soil is ready for planting is not a date but the temperature of the soil. At 7am put a thermometer in the soil four inches deep, if it’s 50ºF (10ºC) or above, the potatoes are ready to plant. For most areas, the soil will be ready around four weeks before your average last frost.
Northern growers in US zones 1-5 can plant throughout the summer time. The only consideration is making sure potatoes mature before a killing frost comes.
Potatoes will stop growing when soil temperatures exceed 80ºF. For those in the southern US, (me included), an early or mid season maturing variety helps the potatoes come to size before the heat prevents them from growing further.
Soil Preparation for Potatoes
Potatoes like soil that is well draining and rich in organic matter. If your soil doesn’t naturally have those characteristics, you can change your conditions in a few easy steps.
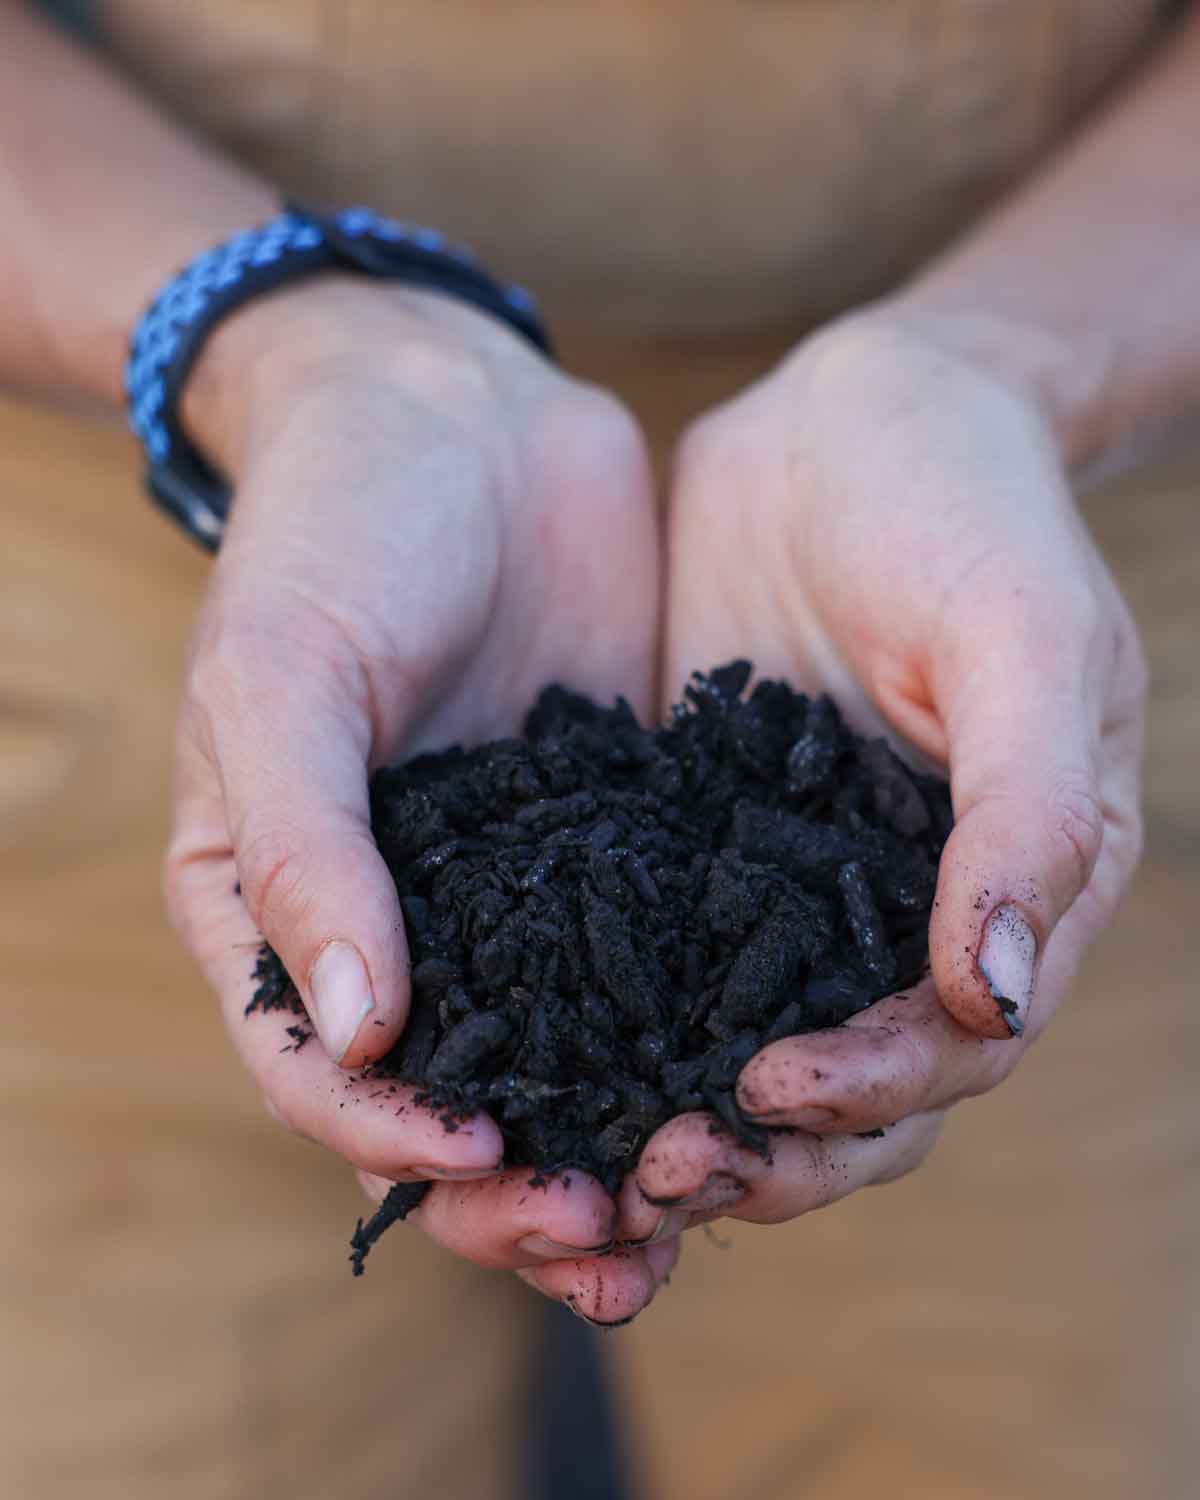
- Add compost to your soil. This is the number one way to add organic matter fast. Choose a high quality compost or make your own. This will help improve drainage as well.
- Make mounded garden rows or plant in raised garden beds. When the soil in a garden bed is raised above the surrounding soil, it drains better and is less subject to water pooling.
Soil pH can be as low as 5.0 for potatoes, with best production between 5.5 and 6.8. Potatoes are less susceptible to scab when soil pH is between 5.0 and 5.5. That being said, they will grow well in many soil conditions.
If you want to figure out your soil conditions, I’d recommend using an easy to use professional quality soil test. If you have really bad soil, here’s where you can find more information on how to improve soil quality.
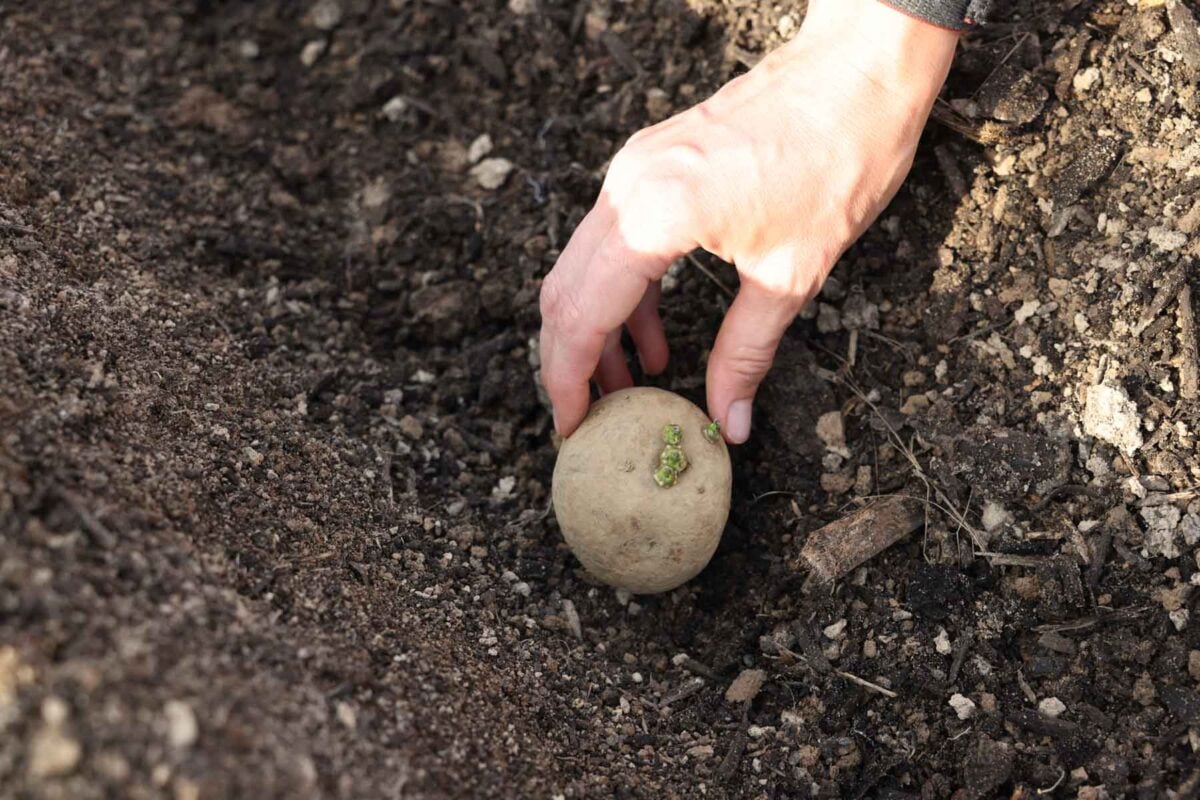
Getting Potato Seed Ready to Plant via Green Sprouting or Chitting
Green sprouting, also called chitting, is a highly recommended technique to prepare seed potatoes before planting. While optional, it can reduce garden growing time by 10 to 14 days.
Simply put, the potatoes form green spouts prior to planting. This helps them get a head start and rotting is less likely.
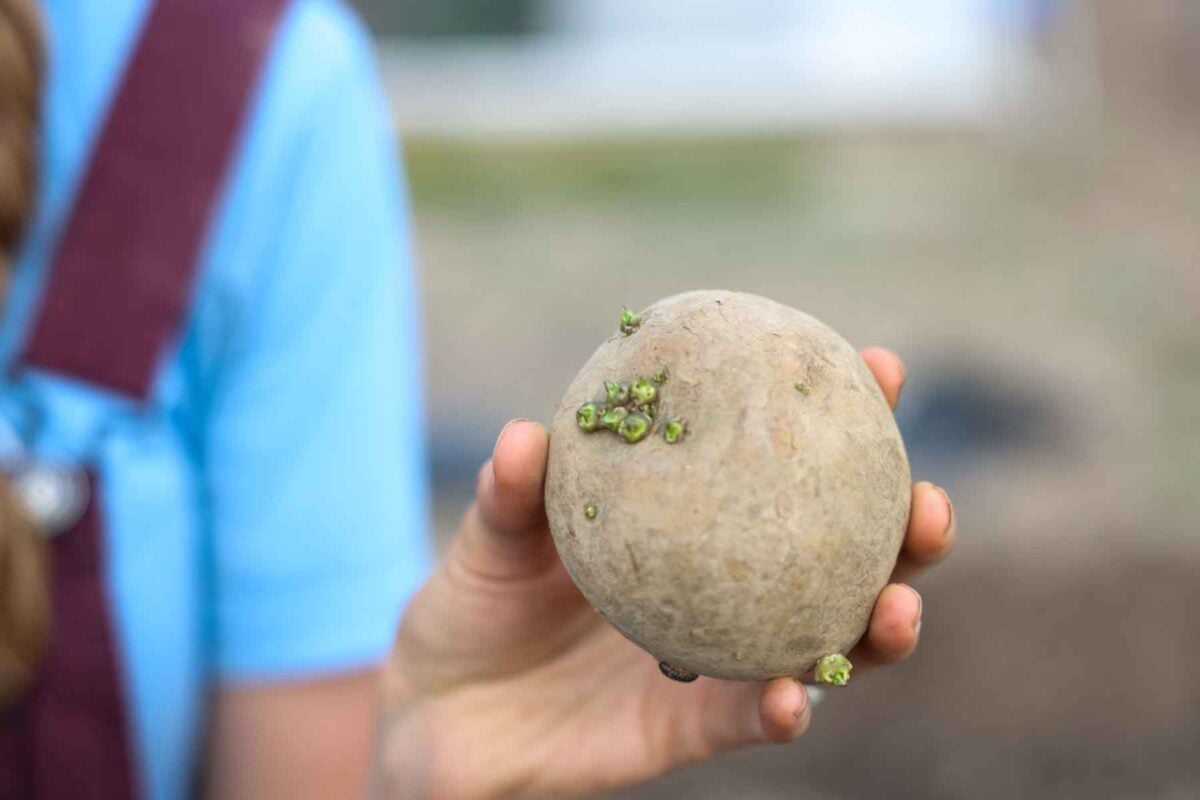
Since seed potatoes are kept in a dormant state until they are shipped or sold, it’s important to wake up your potatoes before planting using this process.
To get the best results, start this process about four weeks before your scheduled planting date:
- Wake the Tubers: Place uncut potatoes in a dark area at 70°F for approximately one week.
- Encourage Growth: As soon as sprouts emerge, expose them to light and lower the temperature to 50°F.
- Strengthen: The light ensures the sprouts turn green and remain short, sturdy, and stocky rather than long and fragile.
Alternatively, if you don’t have 4 weeks before planting let the seed potatoes sit at room temperature 70ºF for at least 2 days prior to planting.
Cutting Potato Seed
Cutting potato seed is an optional practice. You can plant potatoes whole, or cut them into smaller pieces prior to planting. Cutting the potatoes means you have more plants but the jury is still out as to whether or not it actually increases the yield.
I personally leave the potatoes whole because we have clay soil and we struggle with potatoes rotting. If you have sandy soil and plant when the soil is warm enough, it’s a viable option.
CUTTING POTATO SEED GuIDE
For the best results, aim for seed pieces that weigh approximately 1.5 ounces (or 0.75–1 ounce for Fingerlings) and have at least two eyes or sprouts per piece.
Use the following guide from Wood Prairie Family Farm to determine how to handle different tuber sizes:
- Small Potatoes- If they are smaller than a large hen’s egg, plant them whole.
- Medium Potatoes- A potato the size of a large hen’s egg weighs about 2.5 ounces; cut these in half.
- Large Potatoes- Cut these into 3 or 4 “blocky” pieces.
There are two options for cutting. You can cut your seed pieces immediately before planting or cut them a few days early to let the surfaces “callous” (dry over).
To lower the risk of rot, you can dust the cut sides with agricultural lime or elemental sulfur. This is a common precaution but not necessary in all cases.
The size of a potato seed piece affects early plant vigor a great deal. Larger seed pieces usually emerge faster than smaller ones.
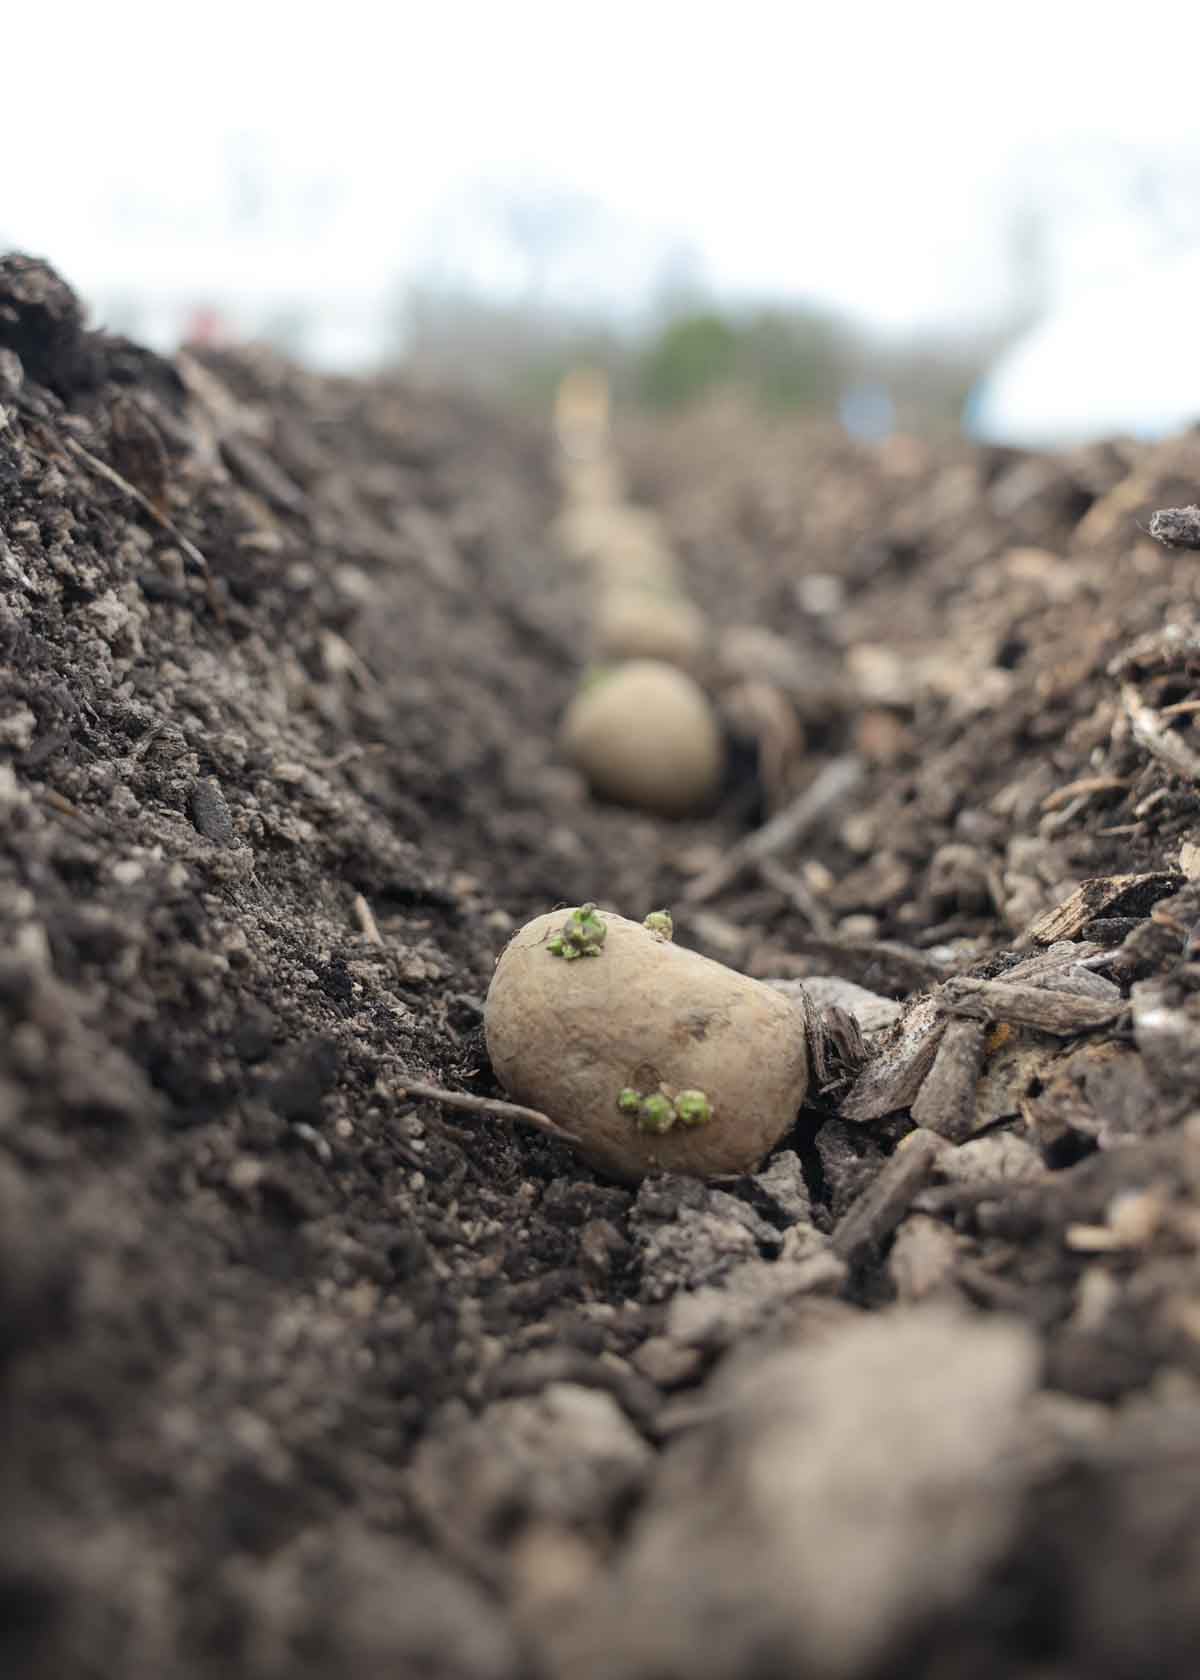
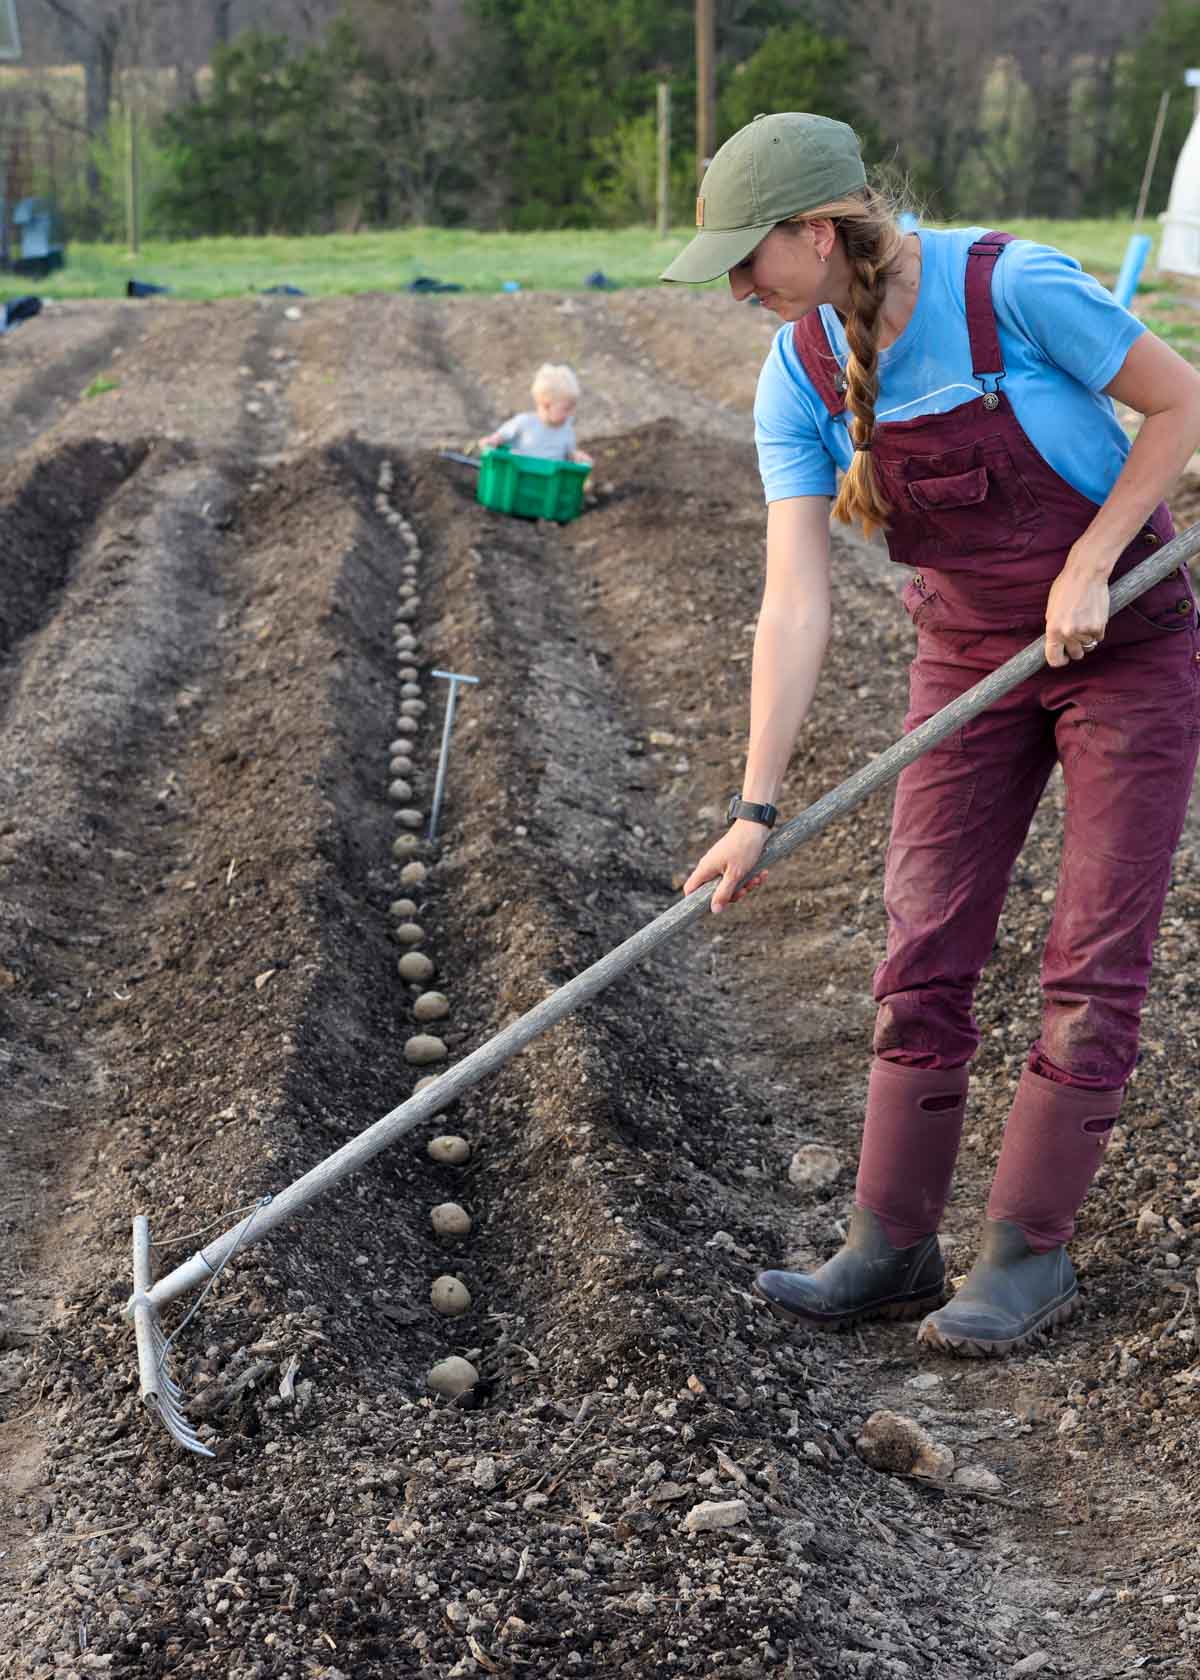
How to Plant Potatoes (Spacing and Depth)
Make a trench that is four inches deep. Plant potato seed 12 inches apart. Cover with 2 inches of soil.
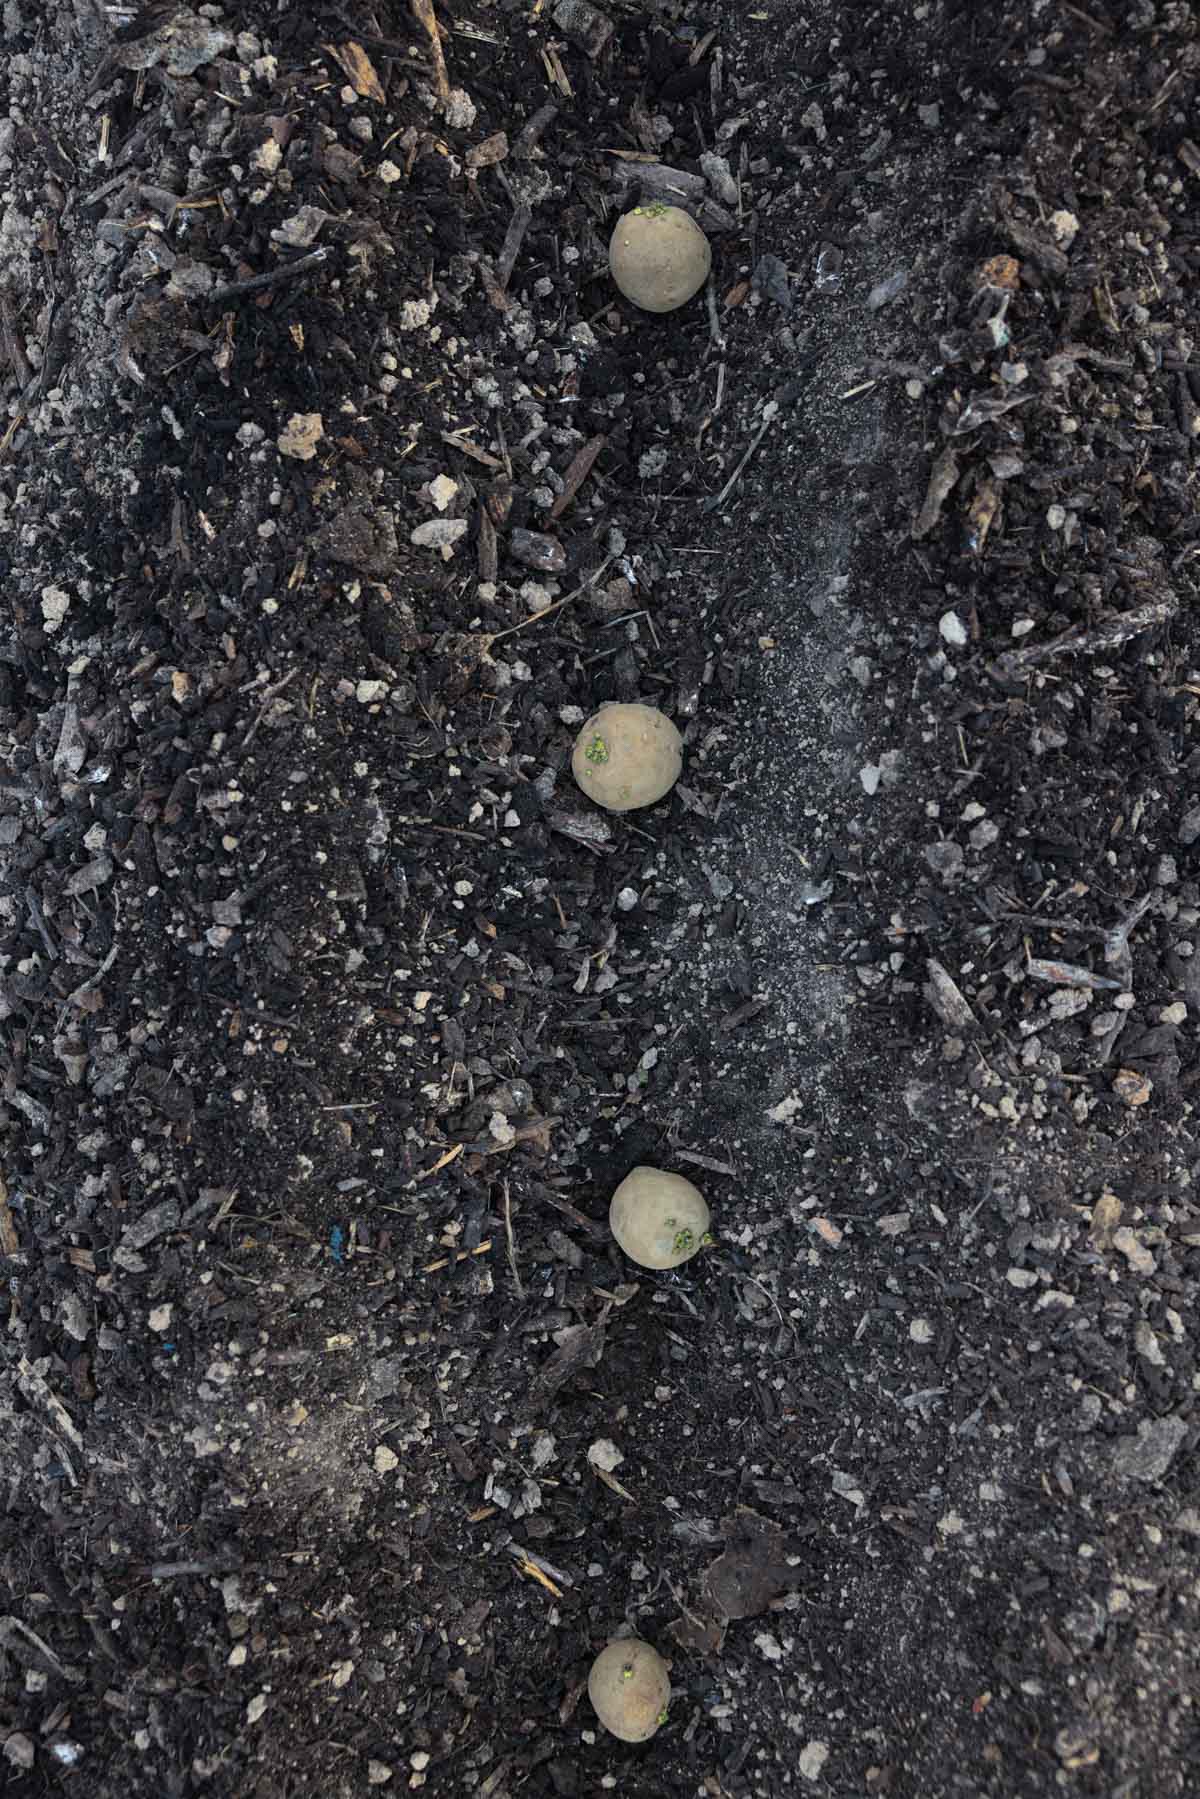
To make this a little more clear, usually a potato is at least two inches tall. A four inch furrow or trench allows 2 inches for the potato and 2 inches for soil to cover it on top. Afterwards the soil level covering the potatoes is flush with the surrounding soil.
For larger potato varieties like russets, you may want to allow 15-18 inches between plants.
Watering Your Potatoes
Watering potatoes helps increase tuber size. If your potatoes experience moisture stress, it can cause knobby or hollow potatoes, and prevent the plant from producing new tubers.
How often you water potatoes depends on how much rainfall your area naturally receives. If you get one inch of rain per week that is sufficient.
If you don’t get enough rain, you need to irrigate. For clay soil, water thoroughly once a week. For sandy soil, water twice a week or more as needed with a good soaking.
Hilling Potatoes
When your plants reach 4–6 inches tall, start “hilling” them to protect the growing tubers. You can use a hand-hoe or a hilling attachment on a tiller or tractor to mound soil from the aisles onto the base of the plants.
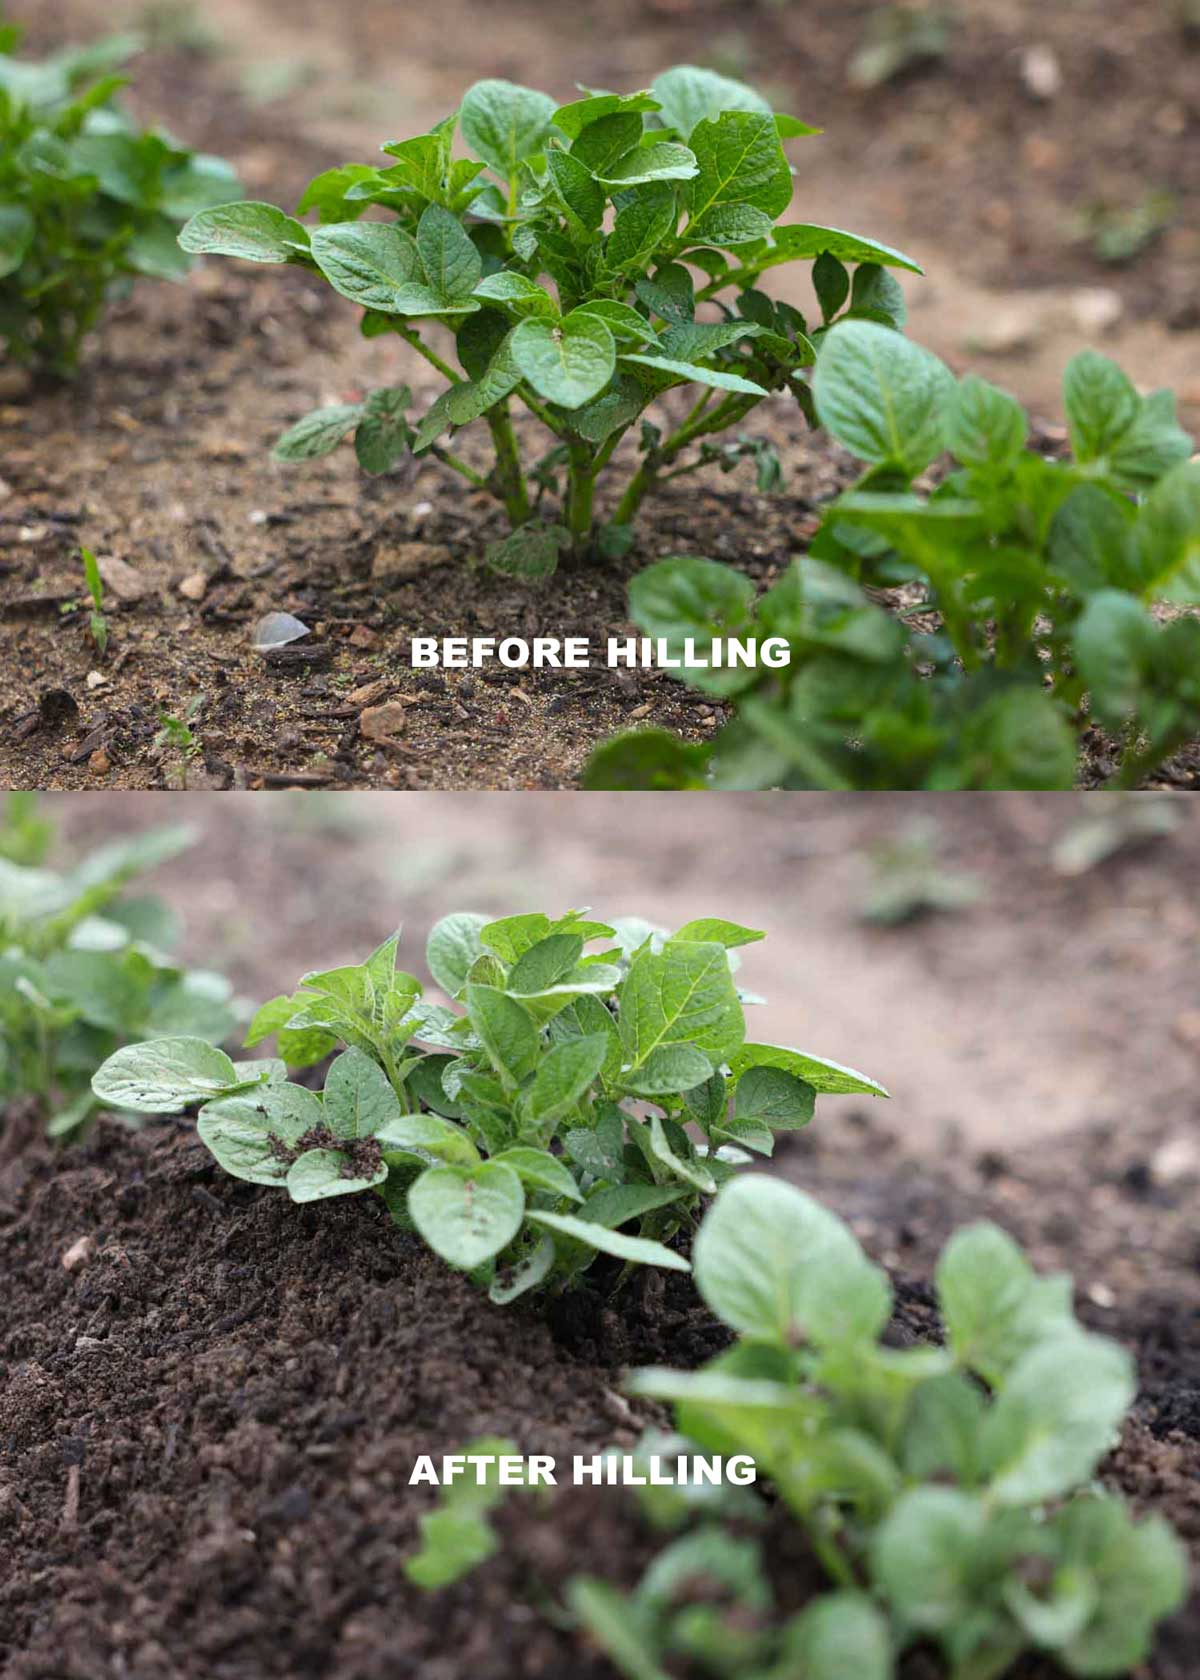
Tips for Successful Hilling:
- Cover the tubers completely to prevent them from turning green and bitter, but be careful not to bury the leaves.
- Alternative: If you prefer not to use soil, you can achieve the same result by applying a heavy layer of straw mulch over the ground.
How to Grow Potatoes in Containers
- Fill your container halfway with a high quality potting soil. Add a potato fertilizer and stir. How much you add depends on the size of container you’re using and what kind of potting mix you use. For this linked organic potato fertilizer add 1 cup per 25 gallon grow bag.
- Use one seed potato for a 5 gallon container. So if you have a 25 gallon container or grow bag, you should be planting 5 seed potatoes.
- Space the potatoes out and then make sure they are covered with soil.
- Water. Soil in containers dries out easily, so be sure to keep it moist.
- After you see the potatoes sprout and they are 4-6 inches tall, cover with more soil. Take care not to cover the leaves.
- Potatoes can be harvested anytime after the tubers start to size up. This is usually around the time the plant has flowers that bloom although they may not always flower. For full size tubers wait until the green foliage dies back completely to a brown color and is dry.
Common Potato Pests
There are a couple very common potato pests to look out for, colorado potato beetles and leaf hoppers.
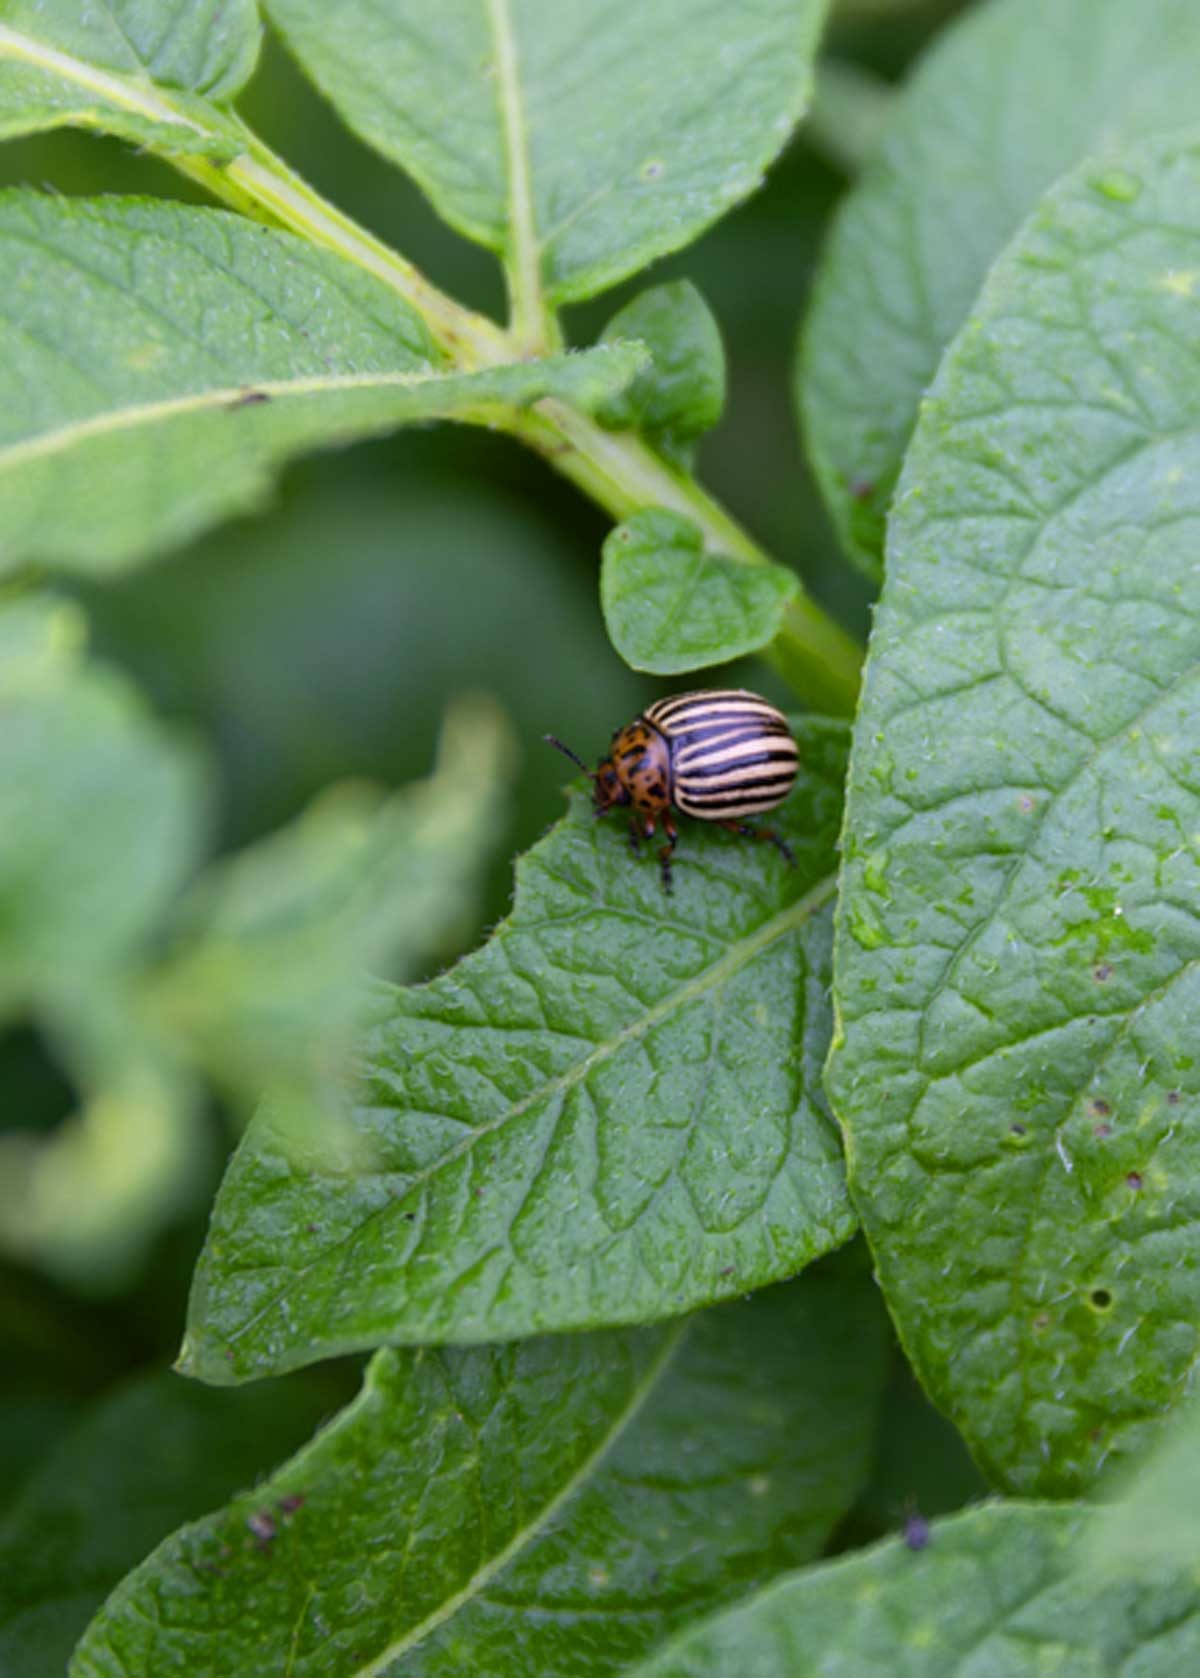
Colorado Potato Beetle
Colorado potato beetles are the most common and thankfully they are easy to control with prevention. Check the undersides of leaves for bright orange eggs. Crush and remove eggs when you see them.
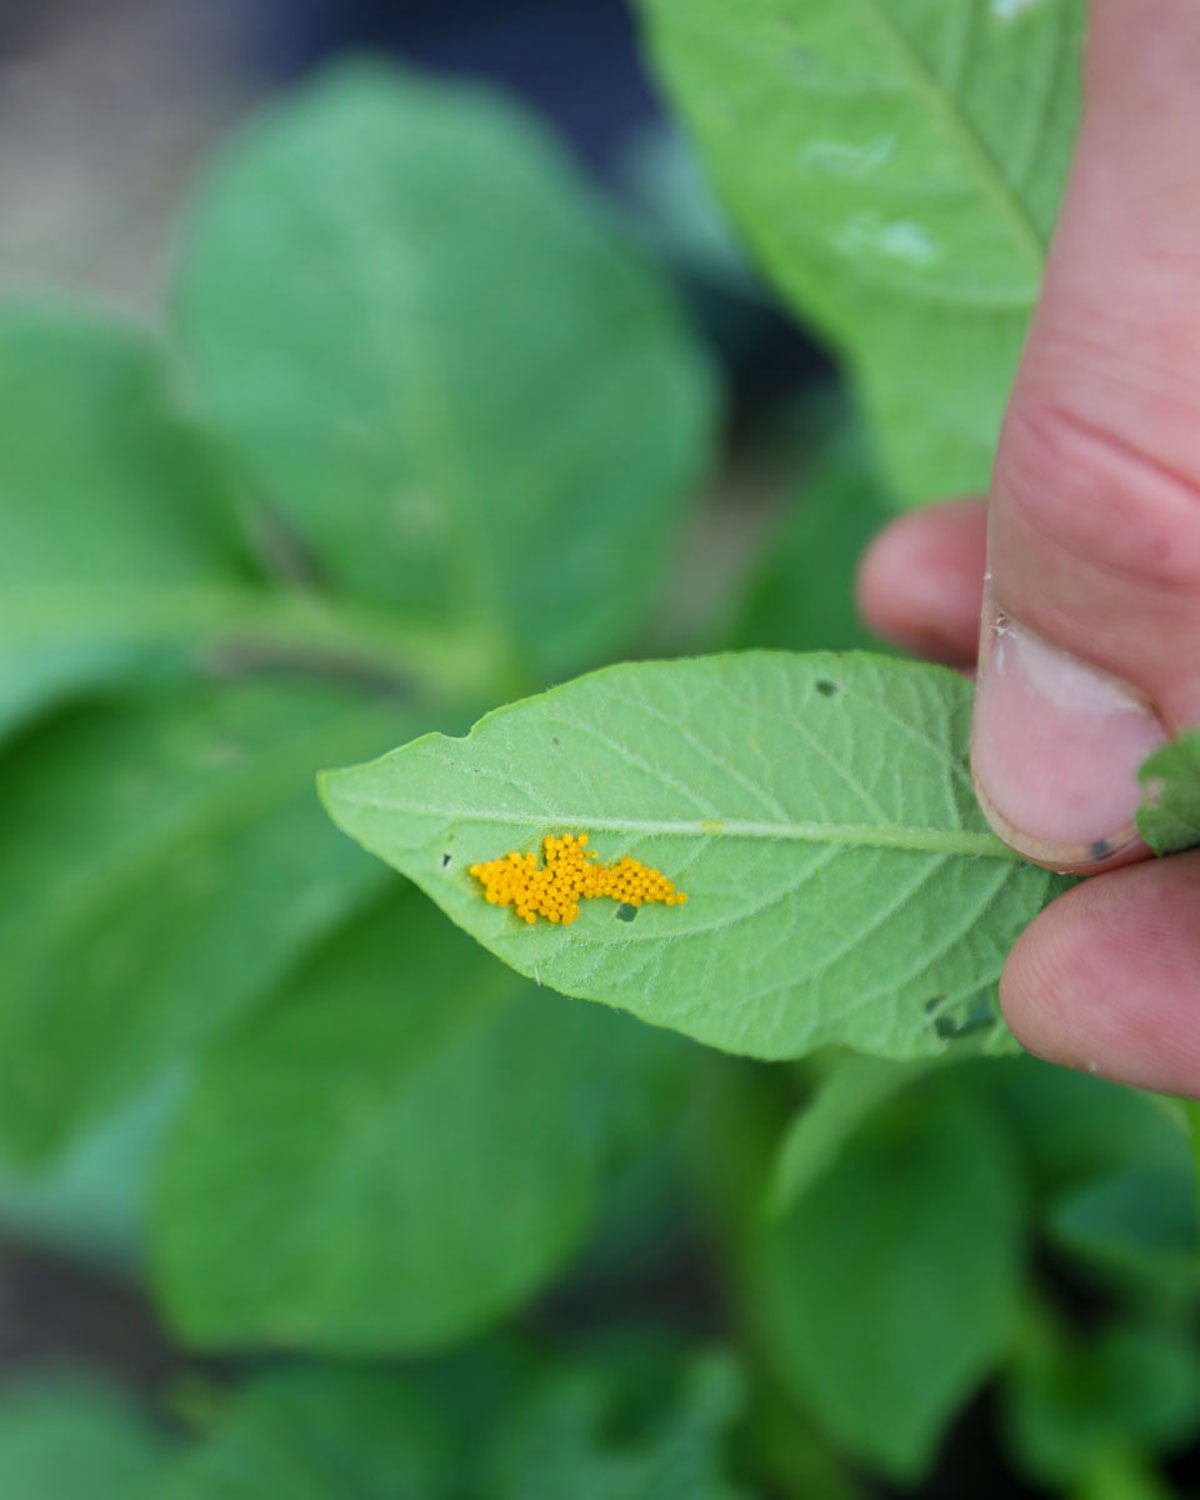
Adults are the size of your fingernail, with a rounded, slightly domed back. Its shell is a warm yellow to orange color, marked by many sharp black stripes running lengthwise. Its head and thorax are darker, with scattered black spots, and it has short, stubby antennae.
The larvae look completely different; they are soft-bodied and plump, usually reddish-orange in color, with rows of black spots along their sides.
Leafhoppers
Leafhoppers are typically tiny (about 1/8 to 1/4 inch long) and have a slender, wedge-shaped body—almost like a little triangle or a grain of rice with wings. Their heads are slightly pointed, and their wings fold neatly over their backs like a roof.
They are harder to control since they jump away quickly and harder to spot, since they are small, about the size of a grain of rice!
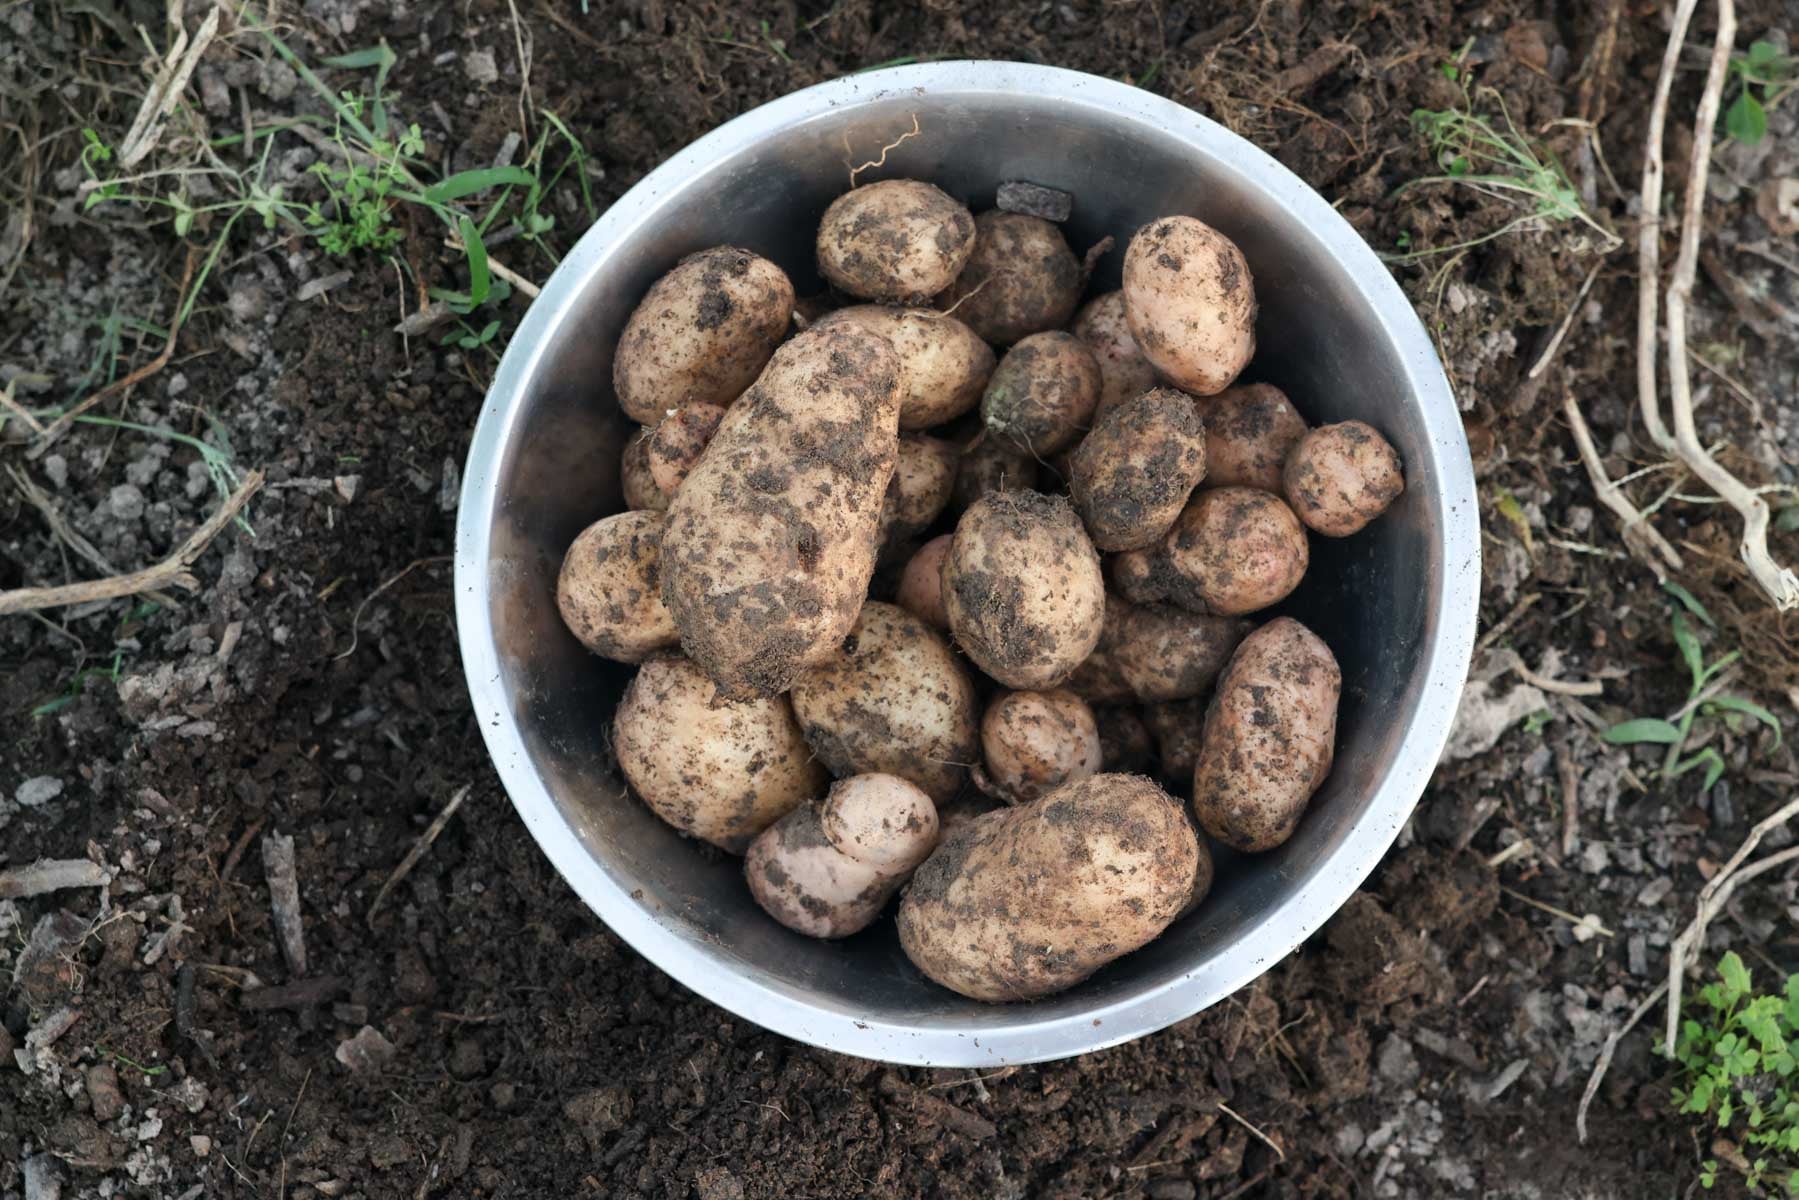
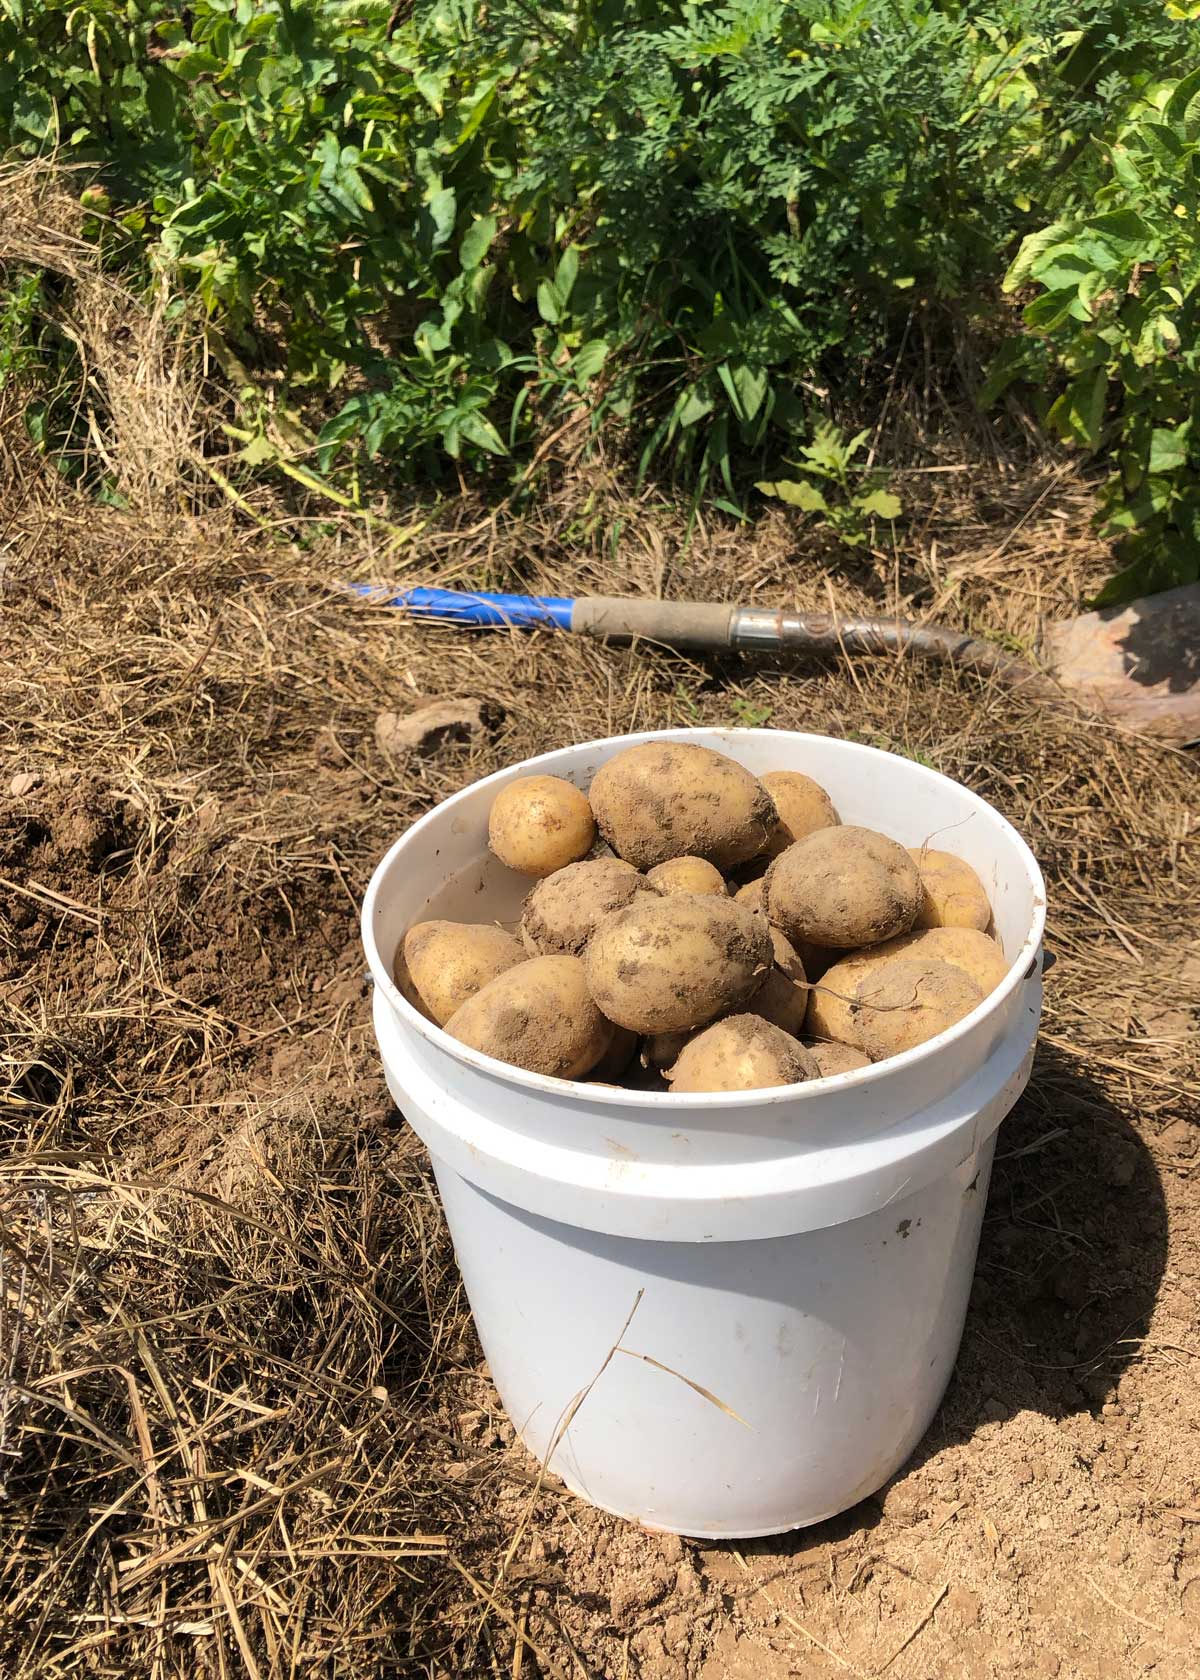
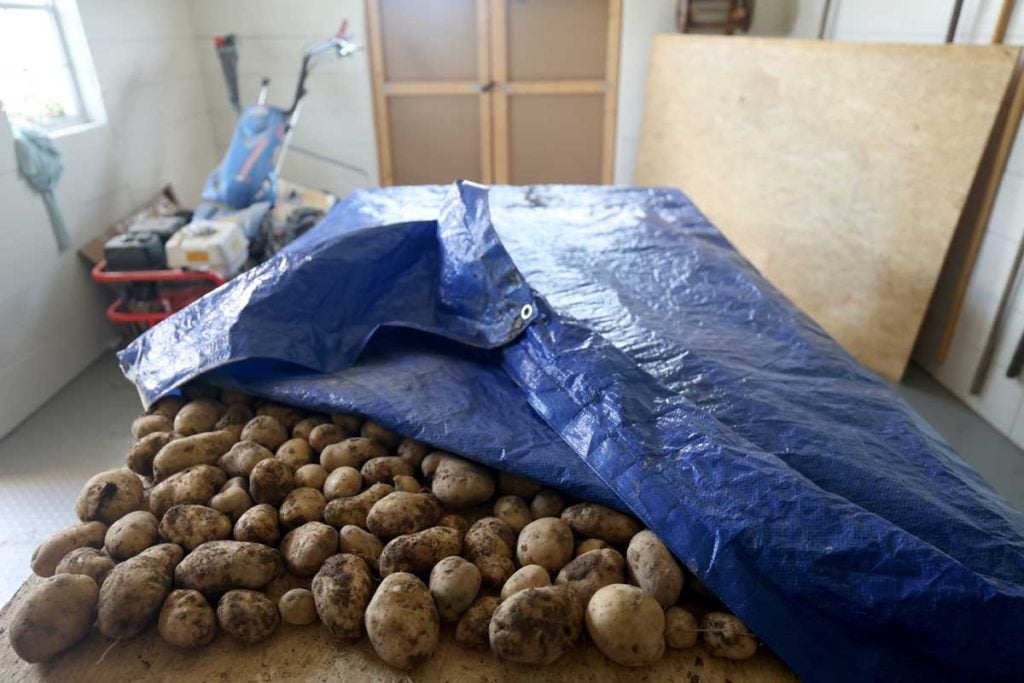
Harvesting Potatoes
Potatoes can be harvested anytime after the tubers start to size up. This is usually around the time the plant has flowers that bloom although they may not always flower.
New Potatoes
Potatoes harvested while the leafy green tops are still green are often called “new potatoes”. They have a thin skin that hasn’t toughened up yet with storage.
Full Size Potatoes
For full size tubers wait until the green foliage dies back completely to a brown color and is dry.
There are many ways and tools to get potatoes out of the ground. The easiest for a home gardener is to dig them out with your hands only. This prevents bruising and accidental chopping or puncture with tools and helps you make the most of your harvest.
You can also use a shovel, pitchfork, broadfork, or a specialized potato harvesting tool designed especially for harvesting potatoes.
Here’s where you can find lots of detailed information of when to harvest potatoes.
Curing potatoes
Potatoes sometimes get bruised during harvest so a curing period before going into cold storage can help callous over wounds and allow skins to thicken. This is not always necessary but if you aren’t sure if the potatoes have cured fully in the ground, it’s a good practice.
Wound healing for potatoes will take place best at temperatures of 45-55 degrees F if the relative humidity is above 90%. These temperatures can be used in the first month of storage. Store in a completely dark area.
Remove any damaged or diseased potatoes before, during, and after curing as you spot them.
Potato Storage at Home
Long term ideal storage conditions for most home gardeners is 40-45ºF with 90-95 percent humidity. Keep them in a completely dark place at ALL TIMES. The tubers will turn green with exposure to light. This is mildly poisonous and should be avoided. Root cellars are uncommon these days so use the closest thing you have at home.
Home storage examples include a cool, damp basement, a closet that doesn’t have insulation, or a storage room in the garage.
Here’s my full guide on how to harvest, cure, and store potatoes for more information.
Personal Experience
Early in our potato growing years, I’ve been pretty lucky. We plant around 40lbs on a yearly basis and harvest anywhere between 350- 450 pounds of potatoes. Harvesting seven to ten times the planting amount is normal yield. Sometimes you get much more!
Due to environmental factors, we had a devastating potato harvest one year. Even though parts of it were outside of my control, it made me stop and if there was anything that could’ve been done to prevent our losses.
I’ve since made it my ultimate goal to grow the best potatoes possible with the conditions I have in my area. We don’t have ideal sandy soil, nor do we have cool conditions for growing potatoes. That means everything we do in regards to planting potatoes must be done with exactness.
So I have both 20 years of personal experience and a ton of research under my belt. I’m not a commercial grower, but we do grow about 250 row feet of potatoes per year so that we can get a year’s supply for our family.
I wish you the best with growing your potatoes this year. Feel free to comment if you have questions and let me know at the end of the season how your potato harvest was!