How to Make and Can Grape Juice (with a Steam Juicer)
I’m excited to share with you how to make and can grape juice with a steam juicer. Homemade grape juice is so delicious! In the past, I never used any special tools or gadgets. I would squish the grapes in a pot as they heated then pour the released juices and pulp through a sieve. It took me countless hours of work to yield just a few quarts of juice.

I finally decided to upgrade and try a steam juicer. One try and I wondered why I had waited so long. It took just one hour of letting the juicer do the work for me and it was ready! I’m excited to share with you just how easy making and canning grape juice is with this incredible kitchen tool.
Supplies you’ll need:
- Steam Juicer Use code BECKY15 for 15% off
- Water Bath Canner
- Quart or Pint Mason Jars, Lids and Bands. New to canning? Here is my must-have canning equipment list and a beginners guide.
Ingredients:
- 9lbs Grapes
- Sugar (optional)
This recipe makes 3 quarts of grape juice.

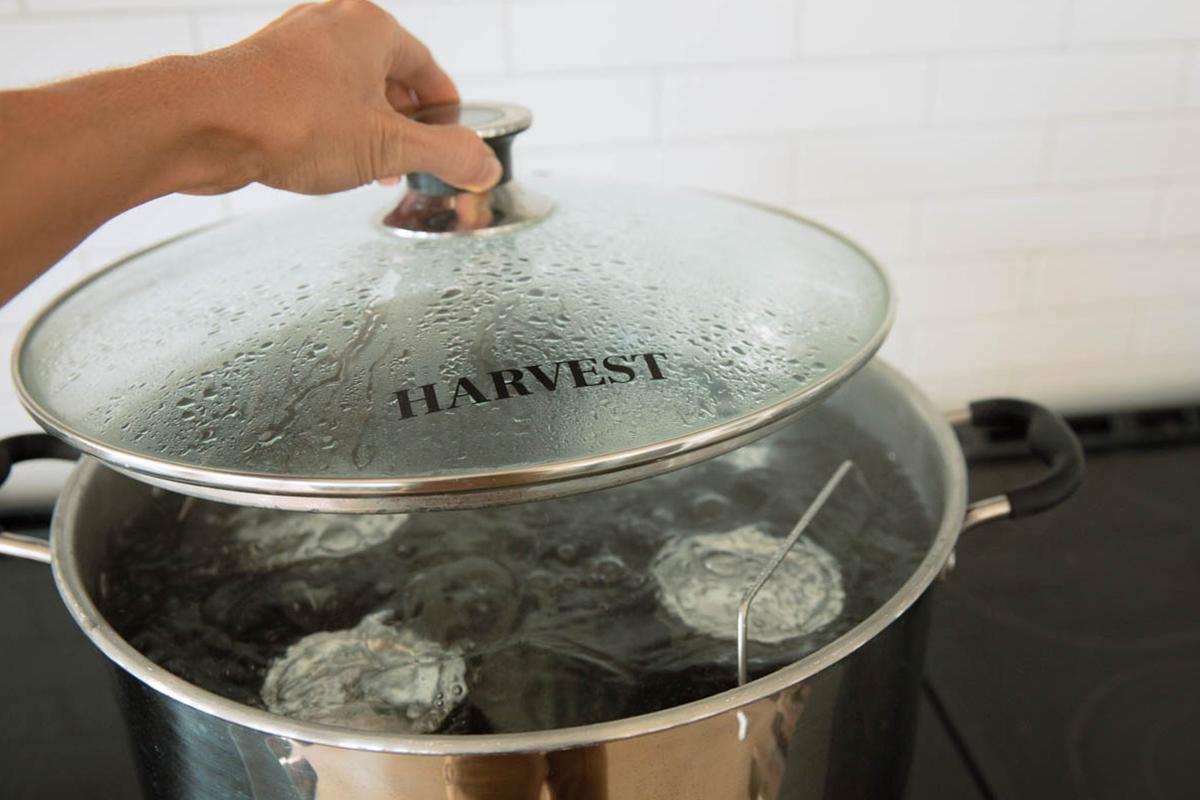
- Start by filling the base of the steam juicer with water. Fill it all the way up to almost the rim and place on a stove top. It’s essential that the water doesn’t dry out when juicing.
- Add the second and third layer to the juicer. Then wash your grapes thoroughly and remove any shriveled, rotten, or unripe grapes. It is not necessary to remove the remaining grapes from the stems. However, you may want to remove the stems if you plan on using the leftover pulp to make jam or fruit leather. Place grapes in the top layer of the juicer. Put the lid on the top, heat to just above medium heat. Set the timer for one hour.

- Meanwhile, heat up the mason jars you will use for canning the juice. This can be done several ways, you can run them through a dishwasher or heat them up in the water bath canner you will be using. Because the grapes will be canned for over ten minutes it is not necessary to sterilize the jars. But do make sure they are hot and clean!

- Put a small table shorter than your cooktop in front of the juicer. Place hot mason jars on the small table. Remove the lid from the steam juicer. Place the hose in the jar and release the juice. Watch in amazement as delicious, pure grape juice fills your jars. At this point you can taste the juice and see if it needs additional sugar. My grapes were a little tart this year so I added 2 Tablespoons sugar per jar. Stir until the sugar dissolves in the hot juice.
- Leave ¼ inch headspace. Wipe jar rims. Add clean lids and bands to jars. Tighten bands to fingertip-tight.
- Place jars in a water bath canner with hot water. Ensure all the jars are completely covered with water by one inch. Bring to a boil and process both pint and quart jars for 15 minutes. After 15 minutes of boiling, turn off the heat, remove the canner lid. Wait 5 minutes. Remove jars from the canner. Let cool for at least 12 hours before removing the bands and store.
Notes: Don’t do any more than this amount of grapes or you will overflow the juice container and it will go into the water below. If you are juicing a large amount of grapes and want to make full canner loads (7 quarts), I recommend purchasing two juicers so you can process six quarts of juice at a time.

Ingredients
- 9 lbs Grapes juicing grapes work best, for example I used Concord and Sunbelt varieties
- Sugar optional
Instructions
- Start by filling the base of the steam juicer with water. Fill it all the way up to almost the rim and place on a stove top. It’s essential that the water doesn’t dry out when juicing.
- Add the second and third layer to the juicer. Then wash your grapes thoroughly and remove any shriveled, rotten, or unripe grapes. It is not necessary to remove the remaining grapes from the stems. However, you may want to remove the stems if you plan on using the leftover pulp to make jam or fruit leather. Place grapes in the top layer of the juicer. Put the lid on the top, heat to just above medium heat. Set the timer for one hour.
- Meanwhile, heat up the mason jars you will use for canning the juice. This can be done several ways, you can run them through a dishwasher or heat them up in the water bath canner you will be using. Because the grapes will be canned for over ten minutes it is not necessary to sterilize the jars. But do make sure they are hot and clean!
- Put a small table shorter than your cooktop in front of the juicer. Place hot mason jars on the small table. Remove the lid from the steam juicer. Place the hose in the jar and release the juice. Watch in amazement as delicious, pure grape juice fills your jars. At this point you can taste the juice and see if it needs additional sugar. My grapes were a little tart this year so I added 2 Tablespoons sugar per jar. Stir until the sugar dissolves in the hot juice.
- Leave ¼ inch headspace. Wipe jar rims. Add clean lids and bands to jars. Tighten bands to fingertip-tight.
- Place jars in a water bath canner with hot water. Ensure all the jars are completely covered with water by one inch. Bring to a boil and process both pint and quart jars for 15 minutes. After 15 minutes of boiling, turn off the heat, remove the canner lid. Wait 5 minutes. Remove jars from the canner. Let cool for at least 12 hours before removing the bands and store.
Notes
- 1001-3000 ft above sea level add 5 minutes additional time for processing
- 3001-6000 ft above sea level add 10 minutes
- 6001-8000 ft above sea level add 15 minutes


