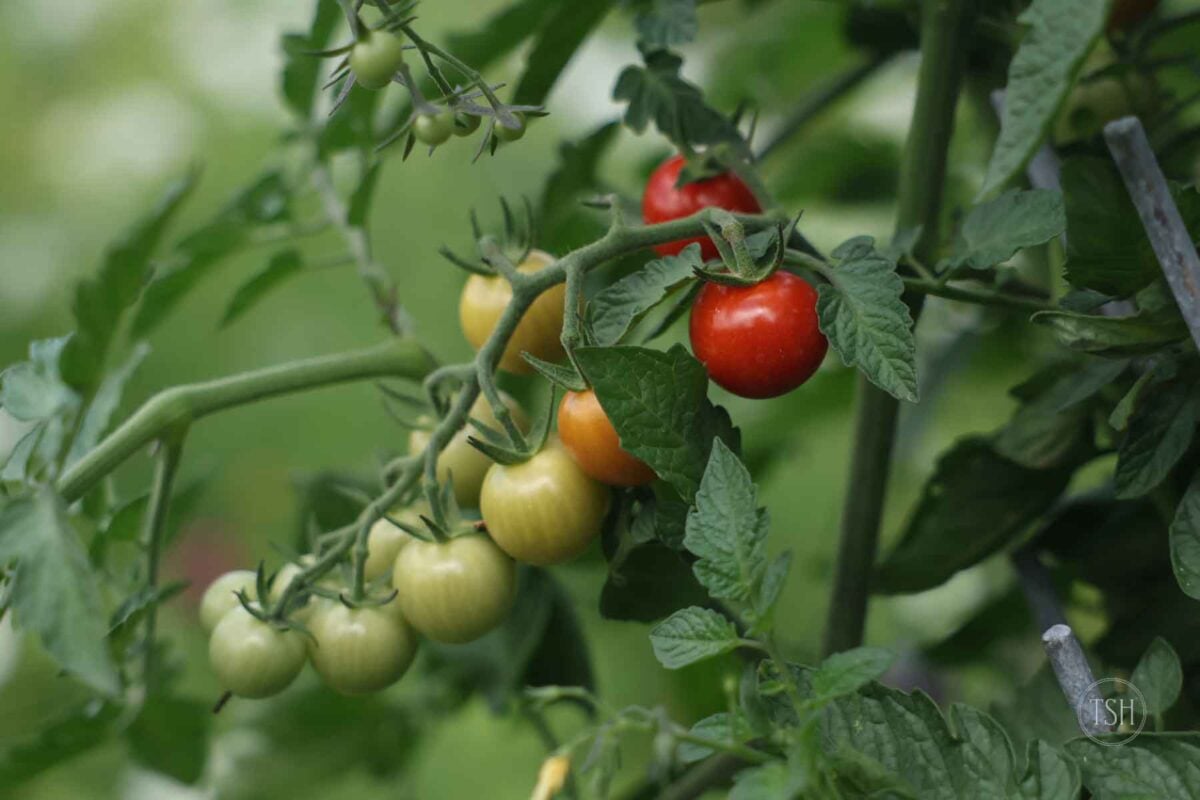
How to Grow Tomatoes from Seeds
This simple guide will help you grow tomatoes from seeds with confidence. After nearly 20 years of growing tomatoes, I’ve definitely had my fair share of “oh no!” moments and later success with growing them. These tips will help you to be successful even if it’s your first year growing tomatoes from seeds.
Why You Should Grow Tomatoes from Seeds
- More Variety If you buy already started seedlings, normally you’re selection is quite limited. There are literally THOUSANDS of options of tomatoes you can grow from seed. So you get to be in charge of what you want most in a tomato.
- Open Pollination The majority of tomato seedlings from a nursery or big box store will be selling hybrid seeds. Hybrids aren’t necessarily bad especially becasue in many cases they are easier to grow. However, they are usually more expensive. It also means that you can’t save the seeds and get the same tomato plant the next year because it’s an intentional cross of two tomatoes for their desirable traits.
- Region Specific You can grow tomatoes that do well in your region. Every growing area has different challenges. Some tomatoes are better at handling certain diseases, pests, and climate conditions than others.
- Inexpensive Growing tomatoes from seeds is cheaper if you are growing many at one time. I’m not sure what the break even point is but I imagine if you are planting more than 10 tomatoes, it’s probably cheaper to grow them yourself. If you are growing less than ten tomatoes then it may not be worth your while to grow them from seeds.
Materials Needed for Starting Tomato Seeds Indoors

Must-Haves
- Trays or pots
- Soil Mix for Seedlings
- Tomato Seeds
- Supplemental Light (LED Grow lights, sunny south-facing window set up with lots of light reflectors, or shop lights)
NICE TO HAVE BUT NOT ESSENTIAL
- Additional Shelving
- Timer for the lights (optional)
- Heat Mats
- Fan
Containers for Growing Tomato Seeds
There are so many different types of containers that can be used to hold soil. And if you’re new to seed starting, you may be surprised to find that is a way to grow tomatoes without a container at all! It’s called a soil block.
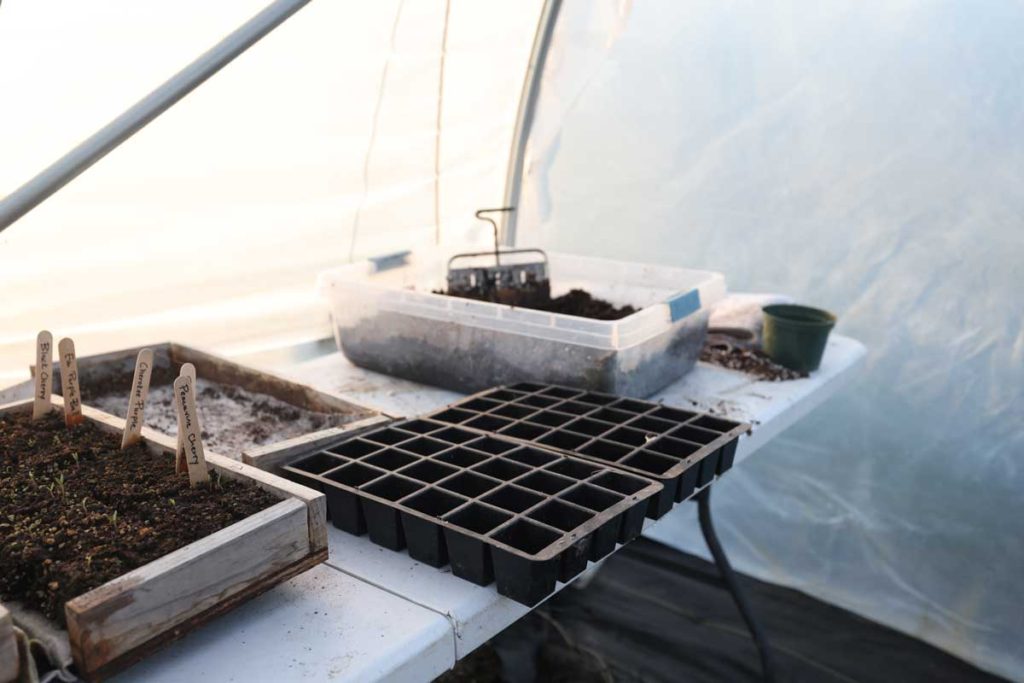
- Cell Trays and Flats: Cell trays are plastic and divided into individual cells. They have holes and the bottom and need a “flat” underneath. This is a second tray that is used with it to allow for watering from underneath or watering from above and it’s a place where the cells can drain.
- Cell Packs or Individual Pots: Small, connected plastic cells are what you often see at garden centers.
- Peat Pots: These are biodegradable pots made from compressed peat moss. They can be planted directly into the ground with the pot. They are supposed to biodegrade fast enough that the roots pop right through but I’ve personally found that’s not always the case.
- Coir Fiber Pots: These are made of coconut fibers. They are more eco-friendly than peat pots because it’s an easily renewable byproduct of the coconut industry. They are also biodegradable.
- Soil Blocks: A method that uses no container at all soil is compressed into a block using a soil block making tool.
- Egg Cartons, Newspaper, or other Recycled Material: If you don’t have specialized trays don’t let that hold you back. If you have egg cartons that are made of molded pulp, save them and use them to start seeds. Plain newspaper (avoid shiny printed paper) can be folded into little boxes or rolled up to hold soil.
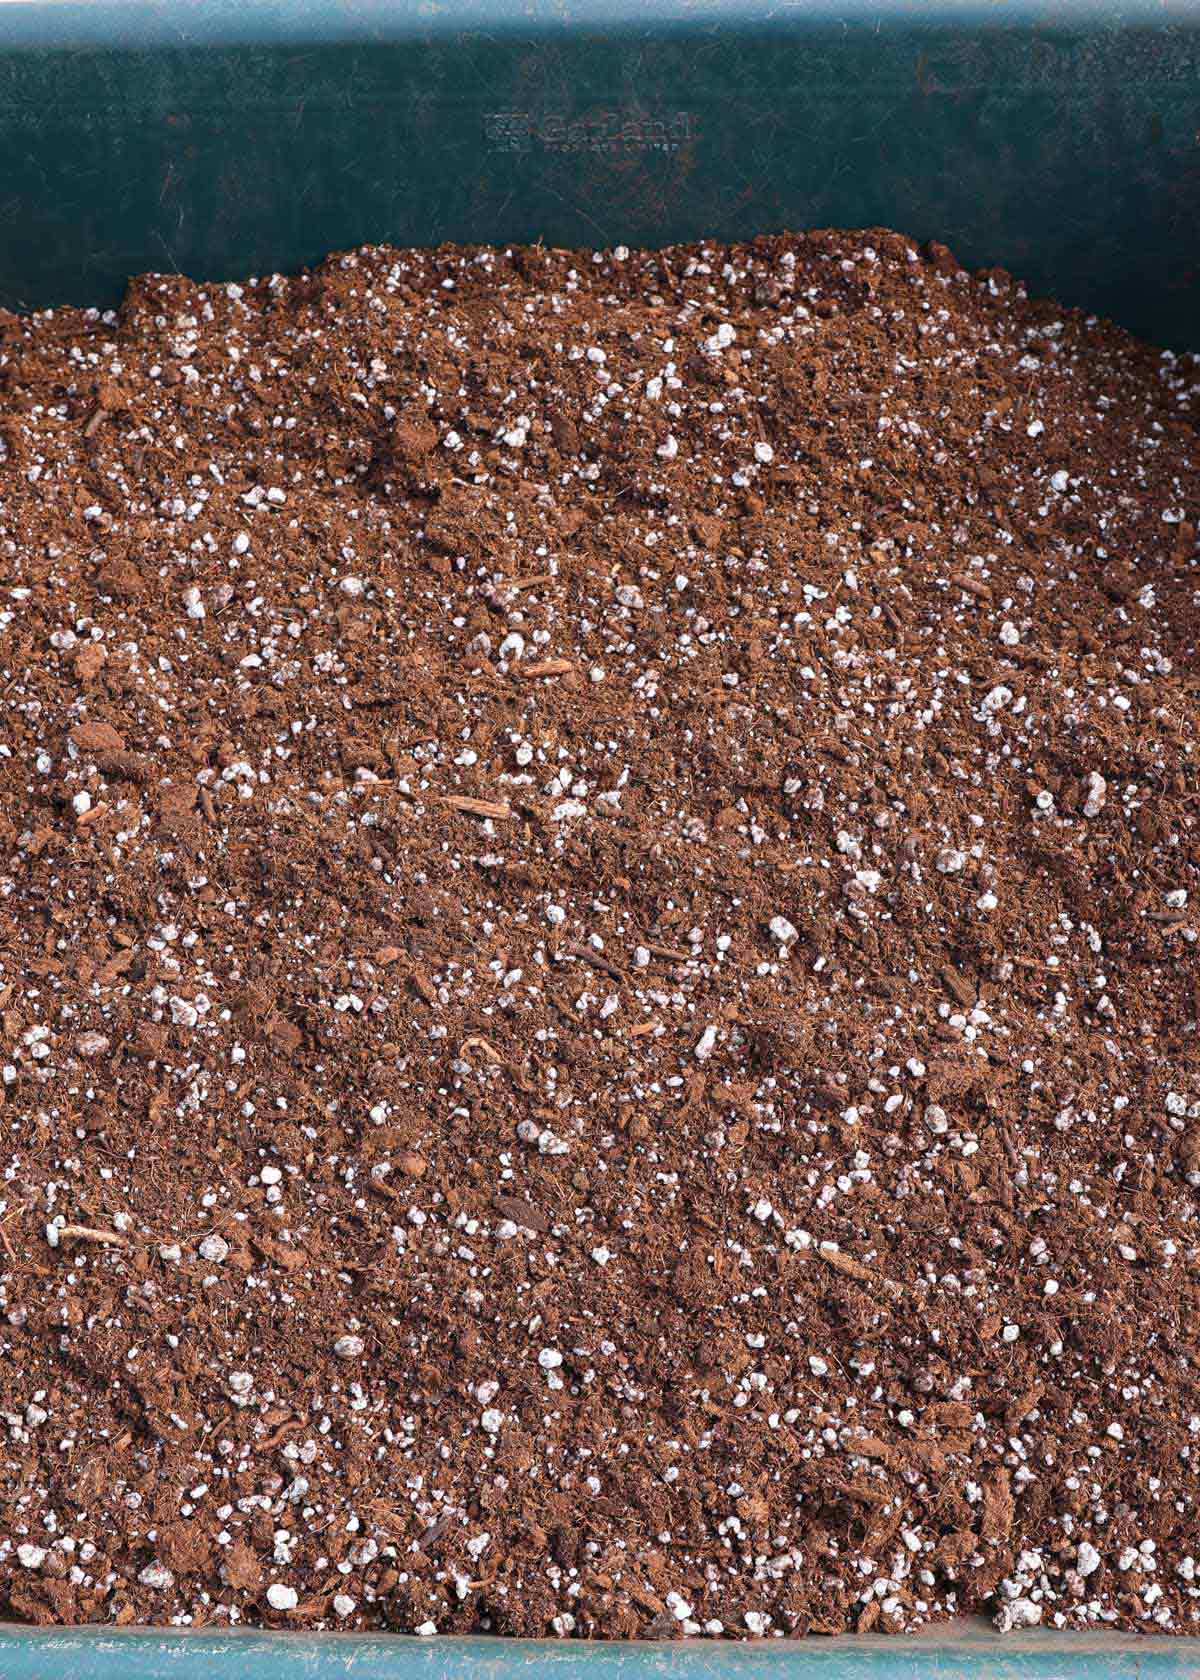
Best Soil for Starting Tomato Seeds
I would argue that the #1 most important thing for starting tomato seeds is to begin with a quality seed starting mix. I made my own seed starting mix recipe so that I can achieve the results I want.
However, if you are new to growing tomato seeds indoors, I recommend finding a quality mix you can purchase. I recommend Vermont Compost Fort Vee if you are in the Northeast US. If you are in the south, try Mindful Farmer Living Potting Mix.
If you’re on a tight budget and can’t afford the above kinds, try Jiffy Organic Mix which is widely available at big box stores. It works as-is ONLY until one to two weeks after seeds sprout.
After that you’ll need to pot up the seedlings. When adding more soil, you MUST add some fertilizer to it. For a 12 quart bag of Jiffy Organic Mix, add 1/2 cup organic all purpose fertilizer or Epsoma Tomato Tone.
Your seedlings will quickly be yellowing and sad if you don’t pot them up with the mix and additional fertilizer.
Setting up your seed starting area
If you’re growing tomatoes indoors to start, you’ll need to make sure you have the best set up you can prepare.
LIGHTING
Lights are a must-have for indoor seed starting. The lighting in your home, even by a sunny window is so little compared to the light found outdoors. Adequate lighting creates strong stocky, healthy seedlings and therefore it’s important to supplement.
A common problem for those who are new to seed starting indoors is they don’t have enough light and the seedlings are “leggy” and stretching towards the light.
When I was using regular ol’ fluorescent shop lights, I had them placed about 2 inches from the soil. Once the plants start growing you want them right above the foliage about an inch above.

For the new LED grow lights, some of them have a stronger light and therefore you can place your lights a little further away. I’d recommend starting at about 12 inches above the plants as a baseline then you can adjust to make them lower or further away as needed. Here’s where you find 2ft LED grow lights and 4 foot long LED grow lights.
We used chains hung from shelving for the lights so they could easily be moved up and down as the plants grow.
SHELVING
You can set your plants anywhere indoors if you only have a few. However, if you’re wanting to start several trays, it’s usually most space efficient to set up a shelving rack.
Metal shelves are usually the best option since they are inexpensive and not ruined by water.
LOCATION
If you have enough supplemental light, seedlings don’t necessarily need to be placed next to a window. You’ll want to think more about where your electrical outlets are located so you can plug in your lights.
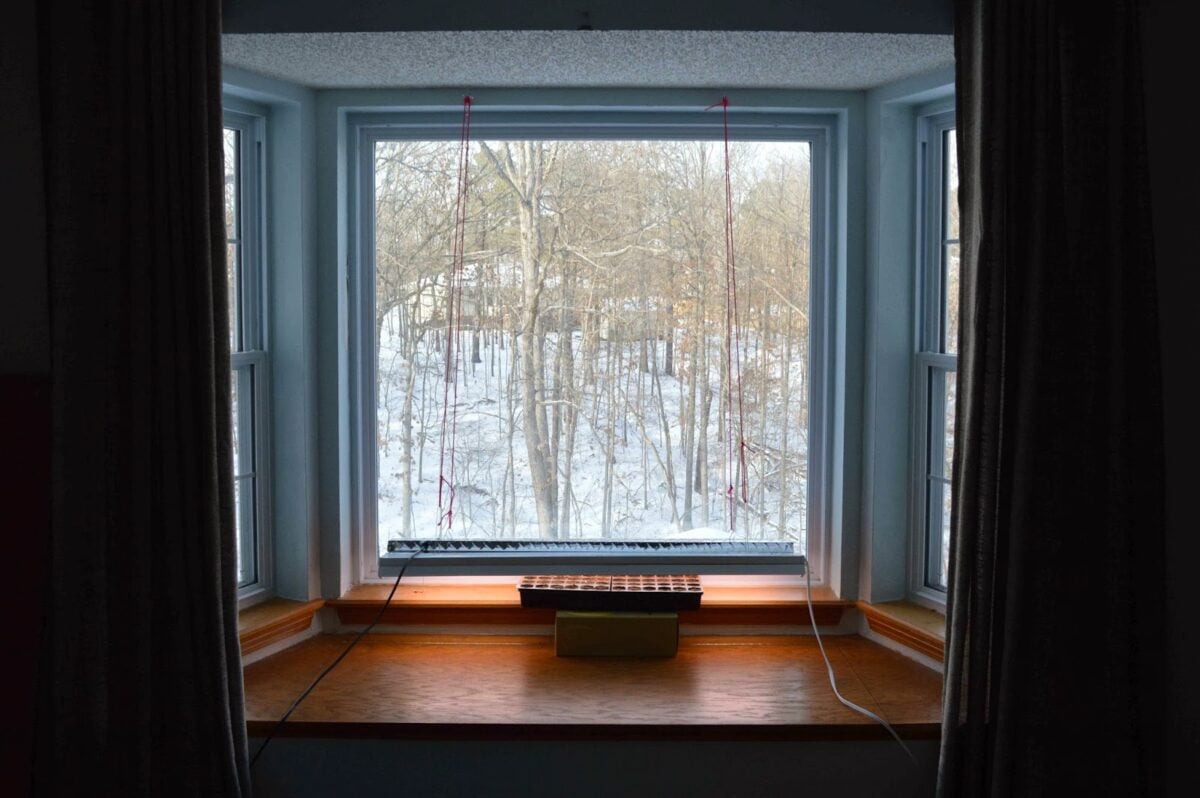
If you do have a sunny south facing window and lighting that is ideal. Just be sure to rotate your trays as the seedlings grow or add reflective screening
Avoid placing your seedling trays over flooring that is carpeted. Little spills when watering happen and it’s much easier to clean up if you have a hard surface like tile underneath.
Step by Step Instructions
Four to six weeks before you’re average last frost, you can start tomatoes indoors. Another HUGE seed starting mistake beginners make is starting them WAY too early.
What happens in the plants will get huge, leggy (have a long stem that is thin and weak), and begin to struggle. I know it’s exciting and you may feel behind but trust me you’ll be better off in the long run. You got this!
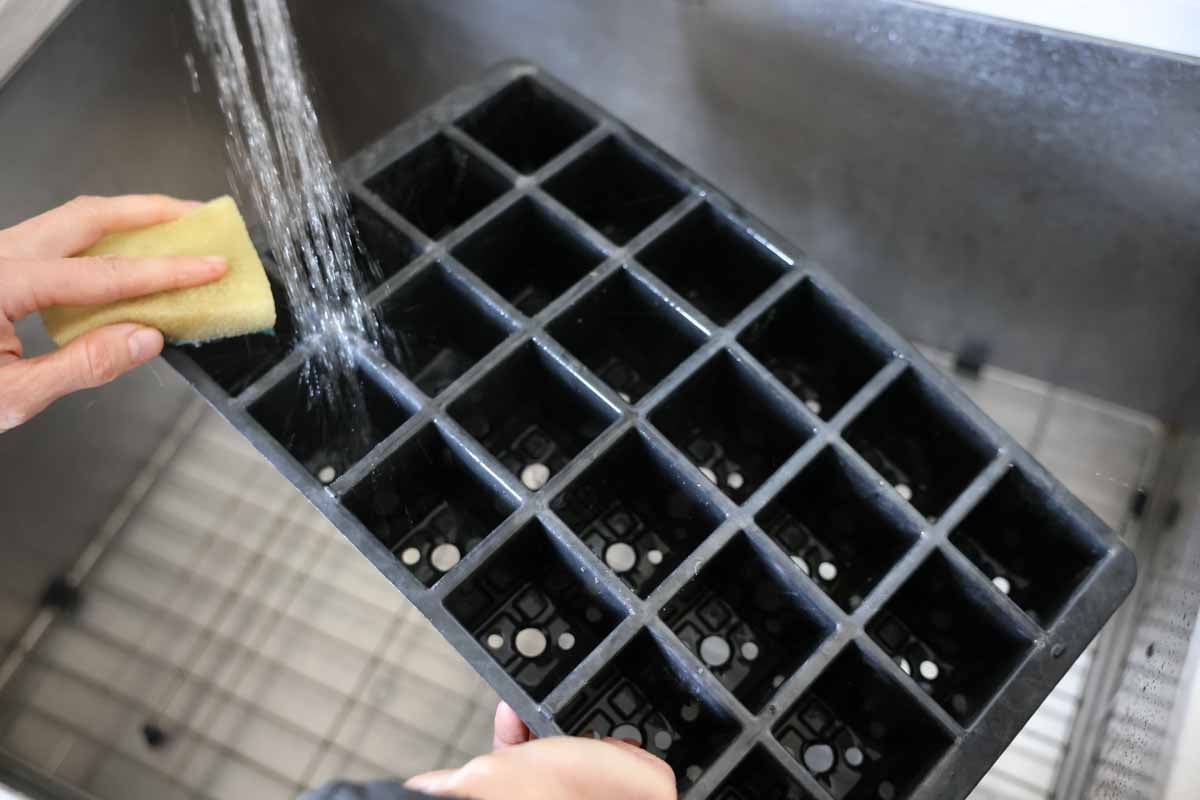
STEP 1 Set up your lights for indoor seed starting and prepare your containers. It’s best to give them a soak very hot water to kill any lingering bad bacteria.
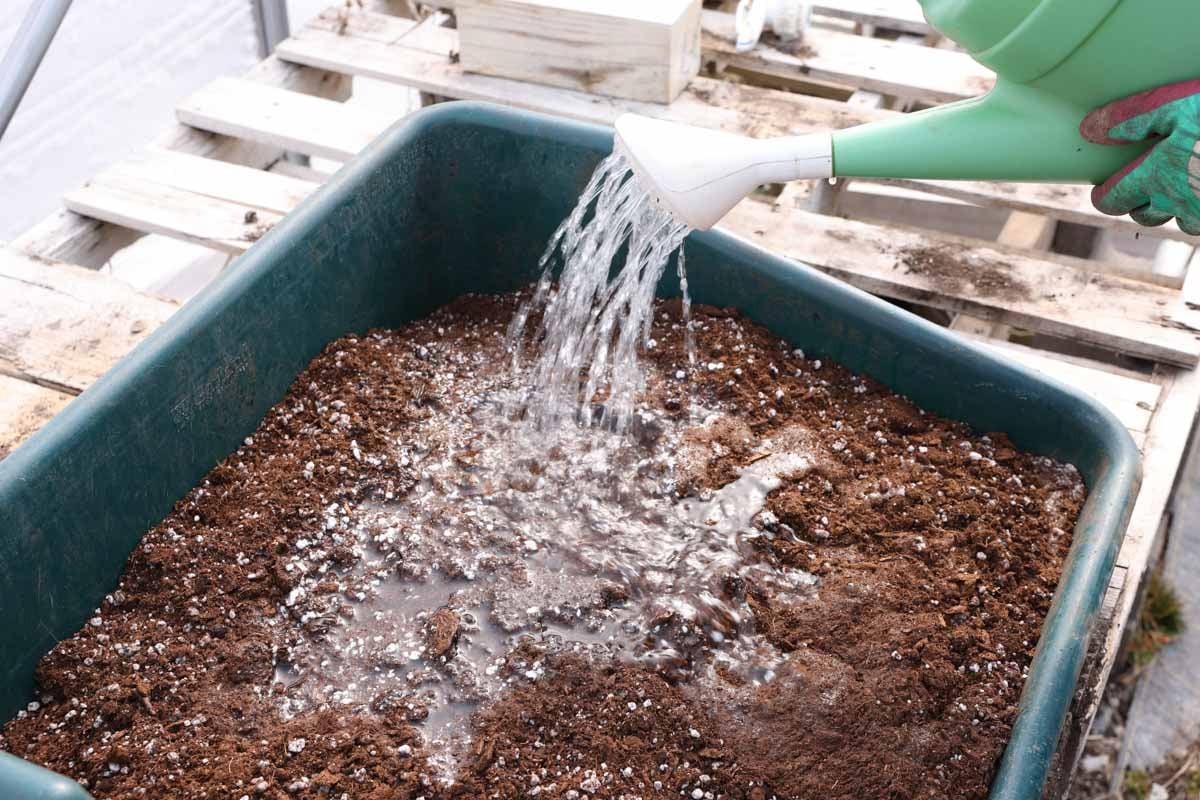
STEP 2 Prepare your soil. Most store bought mixes have a “wetting agent” which basically means you can add your soil to the tray dry and then water it afterward with no problems. A wetting agent helps dry materials (like peat) that normally repel water at first to absorb it easily. If you’re using homemade mix or a soil that doesn’t have that added you’ll need to get it wet BEFORE putting it in the trays.
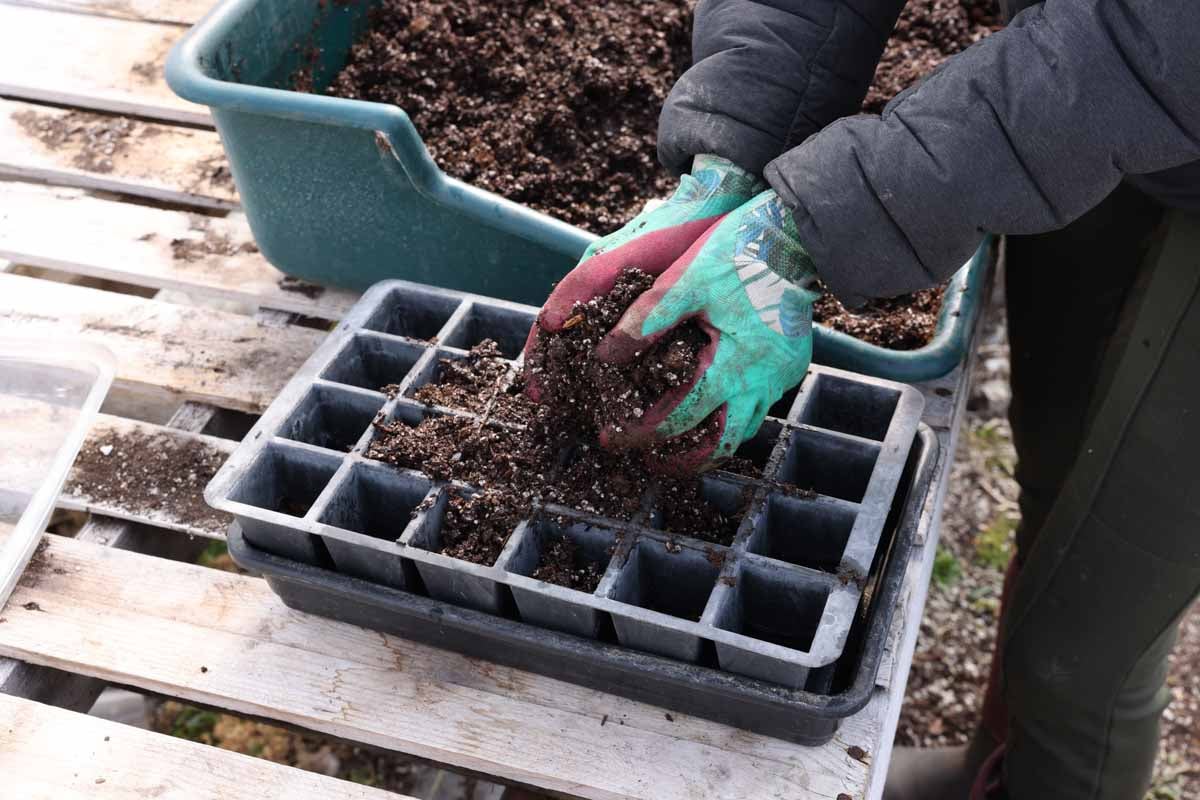
STEP 3 Add soil to your trays. Or if using soil blocks form your blocks. Here’s my tutorial on how to make soil blocks if you need it. When adding soil to cells try your best to fill them to the top.
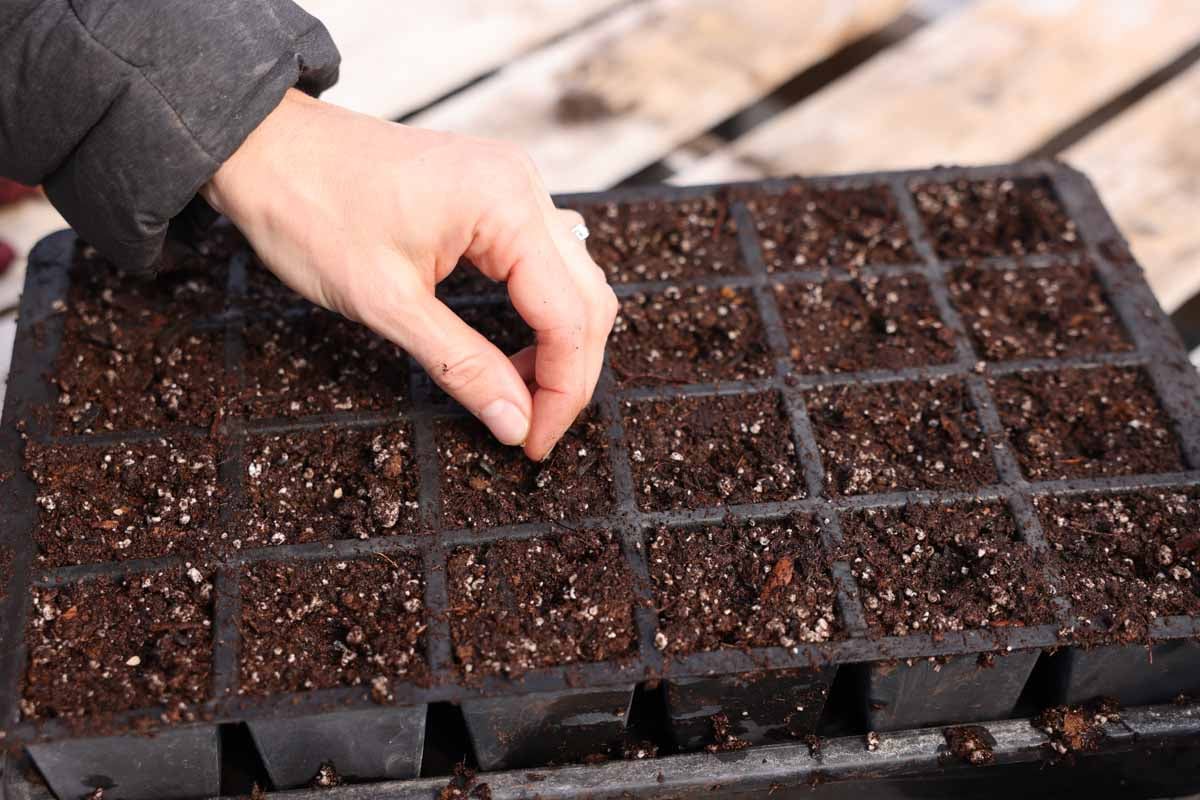
STEP 4 Make a hole in the soil about a quarter inch deep. Place your tomato seed in it. Cover it until it’s level with the surrounding soil. If using soil blocks cover it with moist soil.
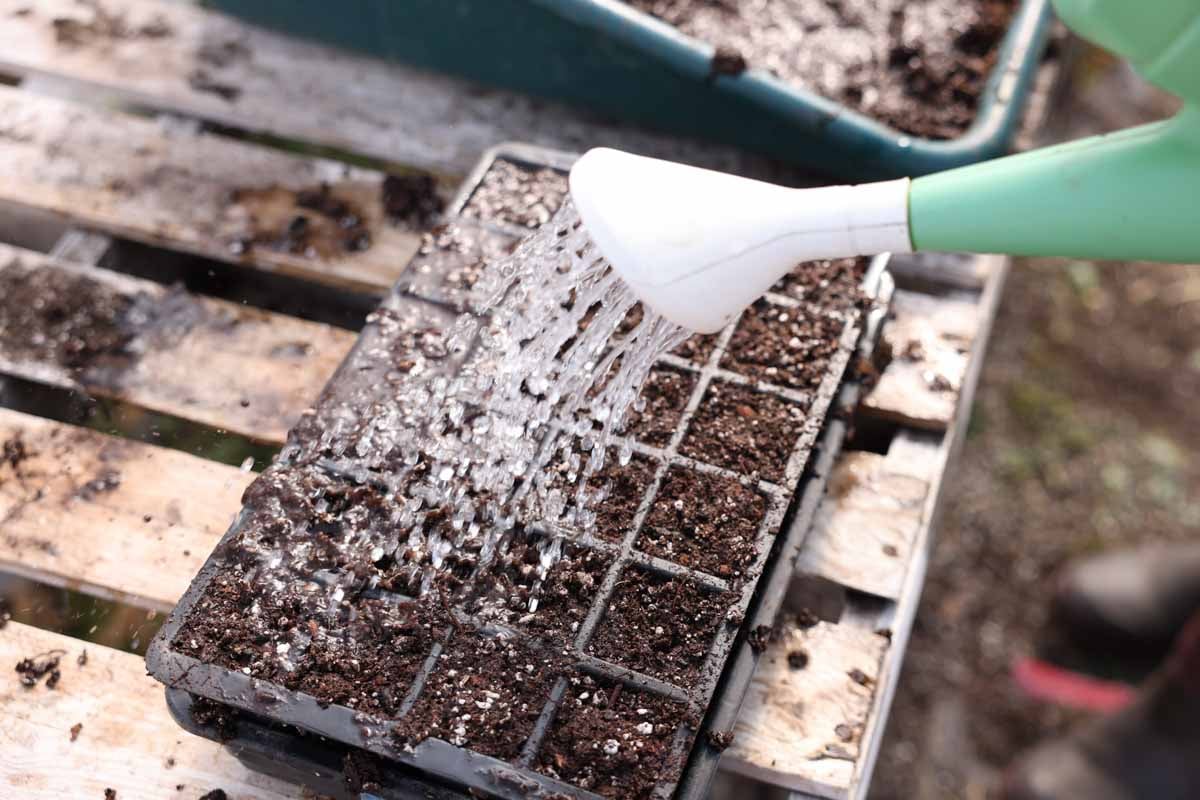
STEP 5 Water cell trays. If using soil blocks, it’s usually not necessary to water. If you have a heat mat, put the tray on it to speed and aid germination.
Tomatoes will normally sprout at room temperature but it takes much longer if you don’t have a heat mat or have them in a warm area of your home.
NOTE: A mist waterer works best until the seedlings sprout. The watering can used above works for tomatoes but don’t even try it for smaller seeds. It will wash them away.

STEP 6 Cover the tray. This is not required but can help keep things evenly moist and lessen your need to water. HUGE CAVEAT HERE… the instant you see one little green sprout poking up the cover comes off.
The plants need air and circulation or they will die. Don’t wait until they all sprout. Domes and covers can do more harm than good if they are used incorrectly. If your consistent about keeping soil moist you don’t even need it.
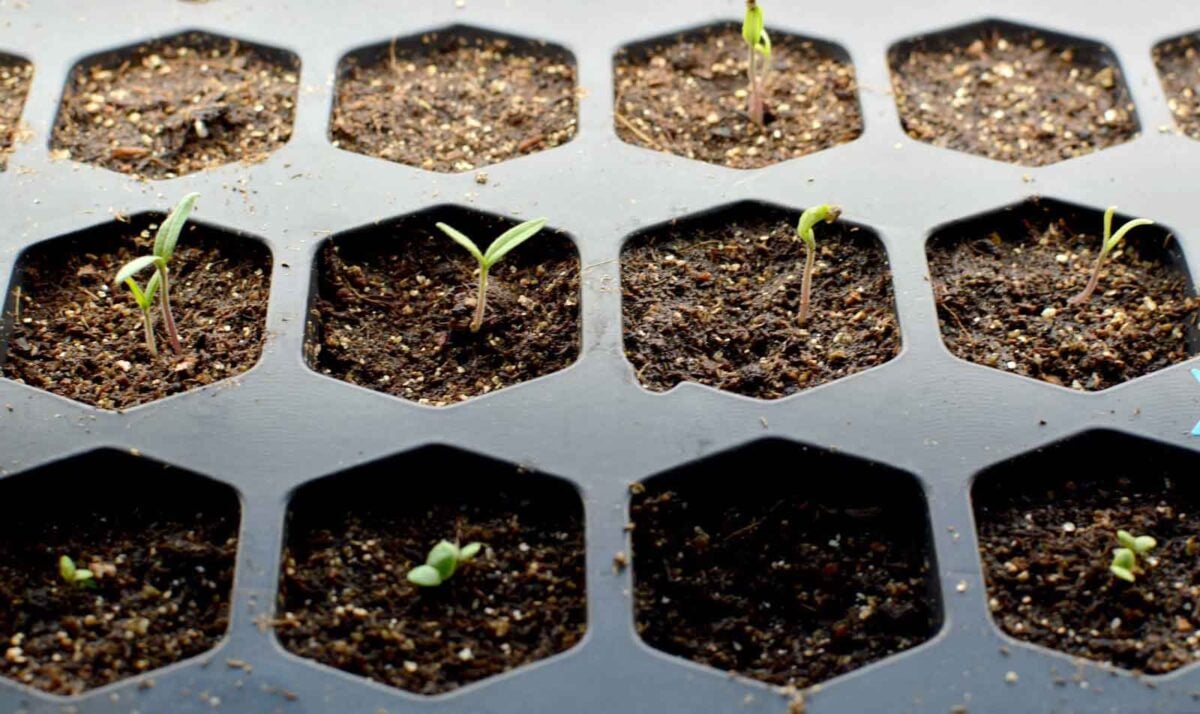
STEP 7 Once tomatoes have sprouted, turn on a fan and keep it on the tomatoes. This helps mimic a natural breeze found outdoors and strengthens the plants. Additionally it helps prevent damping off (more on that below). Make sure your lights are on at least 14 hours a day but not more than 18 hours. This is where a timer comes in handy.
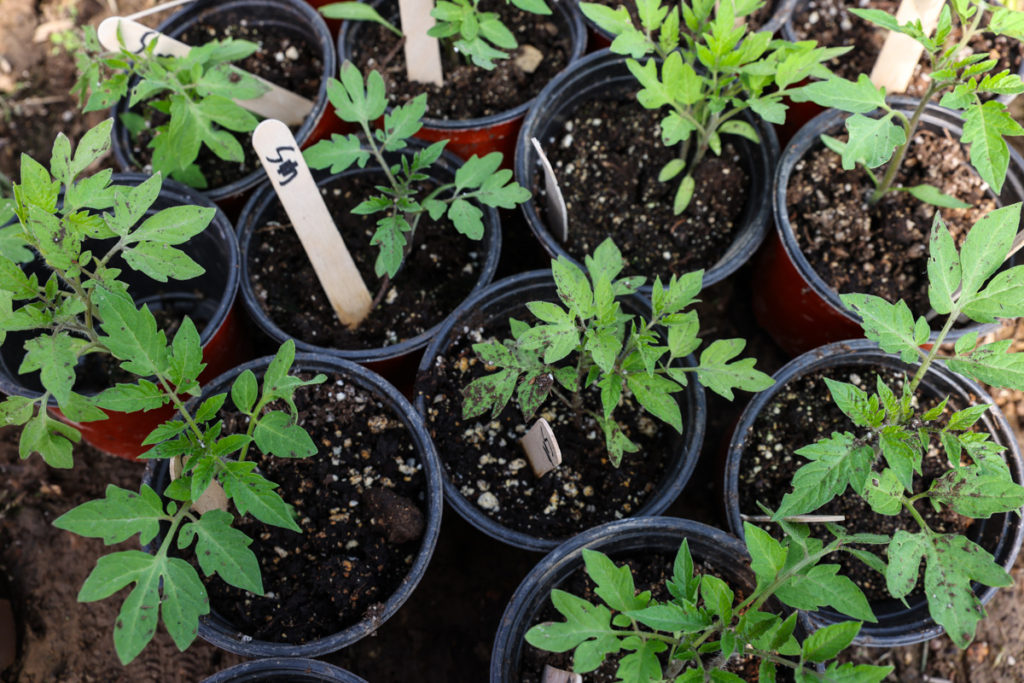
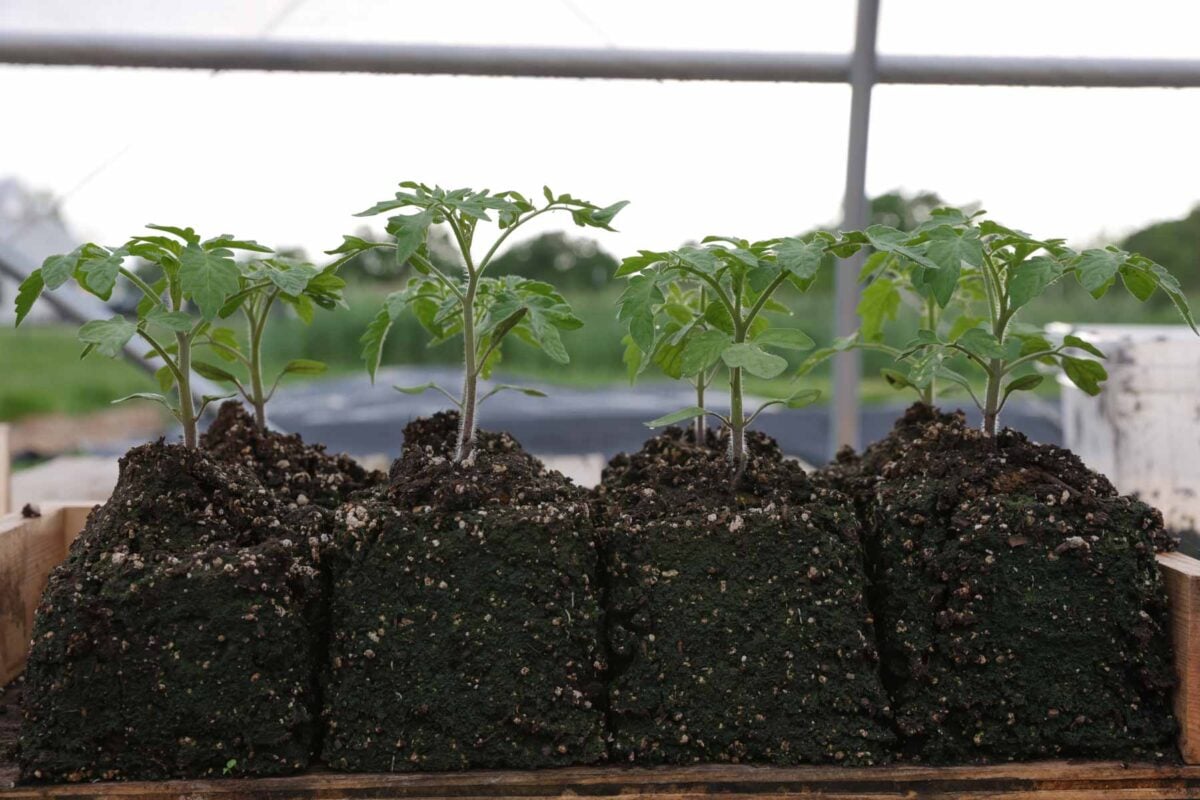
STEP 8 After a few weeks tomatoes need to move up to a larger size pot. This is called “potting up”. You take them out of the cell and move them to a larger cell, larger pot, or larger soil block. It gives the plants fresh soil, more nutrients, and the space they need to grow larger.

STEP 9 When ready to plant you’ll need to get the plants used to being outside slowly. This requires taking them outside a little bit at a time so they get used to the increased amount of light. Full guide on that is below.
STEP 10 After your average last frost date Once plants are fully acclimated to the outdoors, transplant them on a cloudy day and water them in well. I usually add a little bit of custom tomato fertilizer to the bottom of each hole. Add irrigation or have some fun watering by hand.
Transplanting Details for Tomatoes
Deep planting or not?
Tomatoes can be planted deeper than the soil line of the pot. If you plant them deep they will develop roots all along the stem where they are underground. This is useful for weak, leggy tomatoes.
However, deep planting should be avoided in a garden with poor drainage, it will do more harm than good. Not a lot of gardeners will tell you that but I speak from experience because many of my tomatoes died one year because of deep planting.
Mulches
Tomatoes are susceptible to all kinds of diseases. It’s a huge problem in wet, humid areas so avoiding disease is the best course of action.
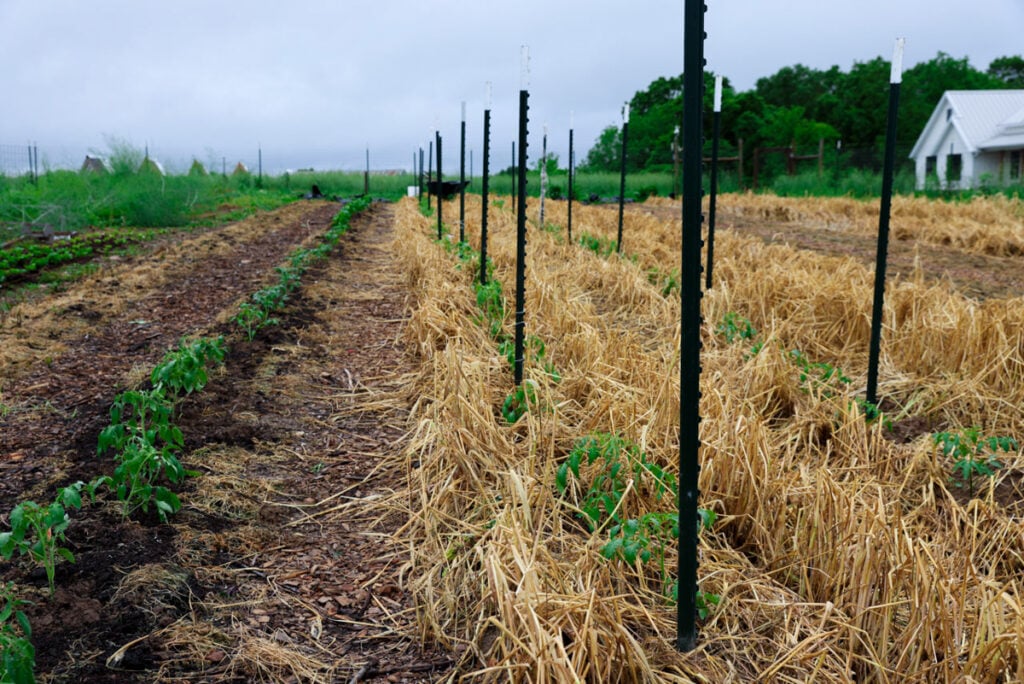
Adding mulch after planting around the tomato helps prevent the soil from splashing up on the tomato and reduces disease.
There are inorganic mulch options like black ground cover that prevent weeds, stop soil from splashing, and heat the ground (beneficial for cooler areas). The other option is using a natural mulch. Here a list of good organic mulches for a vegetable garden.
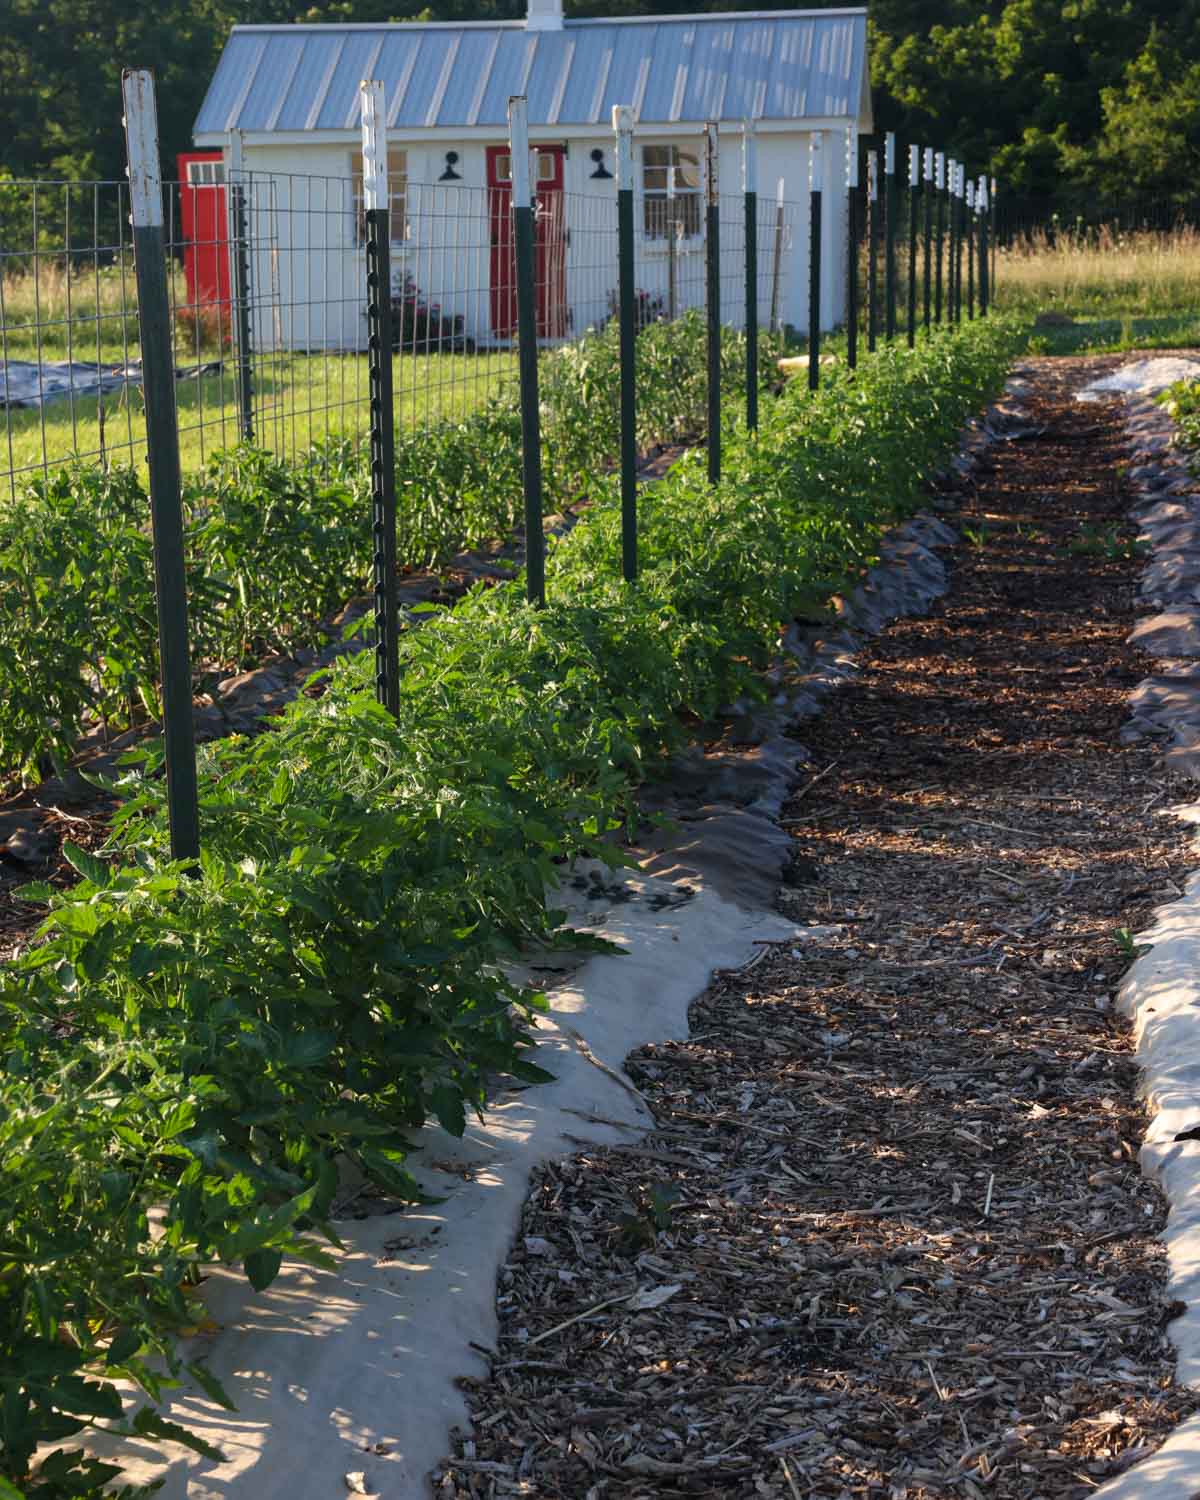
Spacing
Tomato spacing is highly variable based on type of tomato and if pruning is being used. In general, I space determinate tomatoes about 2 feet apart. Indeterminate tomatoes are pruned to one leader and spaced 18 inches apart. I have a great visual of spacing for both in garden and raised beds in a related post, The Ultimate Beginners Guide To Grow Tomatoes.
Tomato Facts
- Tomatoes are a member of the nightshade family.
- Tomatoes originated in South America. They like heat and will not thrive when temperatures get below 45ºF (7ºC). They will die in temperatures below 32ºF (0ºC).
- Even though they like heat, if it gets too hot the blossoms will fall off and they’ll stop producing fruit. Usually this happens if the daytime temperature is above 92ºF (33ºC) and nighttime temperature are above 70ºF (21ºC).
- Although the tomato is cooked and eaten as a vegetable, botanically, a tomato is a fruit.
Common Diseases and Problems With Tomato Seedlings
DAMPING OFF
The most common problem with growing tomato seedlings is something called damping off. Its a disease that is fatal to seedlings and is due to any number of pathogens that exist in the soil.
It’s often brought on by cool, wet soil conditions, and little to no airflow. What you will see is the stem shriveling up and turning brown at the soil line. The seedlings will then die. There isn’t anything you can do to save them at that point.
Sorry I don’t have a photo of this. I haven’t had a problem with it in about 4 years!
Tips for Avoiding Damping Off
- Make sure the plants have plenty of airflow
- Don’t overwater
- Use a heat mat
- Add mycorrhizae to your soil mix prior to planting tomatoes
- Use compost in your seed starting mix. Most universities recommend a sterile soil mix to avoid pathogens but from personal experience I’ve found the opposite to be true. Adding compost to my soil mix introduced good bacteria that could fight off pathogens.
How to Harden off Tomato Seedlings
Once outdoor conditions allow you to do so, (warm enough soil and air temperature), it’s time to harden off the seedlings.

This process gets them used to the outside light and air. Slow and steady is the absolute key!
- On the first day, move all seedlings outdoors for 30 minutes, then they go back inside under the lights.
- On the second day, move all seedlings outdoors for 1 hour, then back inside under lights
- Day 3, 1.5 hours outdoors
- Day 4, 2 hours outdoors
- Day 5, 3 hours
- Day 6, 4 hours
- Day 7, 5 hours
- Day 8, 6 hours
- Day 9, 7 hours
- Day 10, 8 hours
- Day 11, 9 hours
- Day 12, 10 hours
- Day 13, 11 hours
- Day 14, 12 hours
- Day 15 12 hours + overnight
- Day 16 Transplant
Keep in mind, this is not an exact science unless you get clear skies everyday. If you get a cloudy day, the seedlings will get less light, on a sunny day, they will get tons of light. Watch the weather closely and adjust accordingly.
want To Avoid Seed Starting Inside?
A little known fact is you can also start growing seeds outdoors in seed trays even in cold areas. It’s slightly riskier but if you can manage it the plants are usually healthier. This is our current method of starting tomatoes seedlings.
We have an unheated tunnel that protects from rainfall and can be closed if its very windy. On days when the temperature gets too cold, I bring the trays inside to protect them. If you’ve ever hardened off seedlings you know how much work it is to bring them inside and outside for 2 weeks straight.
I prefer bringing the seedlings in on the rare occasion that it’s too cold outside for them.
Lastly, if you really want to get brave and have a very long growing season, you can plant tomato seeds directly in your garden!
Video Tutorial
Here’s a video of us starting tomatoes from seed last year.

More About Tomatoes
- When to Harvest Tomatoes
- 10 Best Tomatoes to Grow
- Crop Rotation for Tomatoes and other Nightshades (especially useful for a small garden)


