DIY Onion Drying Rack
This easy, budget friendly, DIY onion drying rack saves space and can be repurposed when not in use. It’s very effective at drying both onions and garlic and allows for maximum airflow.
We had a great garlic harvest this year and using some sawhorses he already made and some 1×2 boards Cam made a drying rack for them. My garlic has never looked better and it dried fantastic!
Having a good drying area and rack is KEY to proper curing. We’ve tried other versions in the past and this one is by far our best one! For maximum storage time, check out our post on how to dry, cure, and store onions.
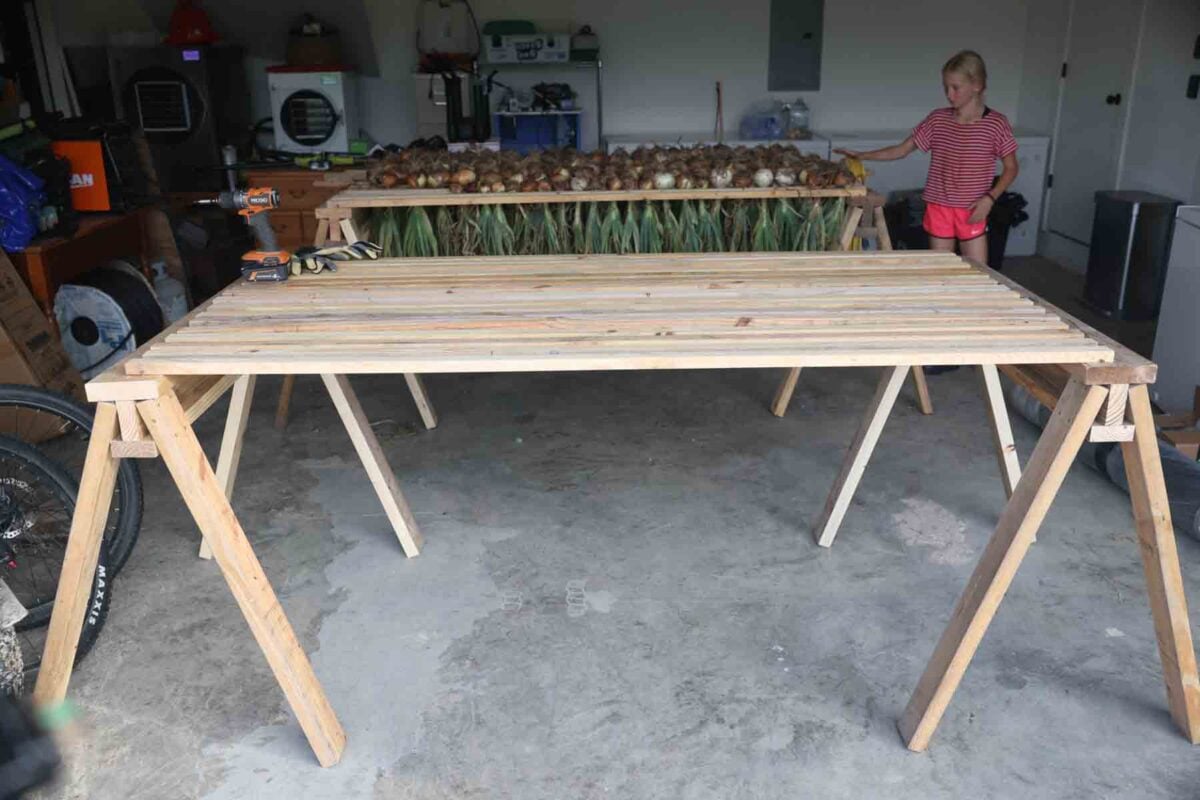
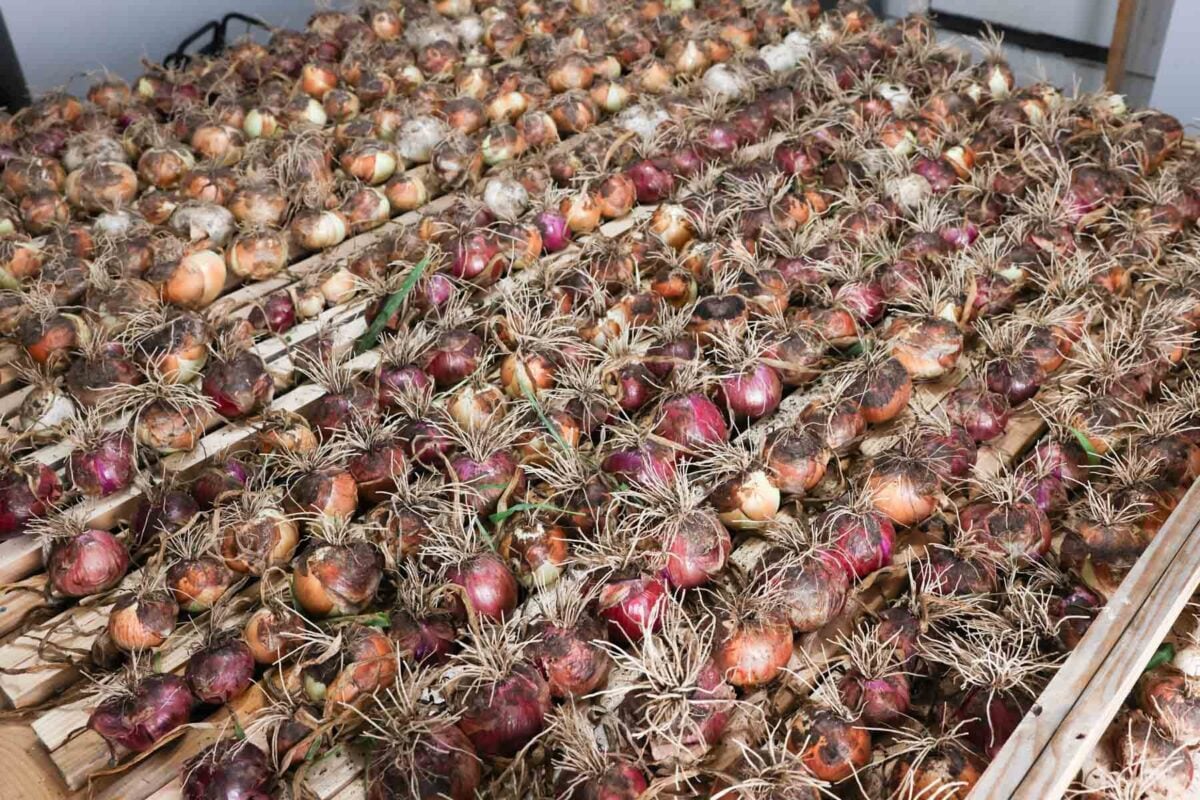
Fast forward a few weeks and we harvested hundreds of pounds of onions. Drying them on the shed or garage floor wasn’t an option. I asked Cam if he would build some more drying racks so he did! Total cost if you buy the lumber is $45-50 at the time of writing this.
He made the sawhorses, then added the 1×2’s and some screws to hold them in place so they don’t slide around.
Supplies
To make the onion drying rack you’ll need:
- Table saw
- Screw driver
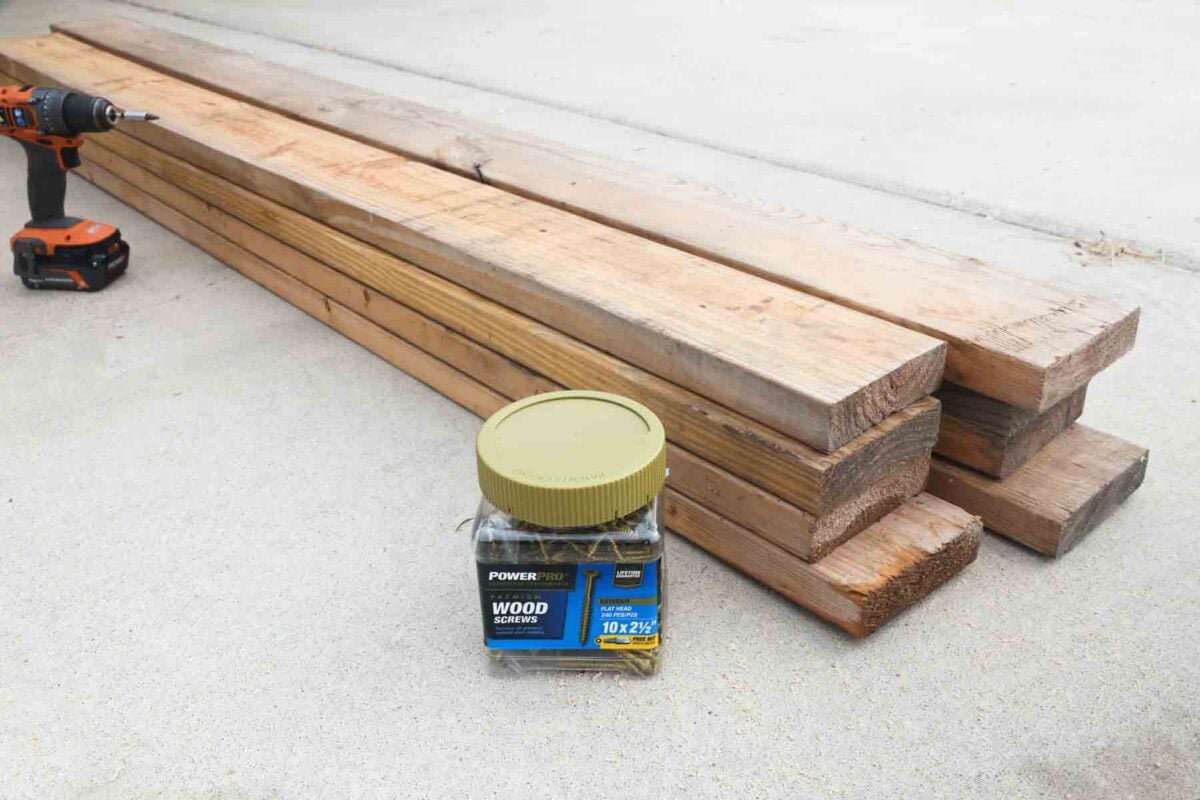
- 8 pieces of 2-inch x 6-inch x 8-ft lumber
- A box of 2½ inch screws
- A box of 1 inch screws
What if I don’t have a Table Saw to make the Drying Rack?
No table saw? Truly, all you need is a screwdriver if you take advantage of the cutting services at hardware stores.
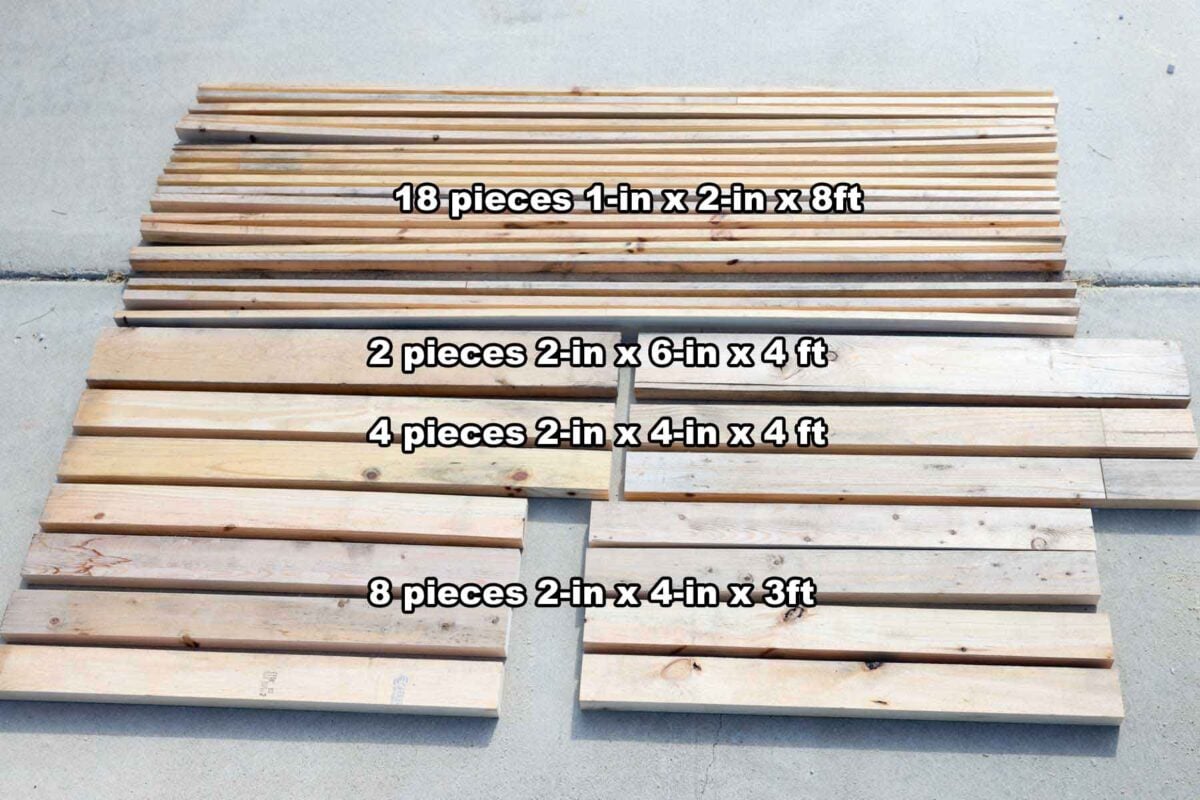
Here are all the necessary cuts and pieces of wood:
- 18 pieces of 1×2 wood, 8ft long
- 1 piece of 2×6, 8ft long, cut in half (2 cut pieces total)
- 2 pieces of 2×6, 8ft long, cut in half (4 cut pieces total)
- 4 pieces of 2x4s, 8ft long, cut into 3ft pieces (8 cut pieces total)
Step by Step Guide to building an Onion Drying Rack
These plans are for making a pair, a set, or TWO sawhorses. Having one sawhorse is like ketchup without mustard, Iike Batman without Robin 🙂 If buying precut lumber, skip to step 3… and begin. If you are using scrap 2×6 lumber like what I used from a prior project, start with step one below.
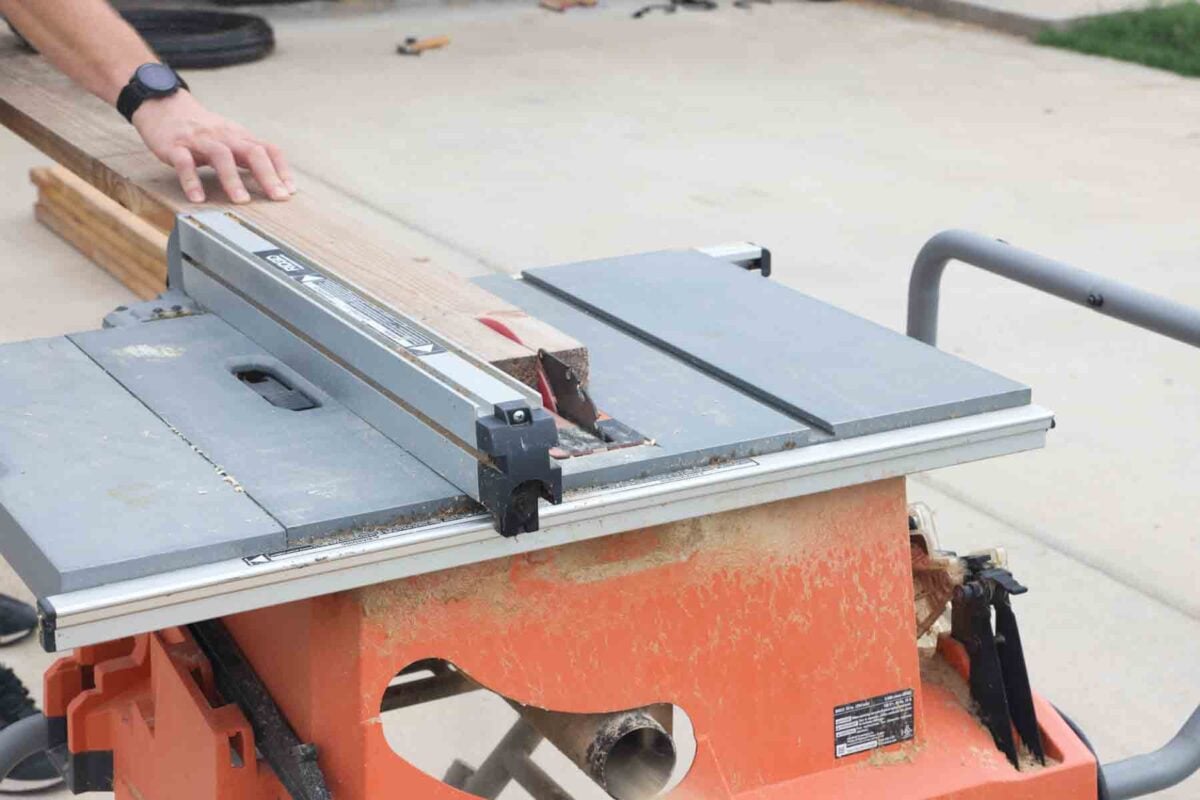
Step 1: Rip six of the 2×6’s each down to a 2×4 and an extra “2×2” cutoff piece.
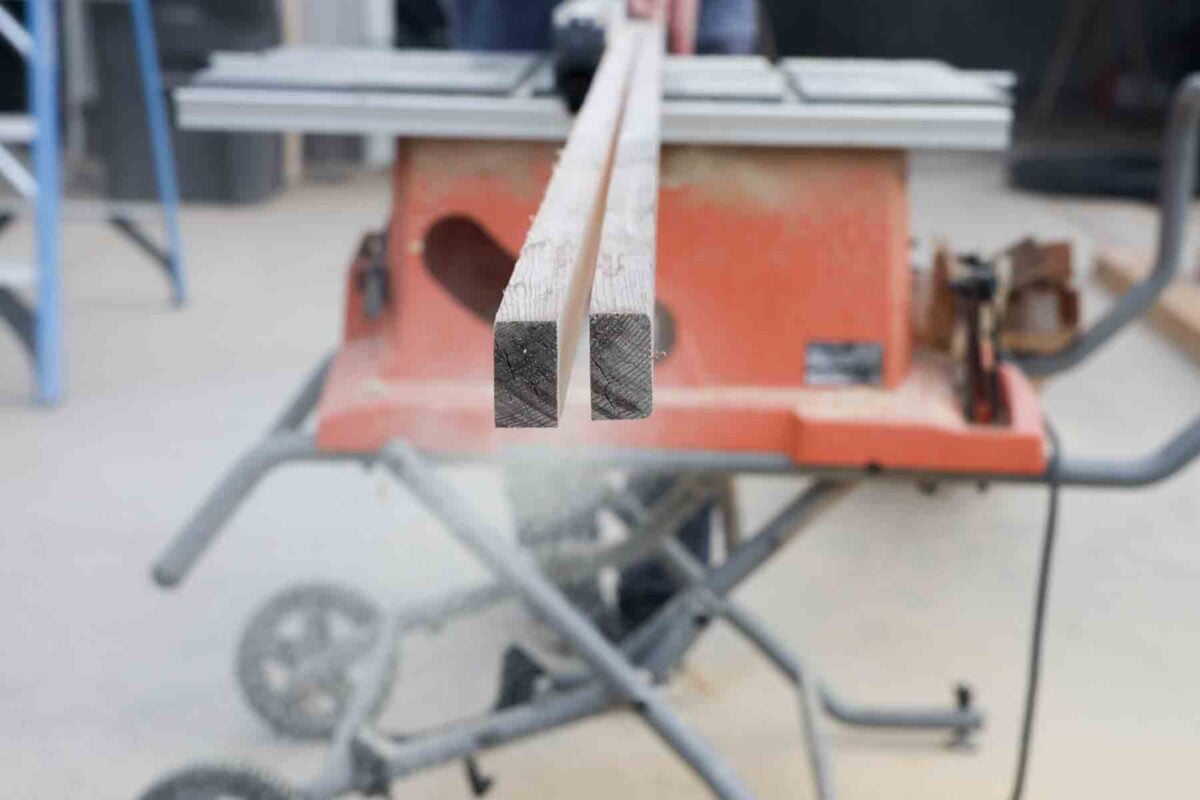
Step 2: Rip the “2×2” cutoff piece into two, resulting in two 1×2 pieces. All these 1×2 pieces will become the drying racks once assembled.
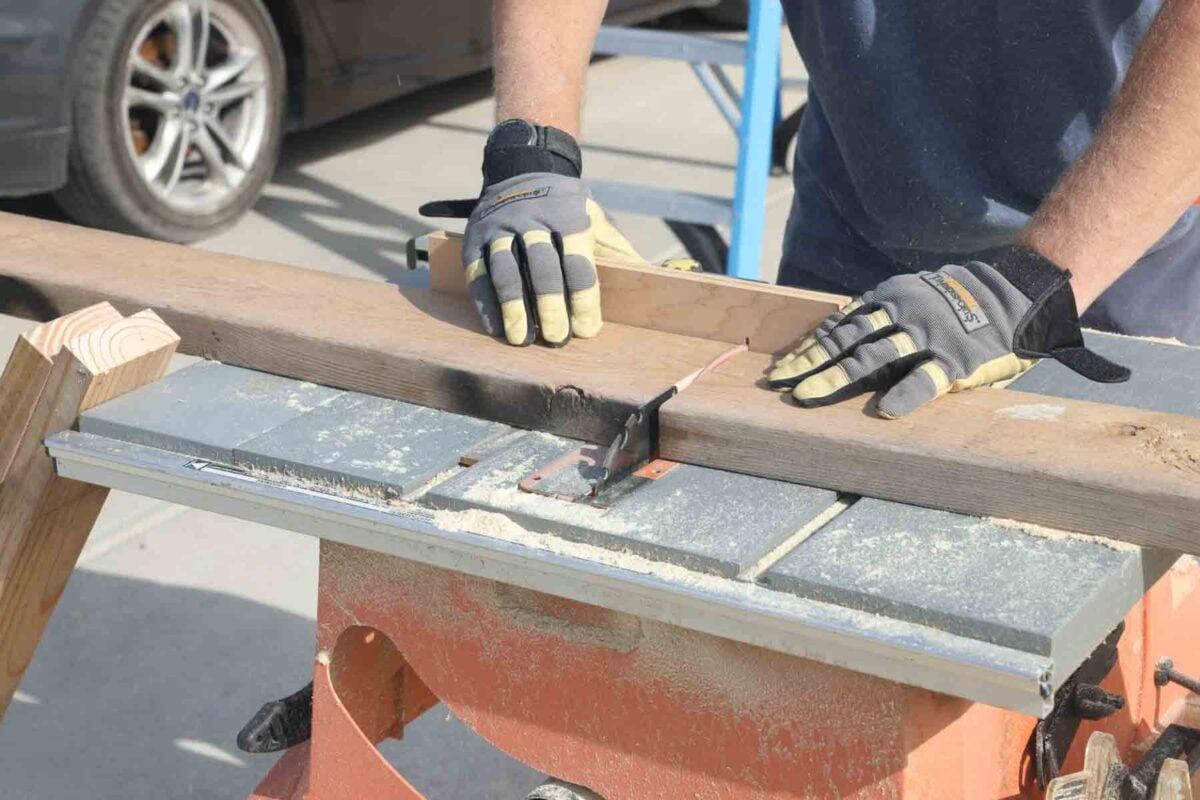
Step 3: Cut one 2×6 into two 4ft pieces. ** If you want a wider or narrower sawhorse, this cut length can be adjusted, just make sure you account for that when purchasing the wood. These cut 2×6’s will be the top piece of the sawhorse.
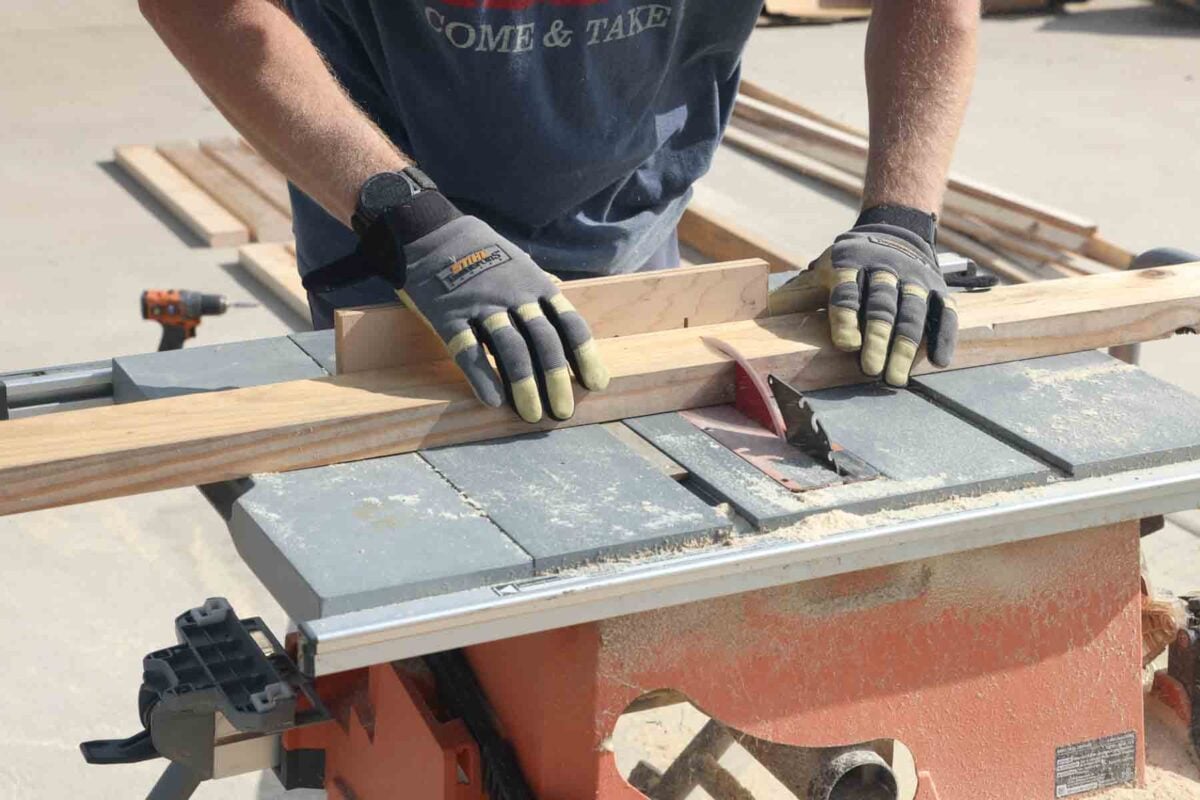
Step 4: Cut two of the 2×4’s into equal 4ft pieces. These will help make the i-beam part of the sawhorse. Cut the other four 2×4’s into 36″ lengths. These are the sawhorse legs. You’ll need eight of them to make two sawhorses.
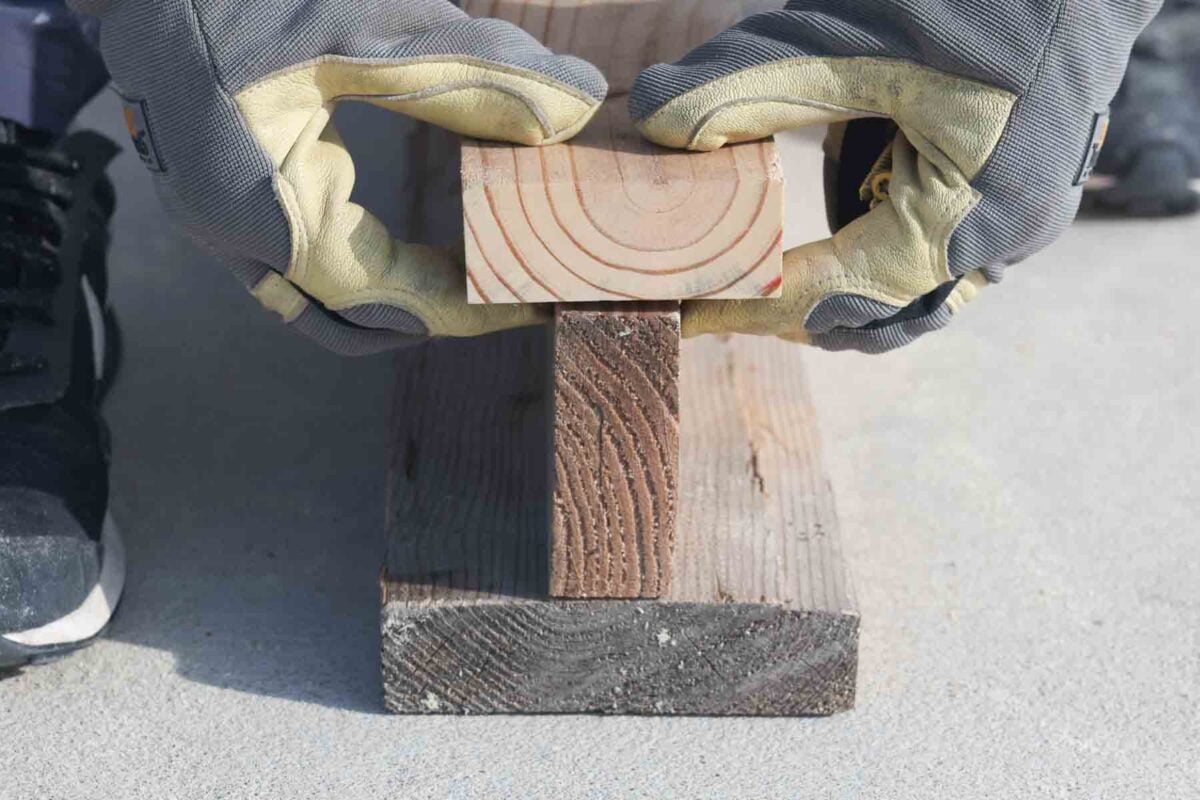
Step 5: With all the wood cut, assemble the i-beam by stacking the 4ft 2×6 and two of the 4ft 2×4’s in an “I” shape, as shown here. Ensure that the boards are centered on eachother.
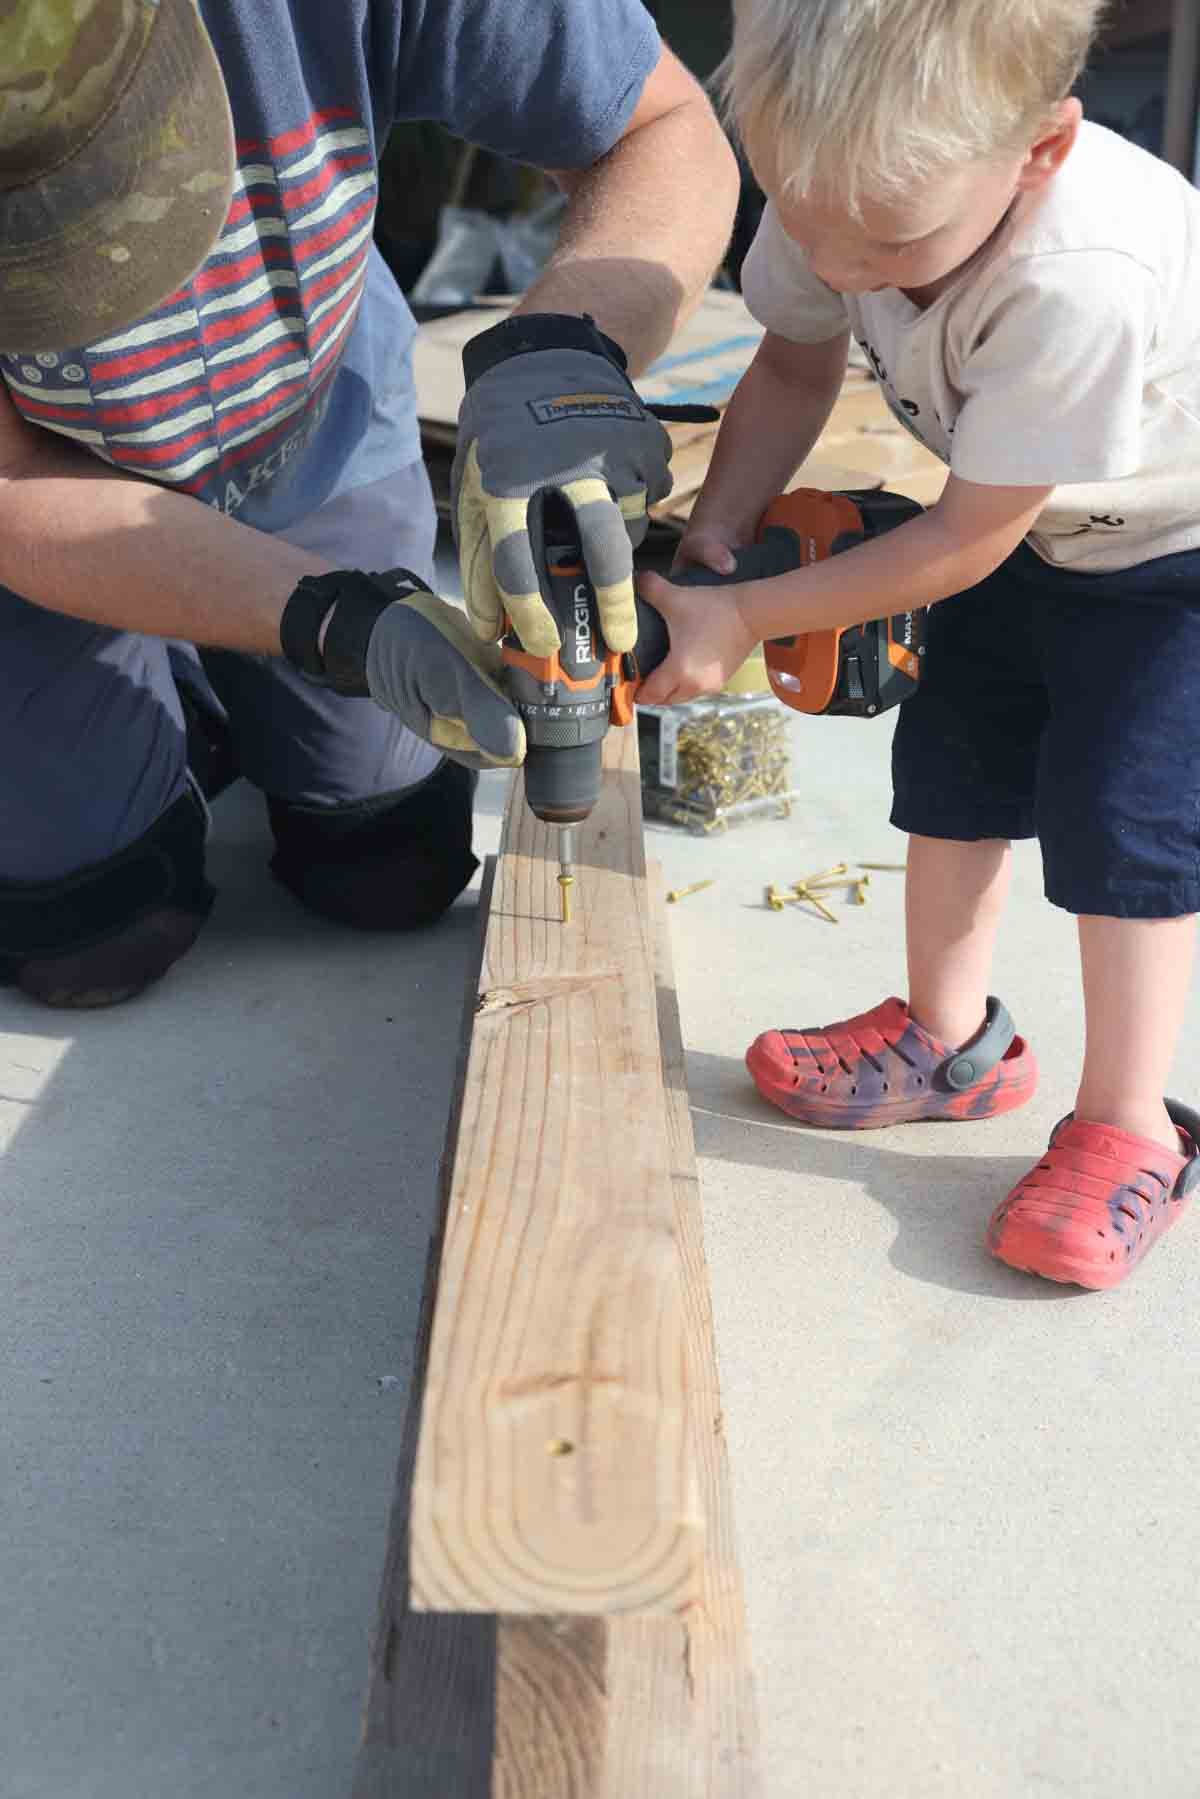
Step 6: Using 2 1/2 inch screws, screw the first board into the middle one. I start on one end, then the other end, then fill in the middle with 2 to 3 more screws.
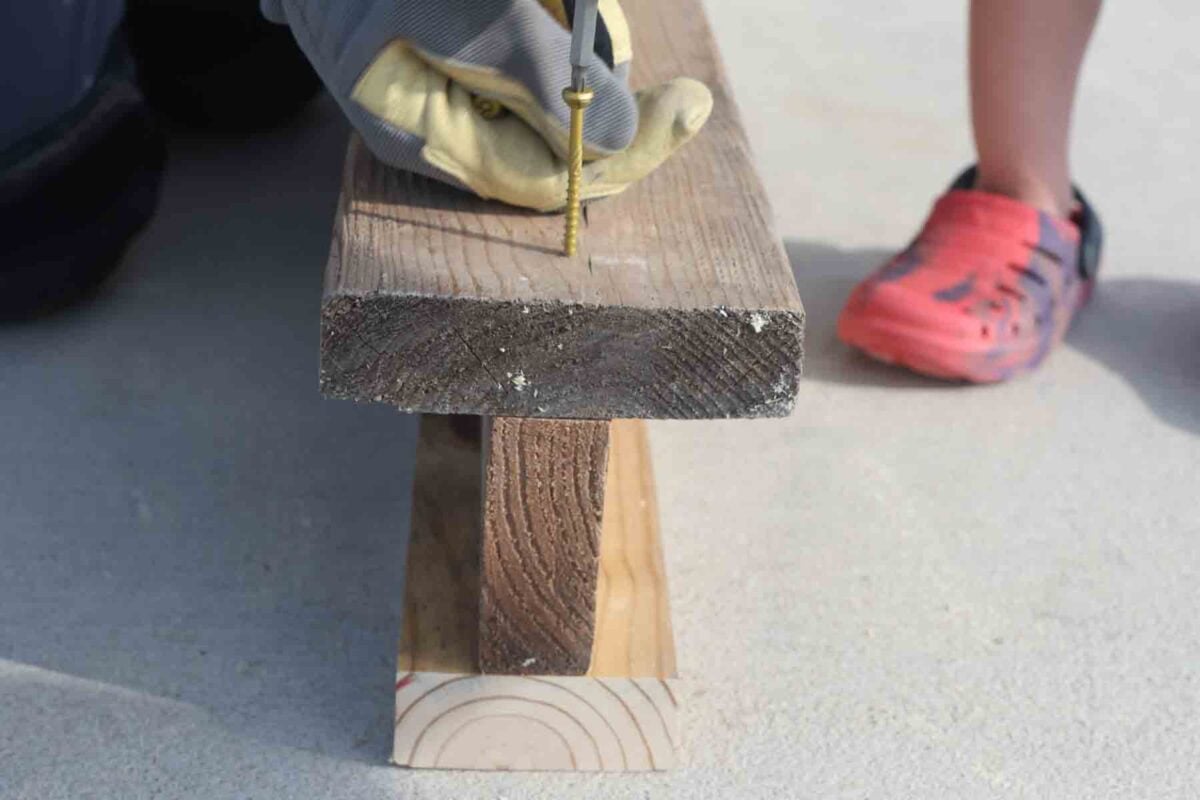
Step 7: Flip the i-beam over and secure the 2×6 as you did the other boards.

Step 8: with the i-beam on it’s side, wedge the first leg into the “I” like shown. The size of that bottom 2×4 on the i-beam is what allows for the perfect angle on these legs. Screw down the wood to secure it to the i-beam.

Step 9: Drill three more screws in, to really lock these legs in so they don’t more any which way.
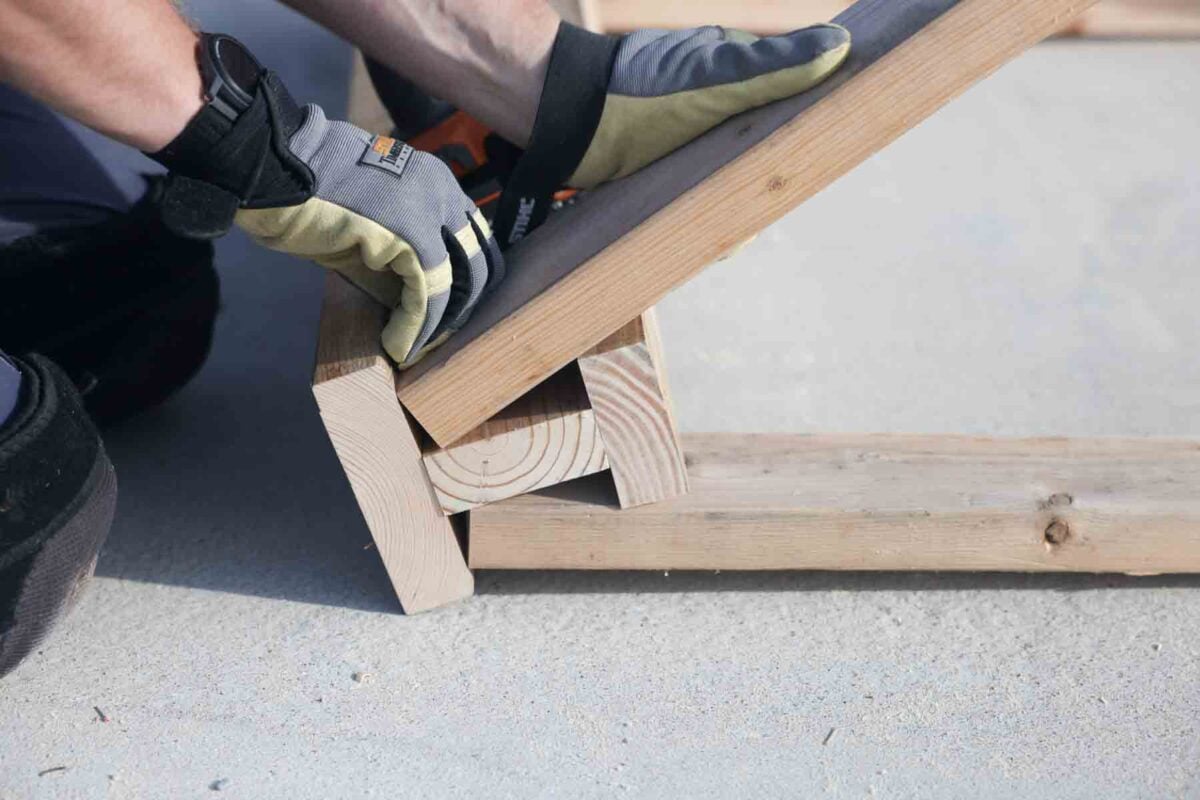
Step 10: Repeat this on the other side of the sawhorse, and then flip over to secure the other two legs.
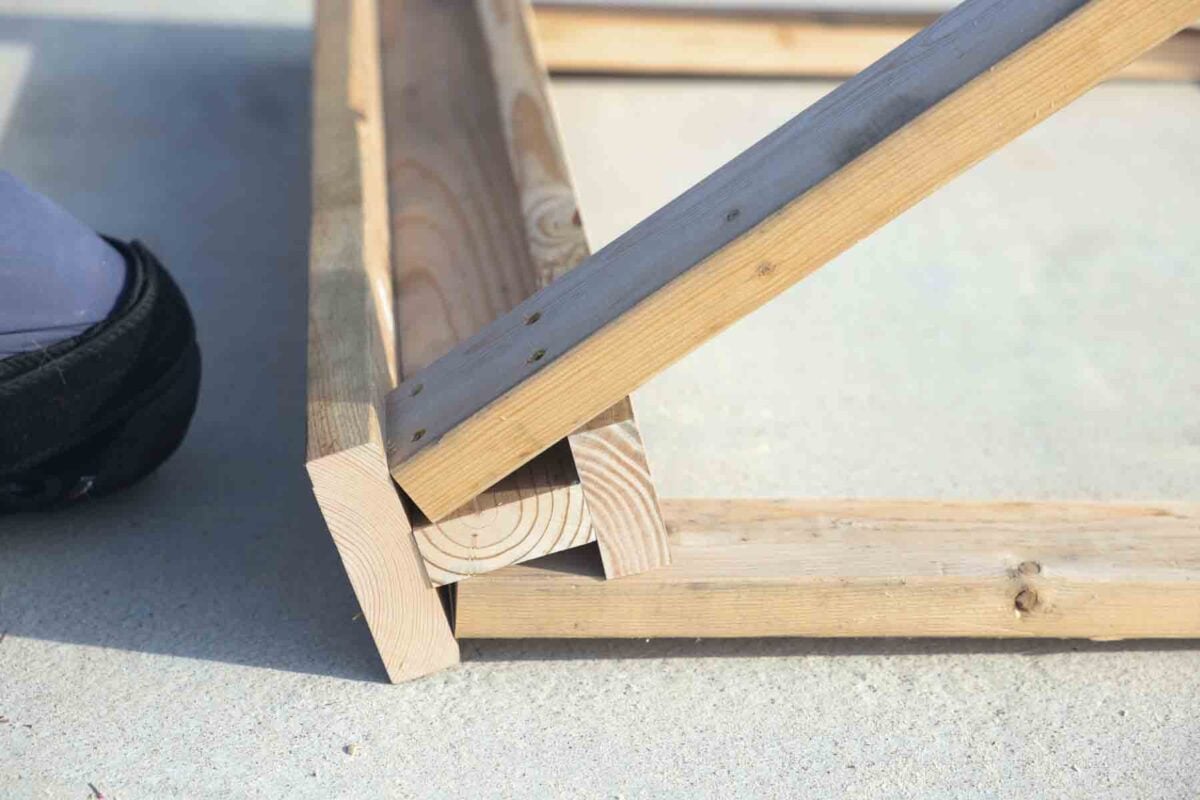
Step 11: Check legs for a tight fit, and no or minimal movement
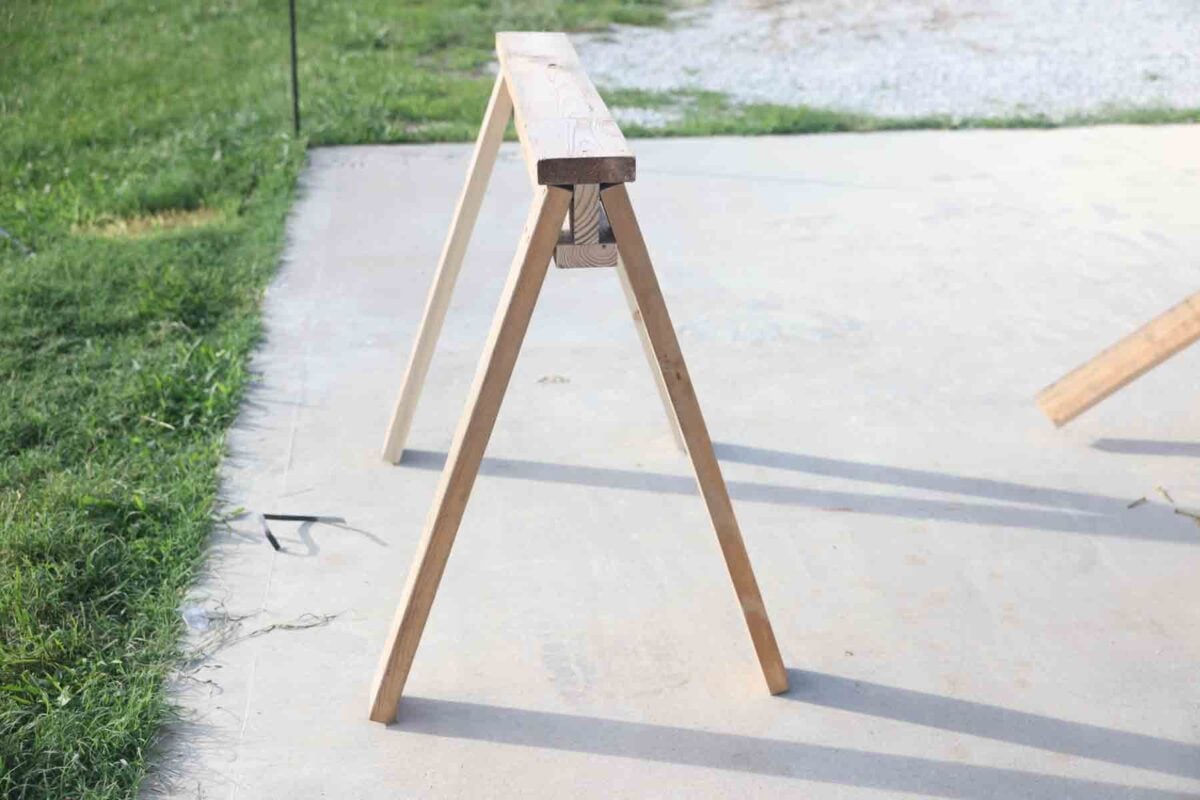
Step 12: Stand up the sawhorse, and check for level, and that the legs are all on the ground. If they are, great! If they are not, make any minor adjustments to ensure the sawhorse is level and sturdy. Repeat steps 1-12 for the second sawhorse if you did not build them simultaneously.
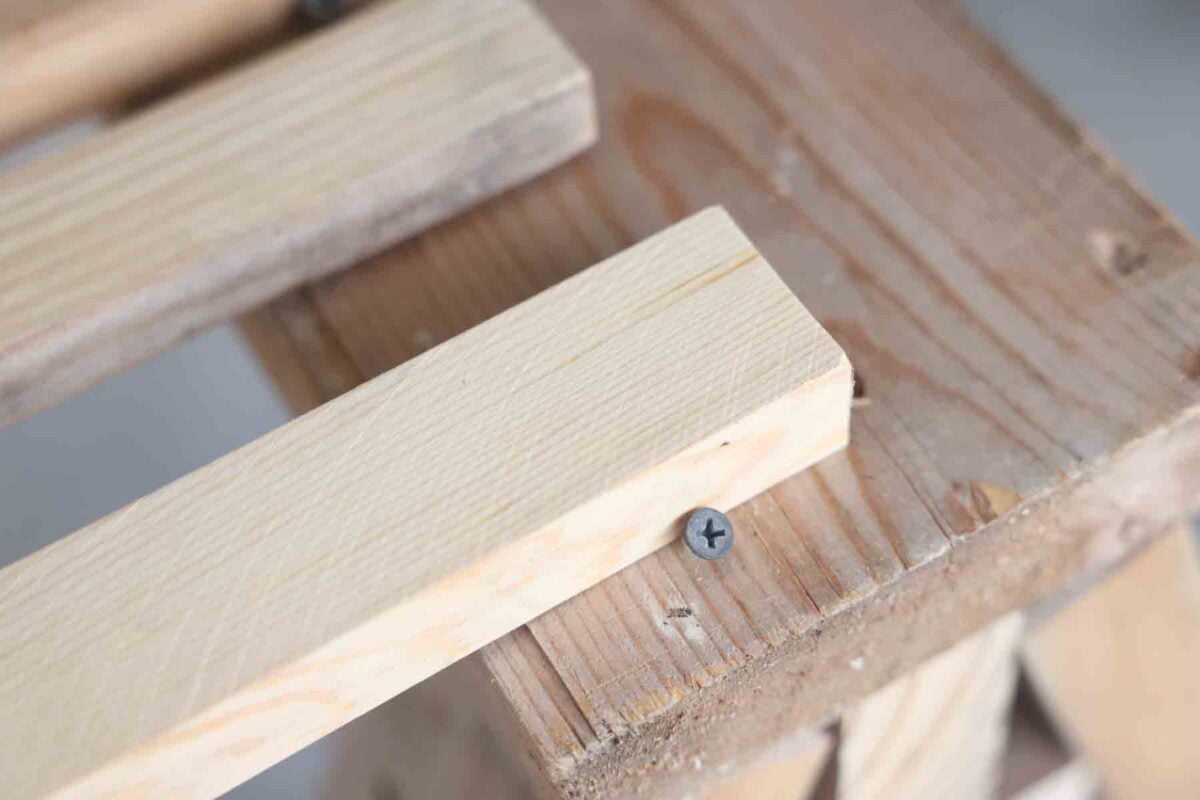
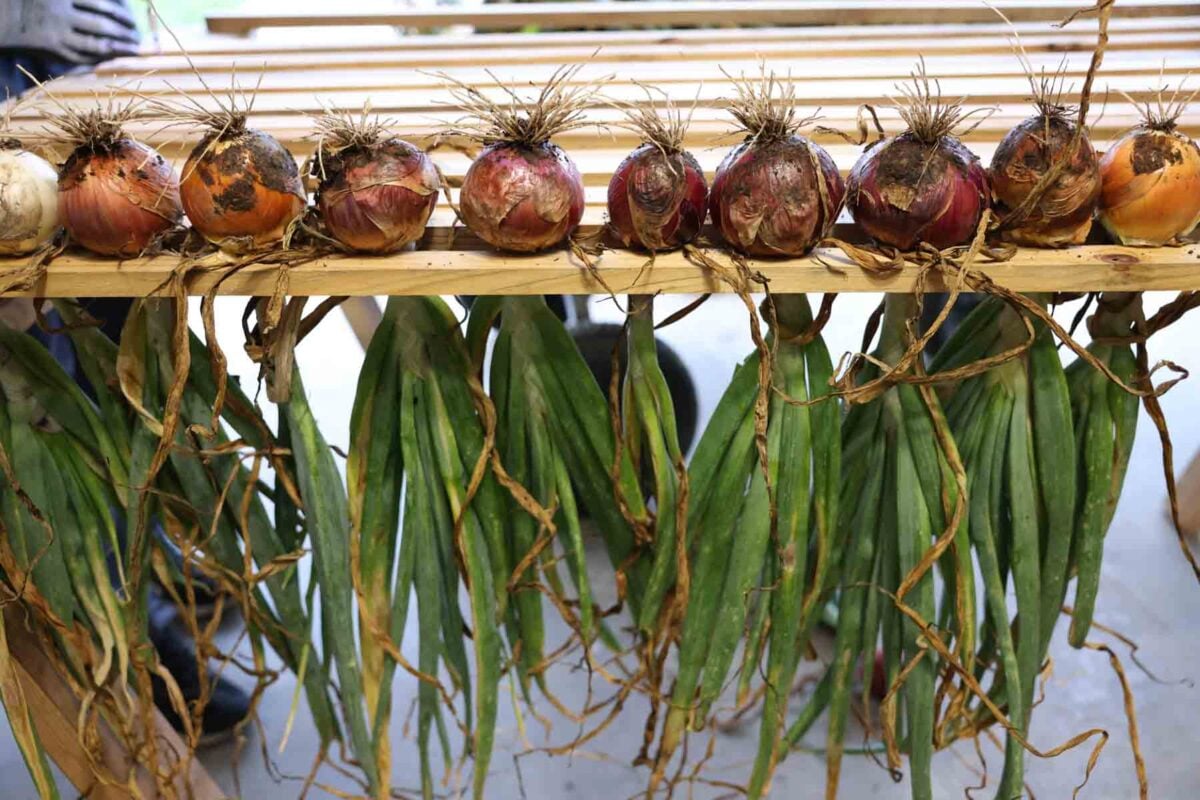
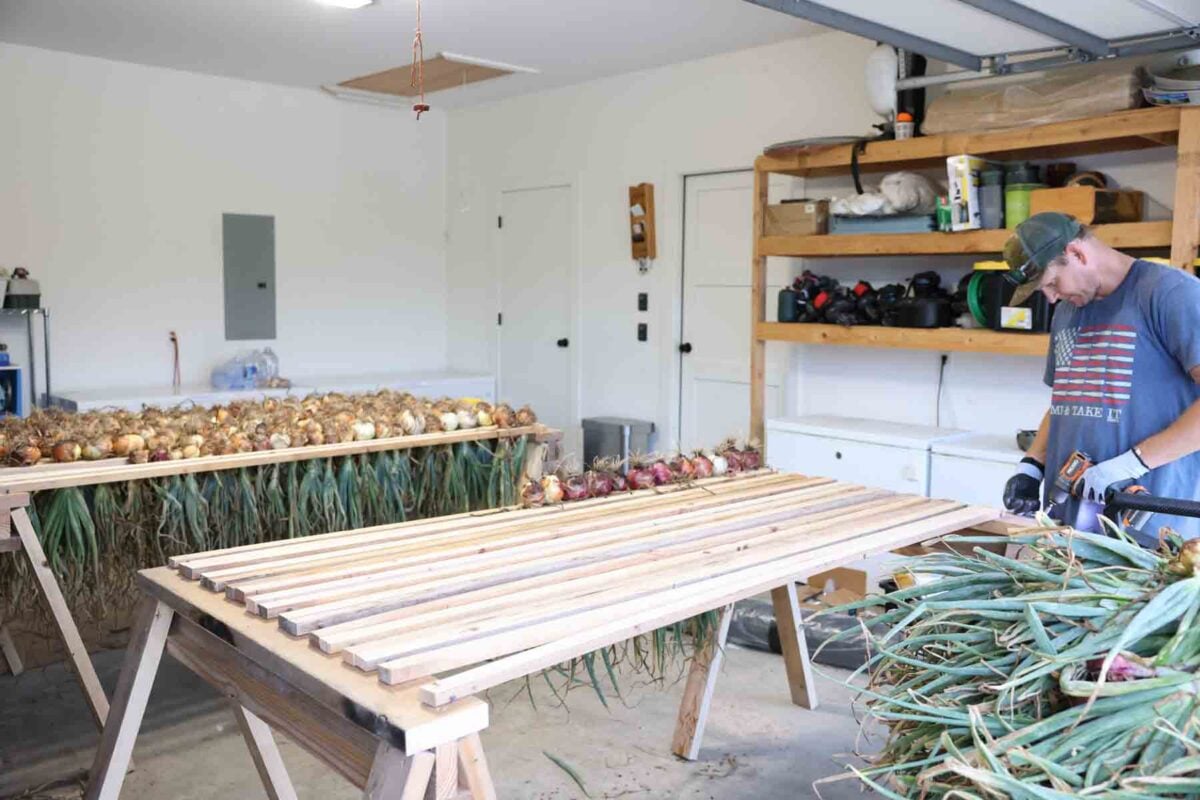
Step 13: Now the onion/garlic drying rack portion. All those 1×2’s are ready for install. Place them so they bridge across from one sawhorse to the other.
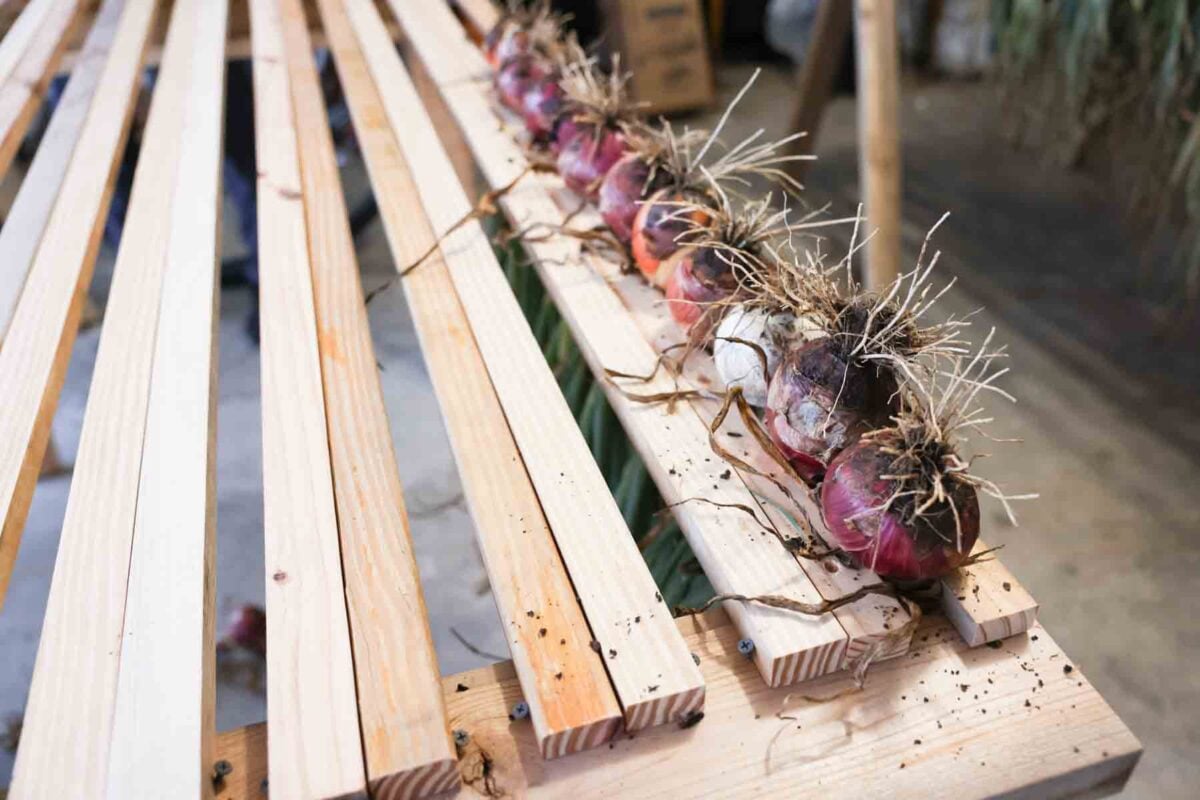
Step 14: Use the 1-inch screws as “stoppers”, to lock the wood sticks in place so that they cannot be forced any wider. The gaps we left for the onions were between 1 1/2 to 1 5/8 inches wide.
Step 15: Continue this until there is either no more room on the sawhorses, or if you have no more onions to place in the racks.
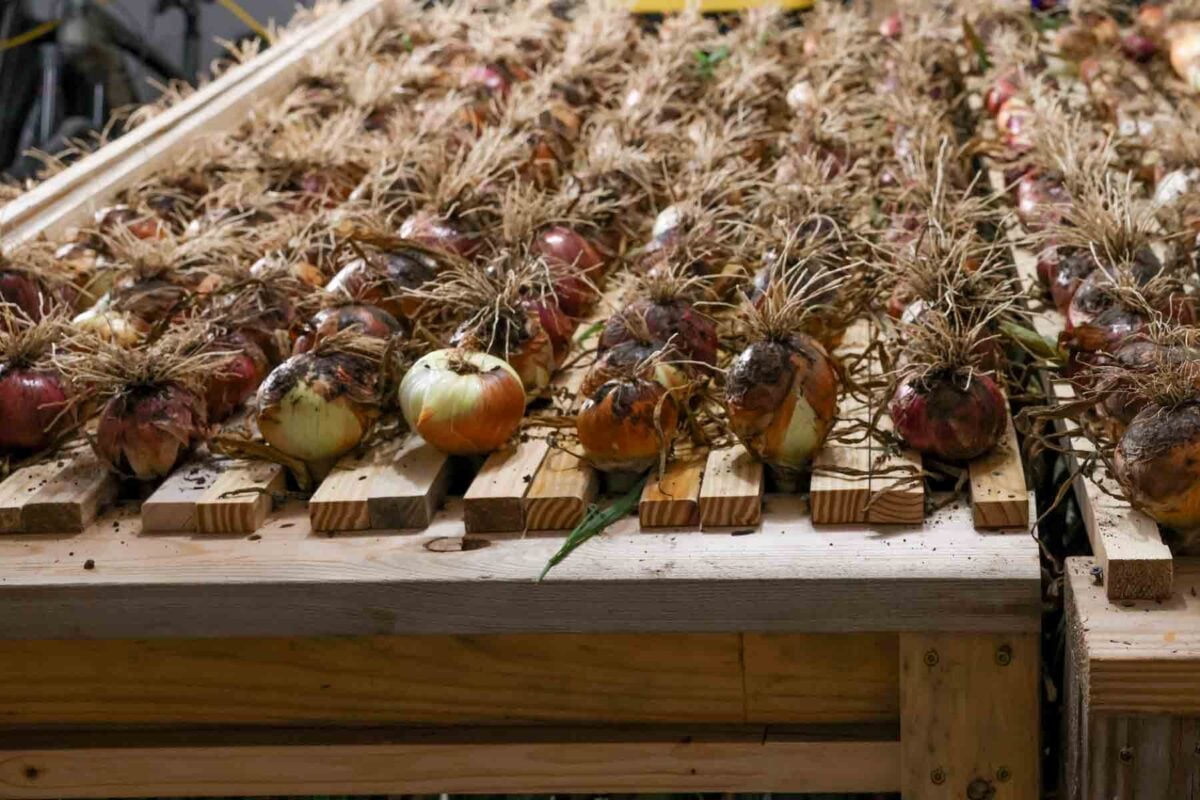
Step 16: Slide onions in the gaps, ensuring they do not touch eachother. Once all the onions are set, put a fan blowing on the onions. This speeds up the drying process, ensures even drying, and helps prevent mold and rot, especially in humid areas like where we live.
Let the onions cure until dry and papery. This could be anywhere from 1 week to 3 weeks. Store in a cool, dry area. For exact temperature and humidity requirements, check out the chart in this post: 10 tips for Storing Garden Vegetables Through Winter.